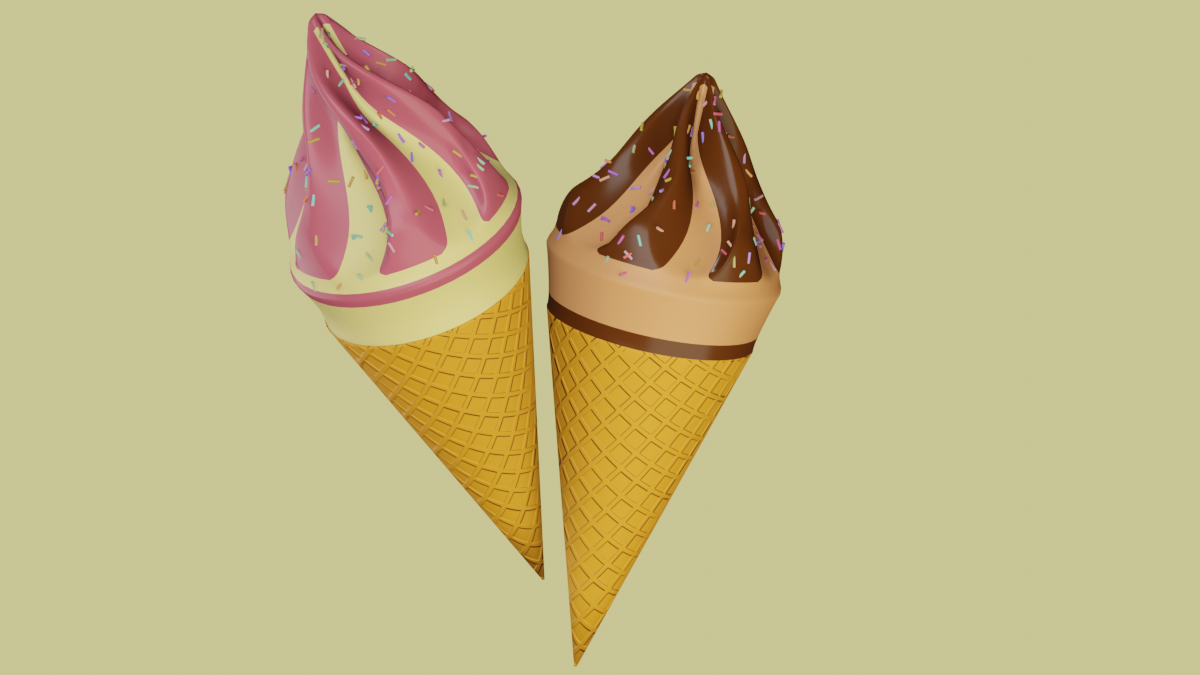
In this tutorial, we will learn how to easily make Cone Ice cream in Blender. We will Model, cone, ice cream and then apply texture to it. And finally, we will do lighting for our scene.
You can also watch the Youtube video or read the detailed tutorial.
We can model the Ice-Cream in the following simple steps:
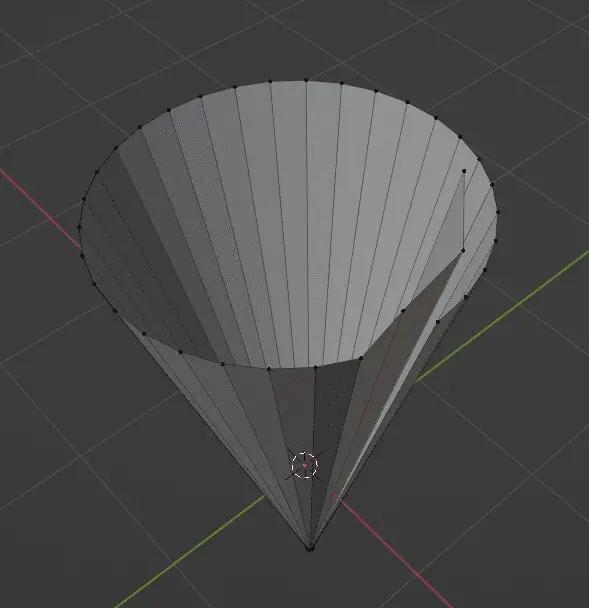
Step 1: Modeling the Cone
Start by simply adding a Cylinder and then adjusting the shape.
Use Normal Map for the texture of Cone. For this tutorial, I made my own Normal map and then applied on the model.
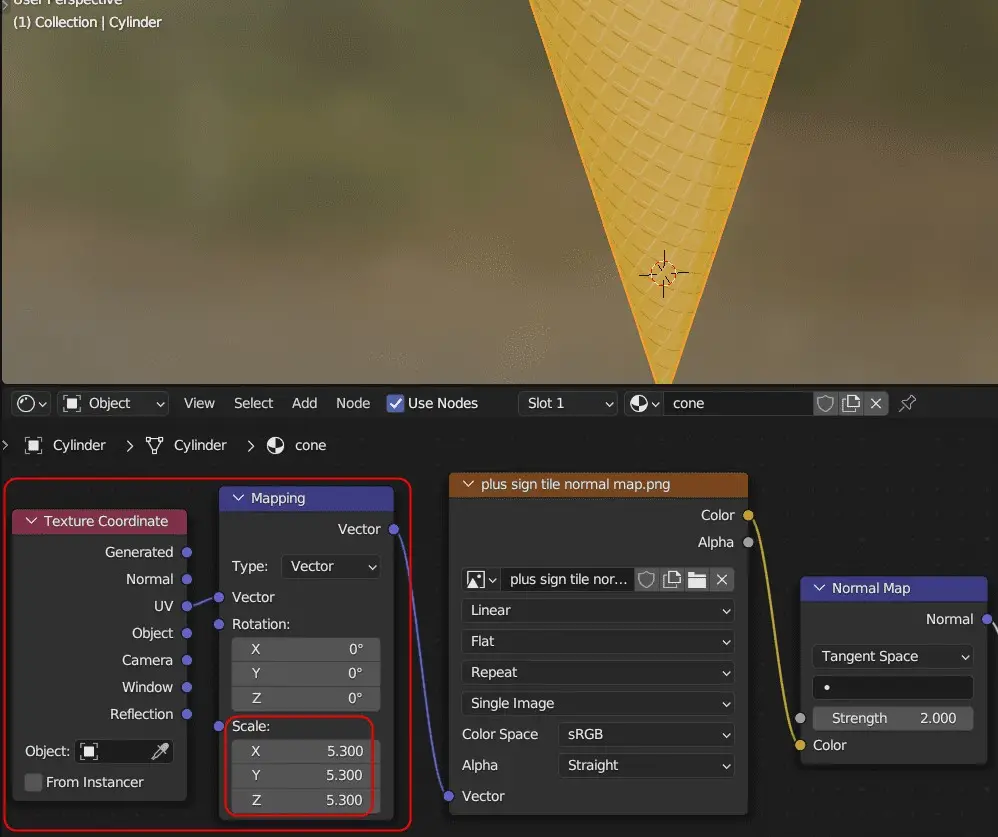
Full tutorial on modeling the cone:
Step 2: Modeling the Ice Cream Mesh
For this we do the following:
- Add a Cylinder, make the basic shape.
- Checker Deselect.
- Extrude and Edit using Proportional Editing.
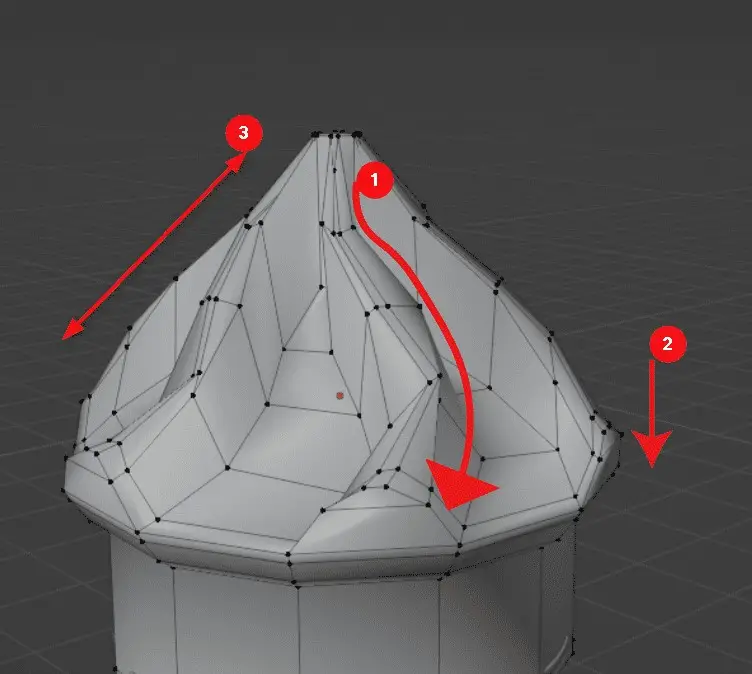
Read more on How to model the Ice-Cream mesh.
Step 3: Add Sprinkles using Particle System
In this step, we add a Particle system, add a Vertex Group, instance the sprinkles and then adjust the rotation.

Read more on Adding Sprinkles using Particle System.
Step 4: Adding Material
Add different materials, for example, one for base and one for topping such as chocolate.
Materials for sprinkles should be random, such that sprinkles have different colors.
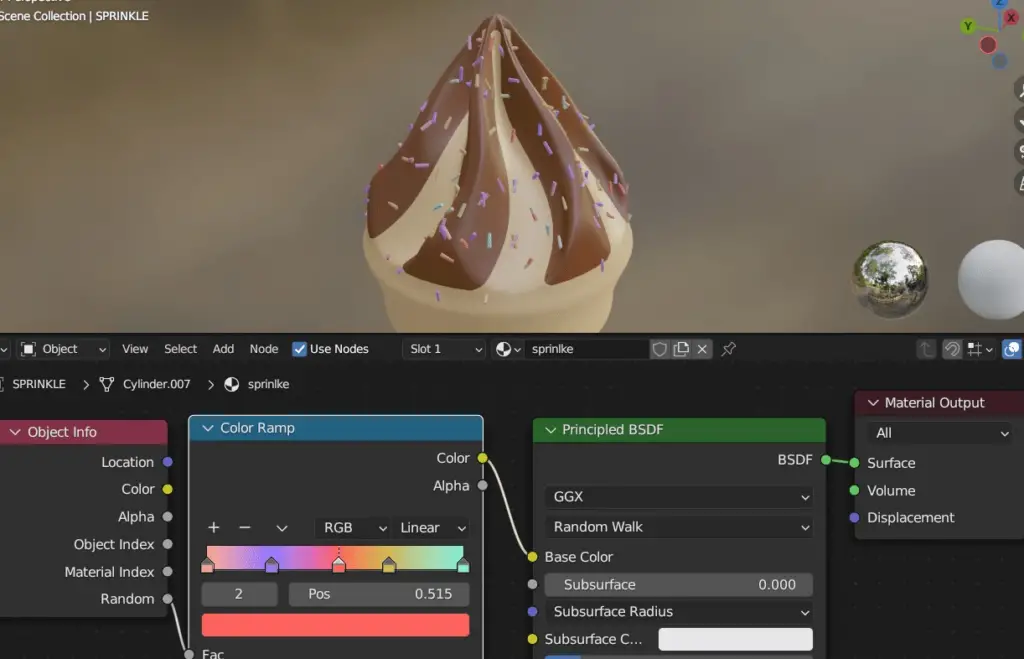
Read more on how to use Materials for Ice-cream.
Step 5: Background and Lighting
We change the Background Color from the Shader Editor, and add Different Area Lights for Better Shading.
