In this tutorial, we will learn, how to cut holes in blender and maintain a good topology.
Cutting holes in mesh, is always challenging for blender users. Many people cut holes using various methods. But for many, the geometry gets messed up. Overview of the tutorial is shown in the following video.
We will make holes with clean topology.
We will learn the following in this tutorial:
- Making Hole in the Mesh.
- Use Array modifier to add Geometry
- Deform by 360 degrees to make circular mesh.
- Subdivision surface for smoothening of mesh.
- Weld modifier to connect the disengaged vertices.
- Apply all the modifiers.
- Clean Topology.
Open blender, delete the cube, by selecting the cube and pressing delete key.
Making Hole in the mesh
Next add, a plane by clicking Add > Mesh > Plane. Go to Edit mode by pressing Tab key.
Subdividing the Mesh
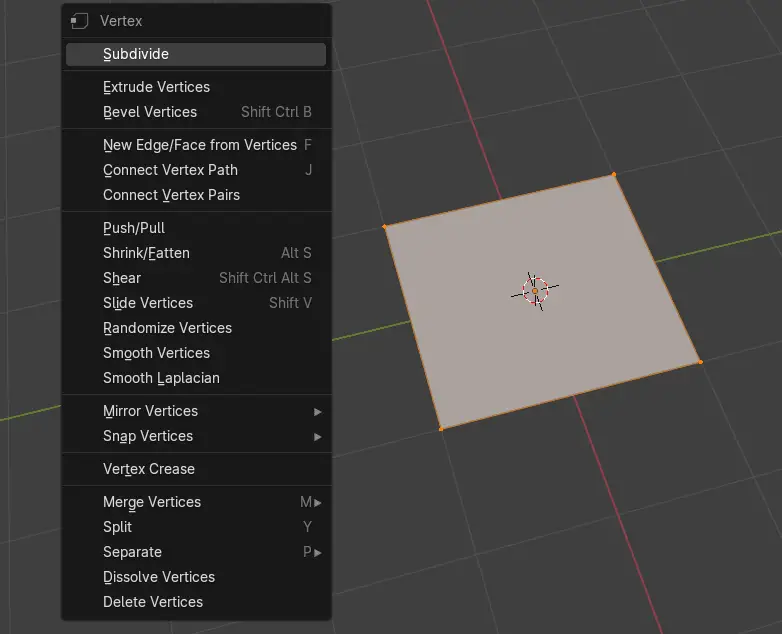
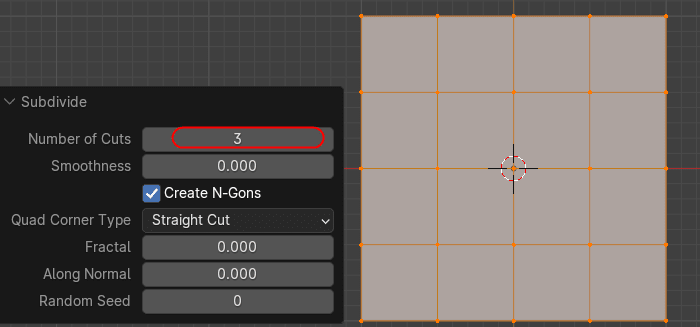
Subdivide the plane, by selecting all the mesh by pressing A key, and press Right Mouse Button.
Select the Number of Cuts to be 3.
Manipulating the mesh to make it circular
Next, we manipulate the shape of the mesh to make it look like a hole.
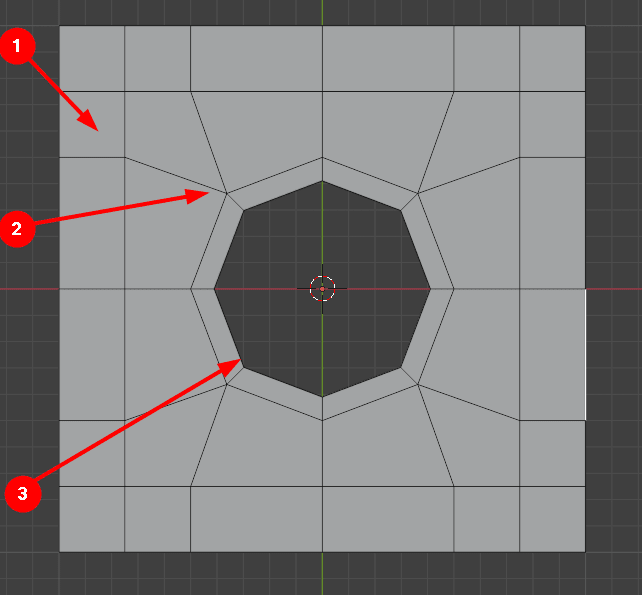
Do the following:
- Add loop cuts on the side as shown.
- Manipulate the middle vertices, and form a circular shape.
- Optionally, you can choose to extrude the circle inwards.
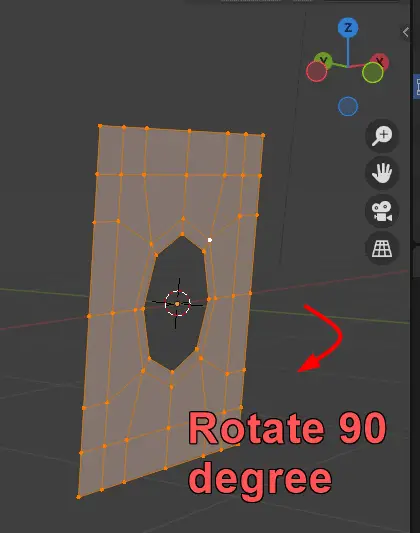
In the Edit mode, rotate the plane by 90 degrees on the X-axis, by pressing R+X, type 90 and hit Enter.
Use Array modifier to add Geometry
Now, we need to choose the number of holes for our mesh, in our case, the number of holes will be 7. We will use Array modifier to increase the number of holes.
Select the mesh, go to Modifiers tab, click +Add Modifier > Generate > Array.
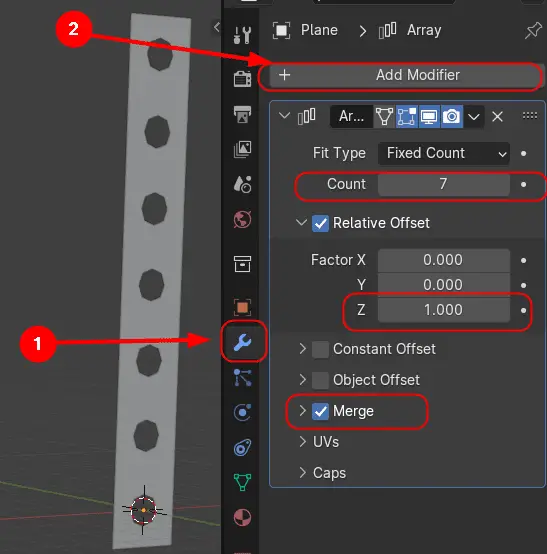
For this tutorial, we want the increment to be on Z axis. Change the Relative Offset on the X-axis to be 0, and change the Factor Z to 1.
Change the Count to the number of holes you want on your mesh, in our case 7. Enable the Merge option so, that the multiple meshes merge with one another.
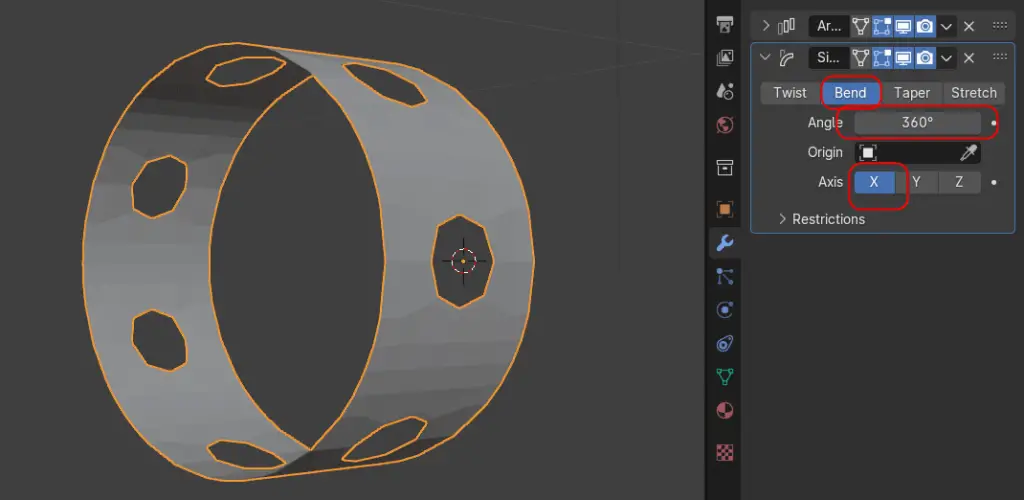
Since, we need a circular pipe, we will bend the mesh by 360 degrees on X-axis.
Deform by 360 degrees to make Circular mesh
Add a Simple Deform modifier, by clicking Add Modifier > Deform > Simple Deform. Change type to Bend, angle to 360 degrees and change the Axis to X.
Subdivision Surface modifier for smoothing of mesh
To smooth the mesh, we can use Subdivision surface modifier. Click Add Modifier > Generate > Subdivision Surface modifier.
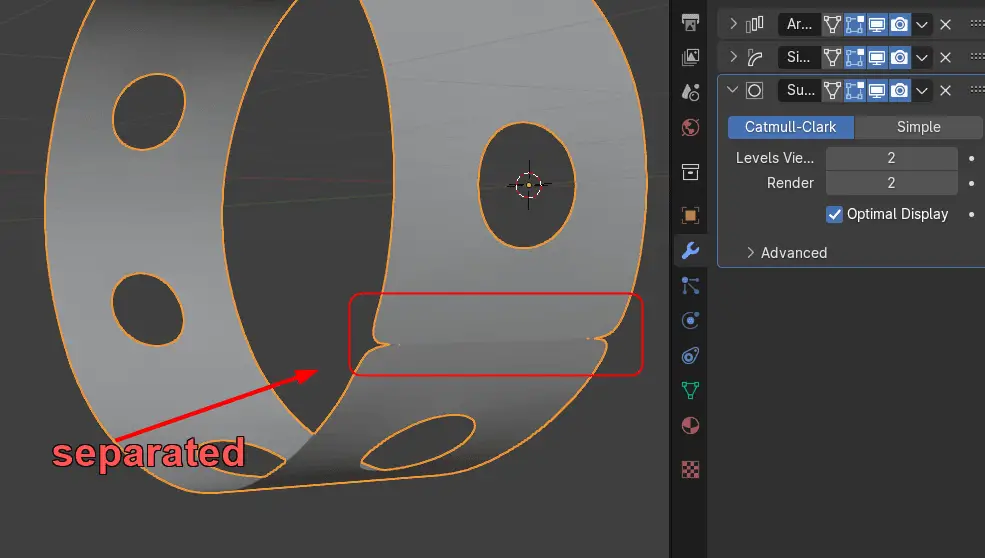
You will notice that, after adding the modifier, the area is separated, because the edges of these areas are not merged. This is because, the first and last of the planes are not merged.
Weld modifier to connect vertices
To overcome this problem, we need weld modifier. Weld modifier, connects vertices, based on the distance between them.
Add a weld modifier, by clicking Add Modifier > Generate > Weld.
The arrangement of the modifiers is crucial, the weld modifier, should be added before the Subdivision Surface modifier.
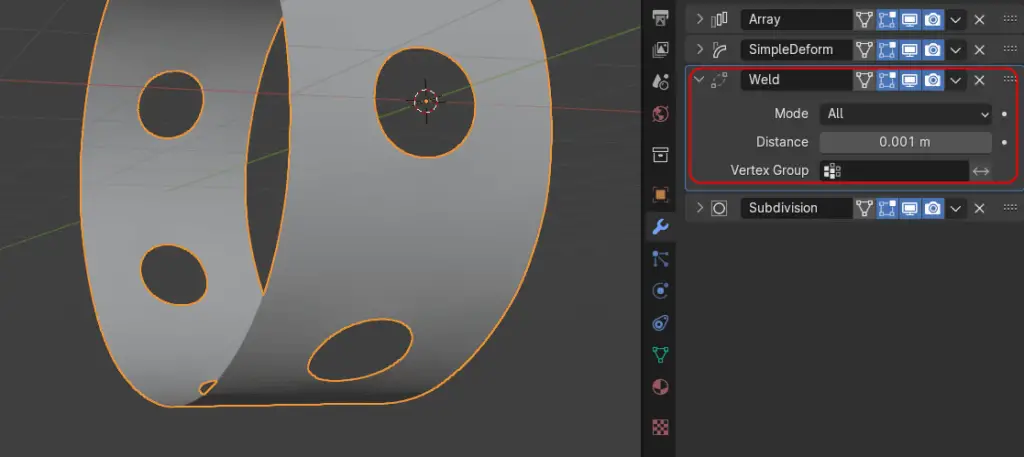
Weld modifier connects the separated vertices. In our case, after deforming the mesh by 360 degrees, top and bottom edges did not merge.
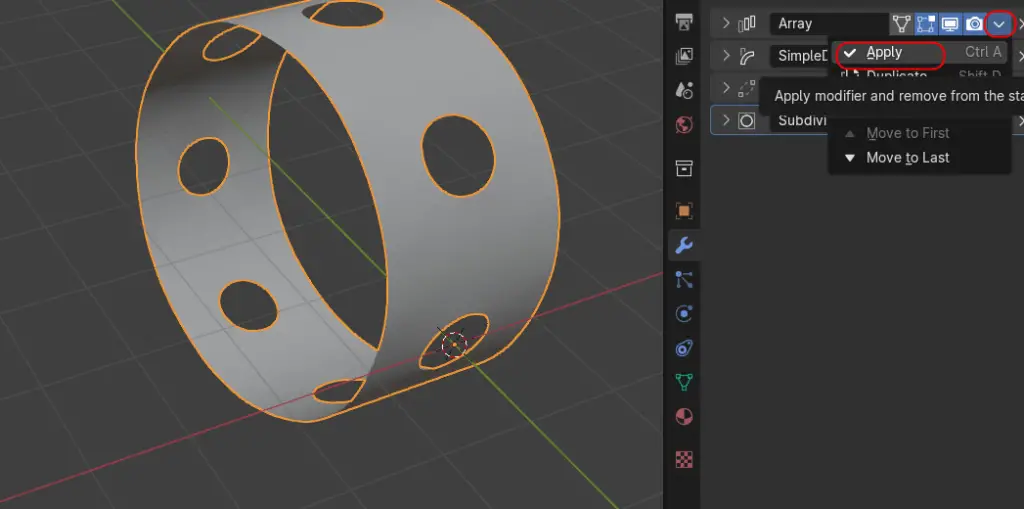
Apply all the Modifiers
Optionally, you can choose to Apply all the modifiers, this is helpful in our next step, making a pipe using this mesh.
Clean topology
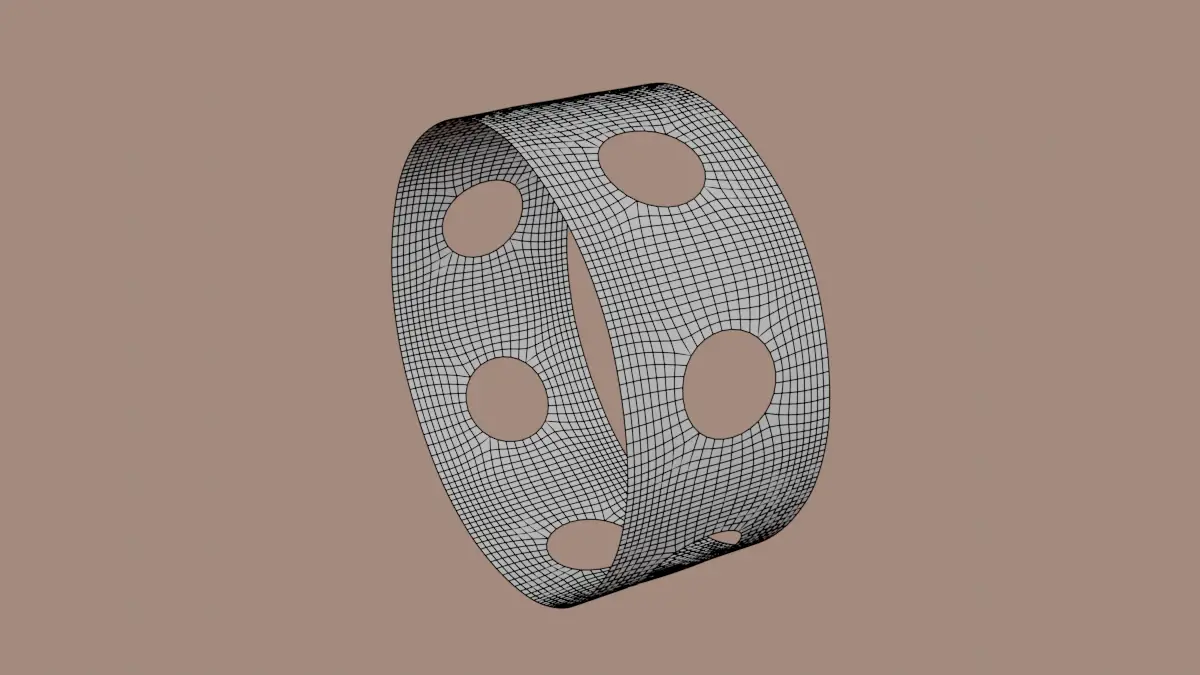
After applying all the modifiers, we can see that we have a clean topology.
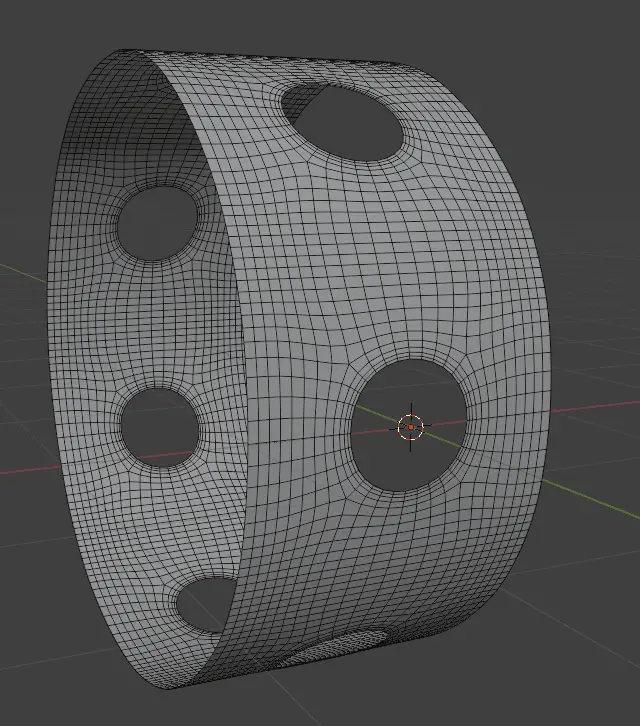
We have now made a mesh that has clean topology with holes.
We can take it to the next step, using curve modifier and Array modifier. We can make the mesh along the curve and increase the length of our mesh. Click here to learn more.