In this tutorial, we will learn how we can render with any background color, without disrupting the lighting of the scene.
We will discuss:
- Switching to World shading.
- Changing Color from a Single Background Shader ( Wrong Method).
- Mix shader for two background shader.
- Separating Lighting and Background color using Light path
We will make changes to the World Lighting for this tutorial, but in a way, that it does not affect the lighting of our scene.
Some blender users change the Environment light, that changes the color, but it also affects the lighting of the scene, this is something different.
Start with the blender file, for which you want to change the background color.
Switch to World Shading
From the top ribbon, go to Shading tab, and change the Shader type from Object to World, by doing this we can change the World Environment.
Viewport Rendering
Make sure you are the Rendered Viewport view, in the 3D viewport(the upper window) , press Z key and then click Rendered, to switch to rendered viewport shading.
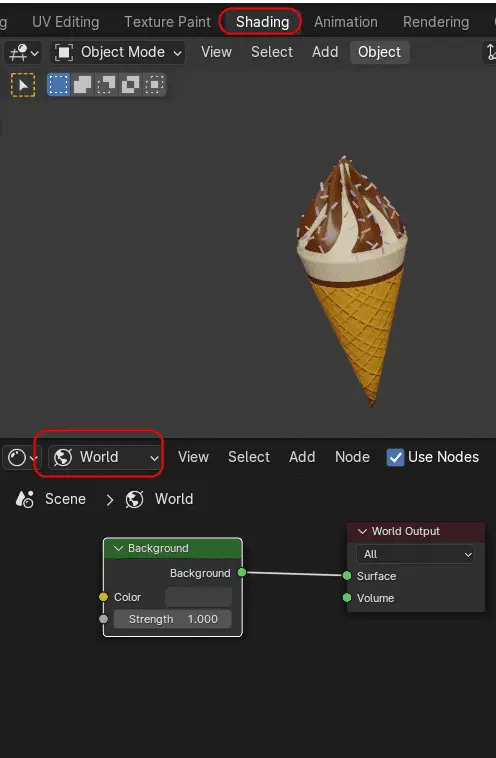
We see that there are two nodes, in World Output. One is Background shader and the other is World Output. Background node determines, the color and lighting of the World Environment, while the World Output, is for determining the type of output, which in our case is Surface.
Changing Color from a Single Background Shader ( Wrong Method)
We can change the background color, by changing the Color input, from the Background node and setting the intensity. But this is the wrong method.
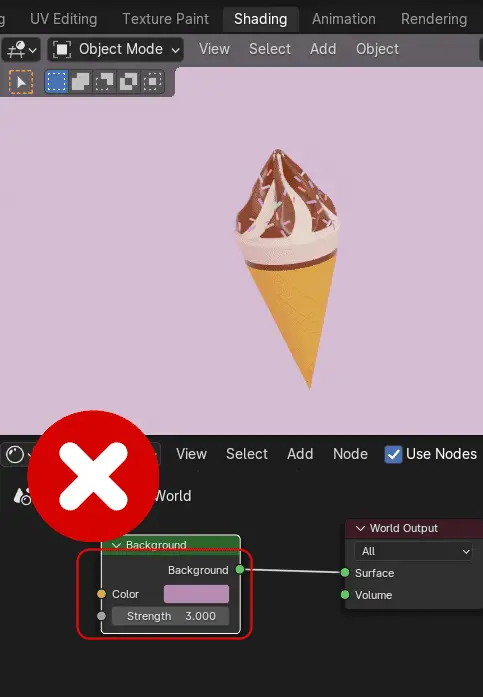
Because, by doing so, we have also affected the lighting of the scene. We don’t want to affect the lighting of the scene.
Mix Shader for two background shaders
To solve this problem, we need two background nodes, one that affects the lighting of the scene, and the other which determines the background color of the scene.
To do this, we use Mix Shader node, add a Mix shader node by clicking, Add > Shader > Mix Shader.
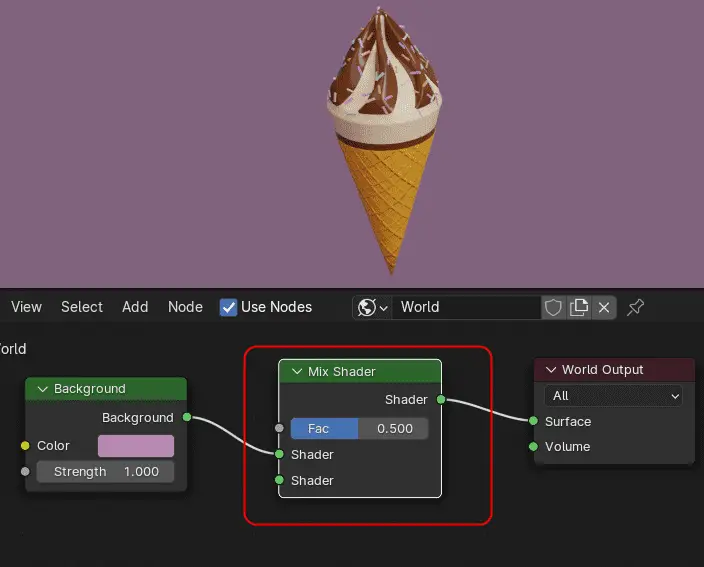
Mix Shader node allows to use two shaders, and helps determine, which shader will have more effect.
We want to keep our current background node, for background color. We add another Background color node, for the lighting of the scene. This way, we can change the background color, and the lighting of the scene, will not be affected.
Another Background shader for lighting
Add Background shader node, by clicking Add > Shader > Backgound shader.
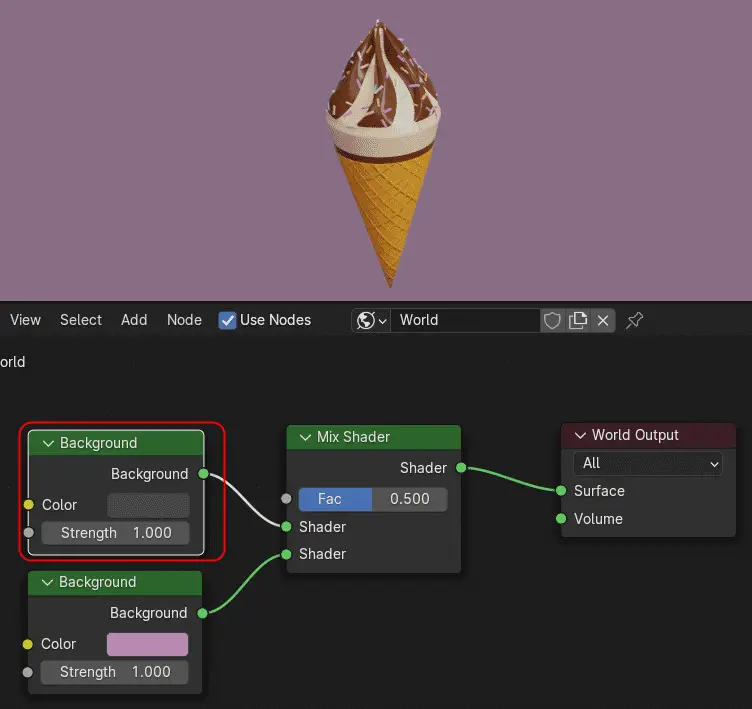
Connect the background shader node to the mix shader node. We see that after connecting both background shader nodes with the mix shader node, we have seen a change in the lighting and background color of the scene. This is because, right now, both of these nodes are affecting the background color and Lighting. We add Light Path node to separate their functions.
Separating Lighting and Background color using Light path
Click Add > Input > Light Path. Connect Is Camera Ray output of Light Paths node to Fac input of the Mix Shader. Make sure, that the background shader node for which you want the background color should be in the second input socket of the Mix Shader node.
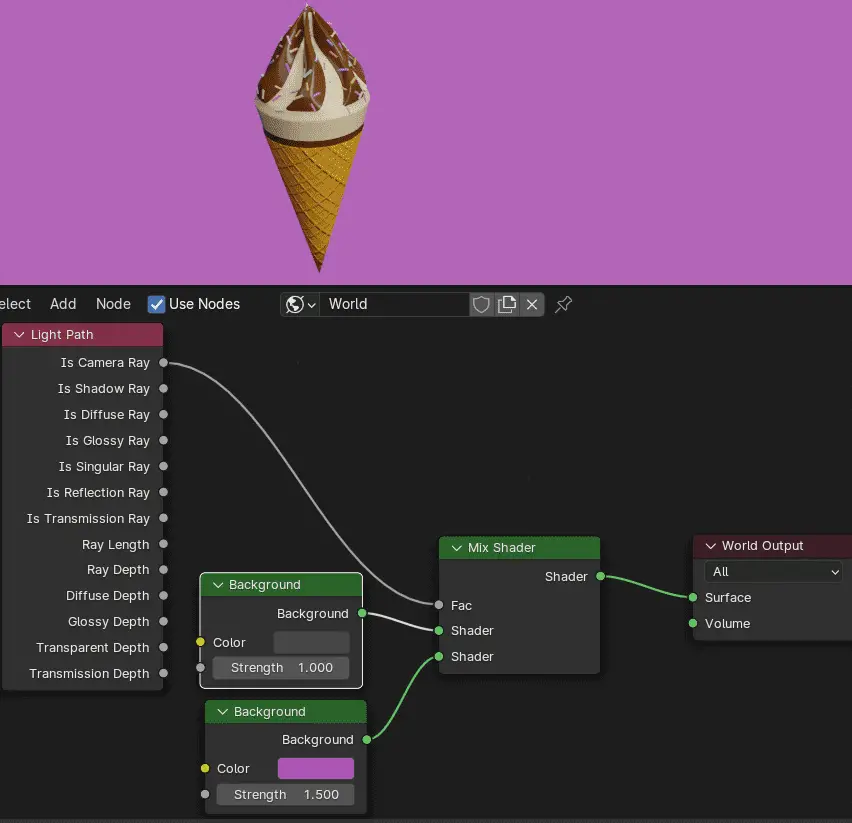
The Light Path is used to find for which incoming ray the shader is being executed, in our case, we wanted different for camera and Environment.
Now, if we change the background color from the background shader that is connected to second input socket of the Mix Shader node, we will see that background will change without affecting the Lighting of the scene.