We will render animation in the output form of a video. We will go through all of the necessary steps that are required.
If we have any type of animation in our scene, we will try to export it or save it in a form of video, that’s what we call rendering an animation.
Click here to learn about rendering an image.
In this tutorial, we will discuss:
- Shortcut for rendering.
- Render settings for your animation.
- Output settings.
- Camera settings.
- Light the scene.
- Set the Frame Range for your animation.
- Render the animation.
Shortcut for Rendering Animation.
The shortcut method to render an animation is by pressing CTRL + F12.
But this method is the shortcut method, and you may need some adjustments, before you can render a good animation video.
Render settings
Render settings are one of the most important things to consider, when rendering an animation. Rendering an animation, usually takes time, but we may reduce that time if we select the proper settings. These are the settings. Render settings can be accessed from the outliner which is usually on the right side of your screen.
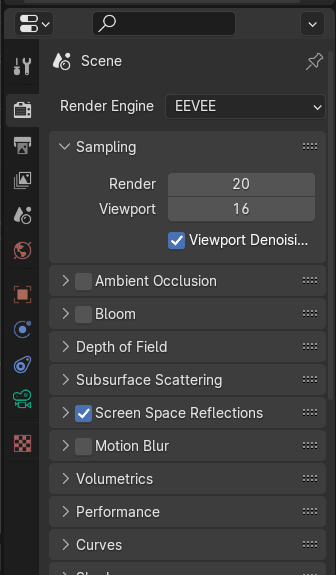
- Selecting the correct Render Engine: Cycles or Eevee. Eevee is faster than the cycles.
- Rendering Samples, the more samples you have, greater will be the rendering time.
- Other settings such as Ambient Occlusion, Bloom, Screen Space reflections and much more.
Learn more, on how to render faster in Blender.
Output Settings
In output settings, you can set the following things:
- Resolution
- Output path
- File format of the video.
- If we select JPEG, PNG or TIFF, then we will have number of images render that will form an animation sequence.
- We can render in MP4 or AVI format.
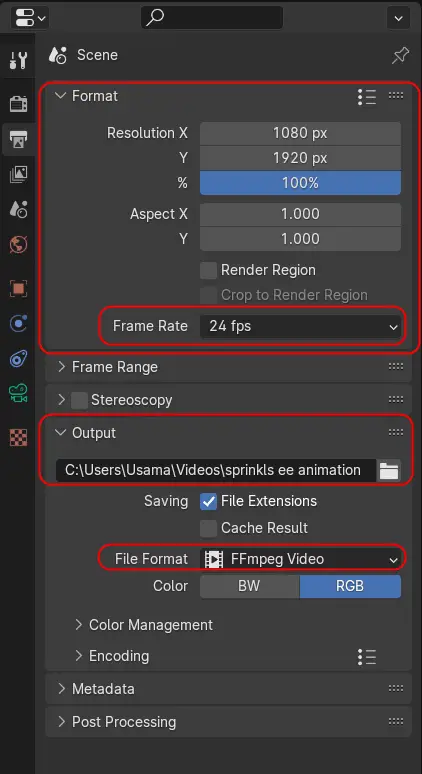
These all are very important settings for your scene.
Set the camera
Make sure that your camera is pointed at the scene, for which you want to render the animation. Learn more about moving camera.
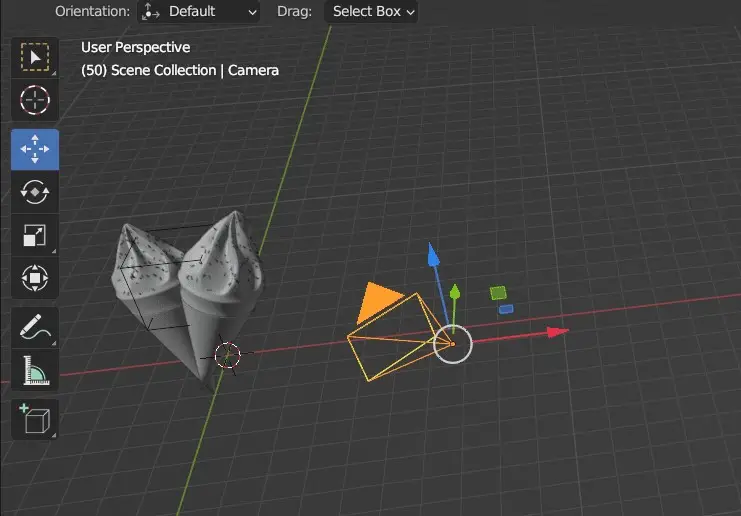
You may also want to animate the camera with the scene.
Light the scene.
The scene needs to be properly lit, so you can have an attractive render out of it. You can render the scene by using an HDRI or you can use multiple lights.
Frame Range Settings
Using the timeline, we can set from where we want to start rendering and on which frame the rendering should finish.
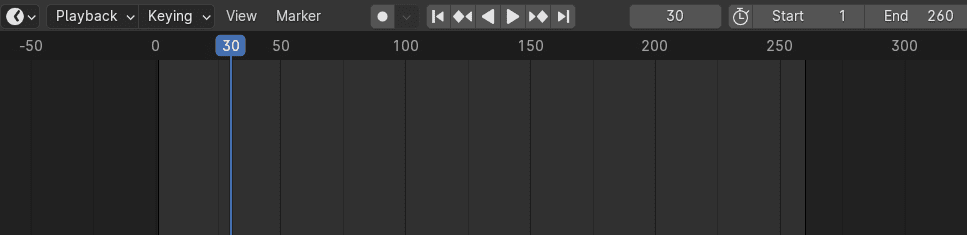
The default frame range is 250 frames, i.e. from frame 1 to frame 250. We can change it depending upon the requirement.
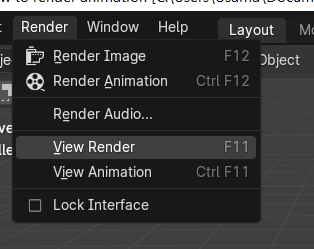
Render your Animation
Finally, we can render the scene using CTRL + F12 key. OR, we can click Render > Render Animation.
When you click the Render Animation, the scene will start to render, it may take few minutes or a few hours depending on the scene.
We can access the saved render from the output path specified earlier in the output settings.