In this tutorial, we will learn how to fix the incomplete ends of the handrail from the previous tutorial. First, the handrail will be moved back along its path to fix the lower end and then the length of curve will be increased to fix the upper end. Blender version 3.0 is used.
This is the seventh part of the Procedural Spiral Staircase tutorial series. In the previous tutorial, the handrail was added by extruding the profile curve.
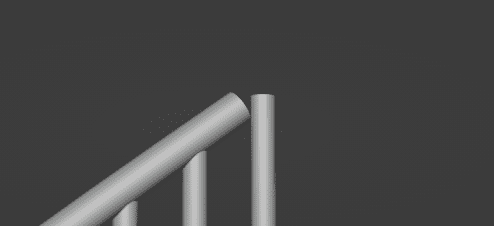
We can see the ends of the handrail are not properly aligned, and this is the case on both sides.
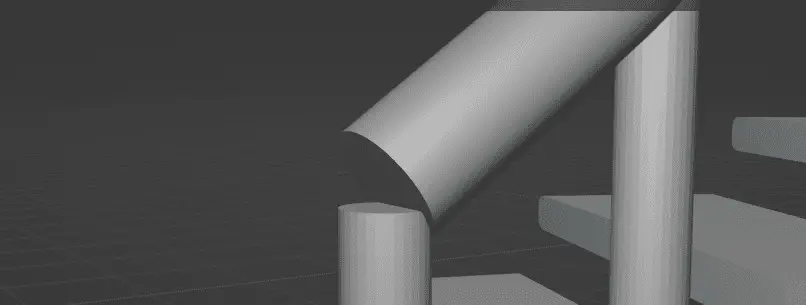
To fix this:
- Handrail should be moved back along the curve to fix the lower end.
- The length of the handrail should be increased to fix the upper end.

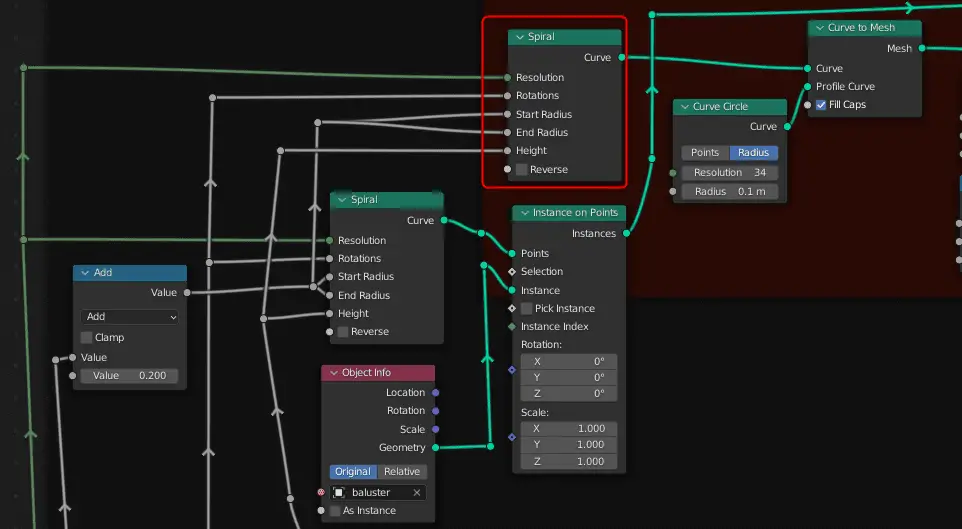
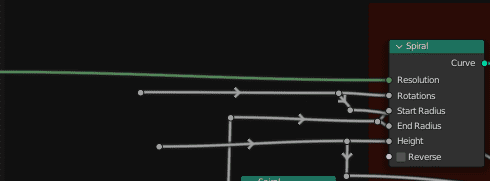
Same Spiral Curve node is used for handrail and baluster. It is necessary to make a separate spiral curve node for the handrail.
Add another Spiral Curve node for the handrail.
Move handrail backwards along the curve
To move the handrail lower along the curve, the handrail should be translated and rotated simultaneously on the Z axis.
Eariler, Transform node was added to translate the handrail on Z axis, we use that node to translate and rotate the curve on Z axis using Combine XYZ.
Add Combine XYZ for Rotation and Translation
By using Combine XYZ, we can change each axis separately.
Click Add > Vector > Combine XYZ for Translation and Rotation.

Add Height and convert Degrees to Radians
We need the elevation that was added to handrail, for this we add a Math node with Add operation, input the elevation for Z axis in one of the inputs.
For the Rotation, add a Math node, and change the Operation to To Radians. Degrees will be entered and will be converted to radians by the node.
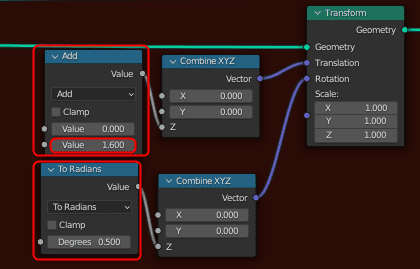
For rotation, in the Combine XYZ node, it is neceassry for the input to be in radians not in degrees.
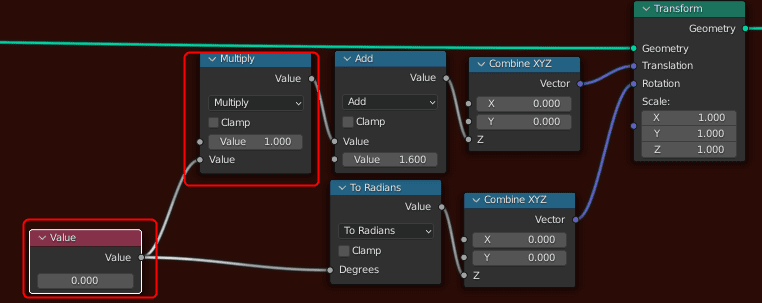
Add Value node
We need a value, which will move the handrail backward along the curve. Our setup is not complete, add another Math node, change the Operation to Multiply, add a Value node by clicking Add > Input > Value. Connect it to To Radians for Rotation, and the Multiply Math node we just added for Translation.
Formula for moving the curve along its path
If value of Value of node is changed, the handrail does rotate and translate but not along its natural curve path. This can be fixed using a mathematics.
To understand this, suppose, there is curve that has a single rotation, with some height. When it rotates 360 degree, it should also translate the length of its height. For this, the value of rotation should be multiplied with the height and divided by 360 degrees.
In case of spiral node, there is Height and Rotations, so their rotation should be used. So the formula becomes as follows:
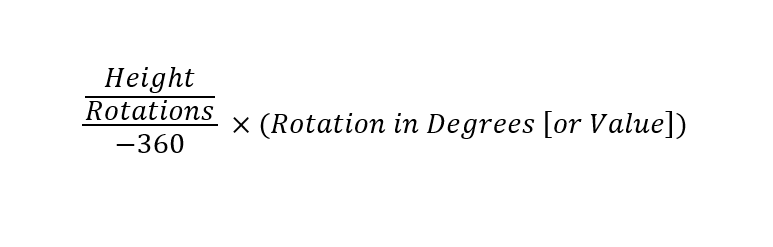
Negative 360 degree is used for correct direction.
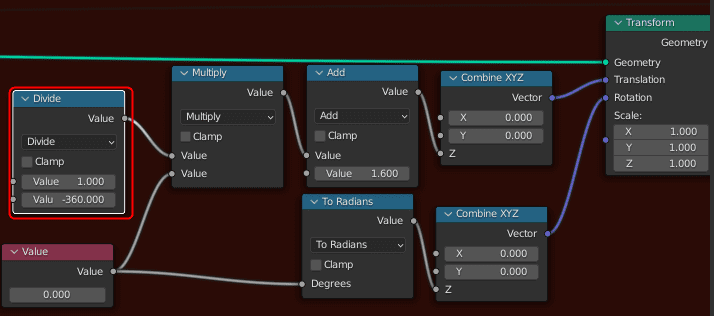
First of all, add a Math node, change the Operation to Divide, change the value of denominator to -360 as in formula and connect it to Multiply Math node.
For the ratio of Height and Rotations, add another Math Divide node, drag the inputs Rotations and Height of the Spiral curve to the Math node, with Height as the Numerator and Rotations as the Denominator, connect that node to the other Math Divide node.
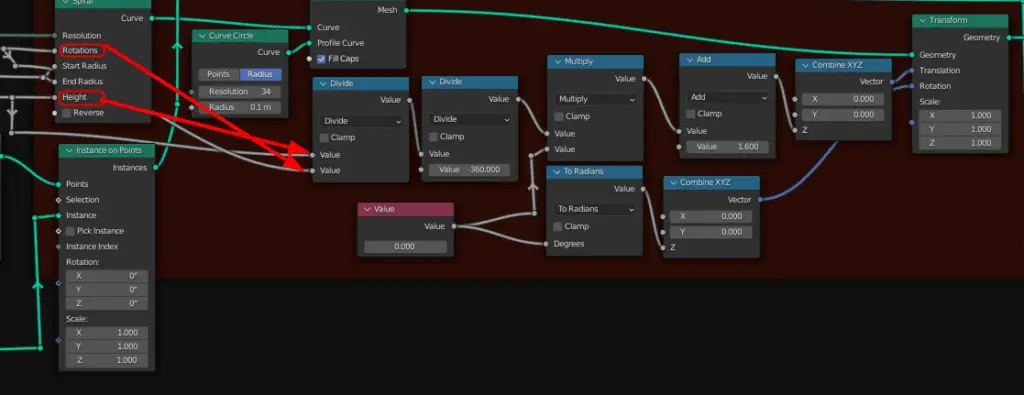
The formula is now complete.
Change the value of Value node, and handrail will slide along its curve path, without any offset.
This will fix the issue for lower end.
Increase length of the handrail
But, doing this, will leave a gap on the upper side of the handrail, because, we have just moved the handrail, the upper side can be fixed by increasing the length of the curve.
Adding Math nodes to increase the length
We use the same method, we used in the earlier tutorial, we add separate Math Divide and Multiply nodes for the handrail.

Disconnect the Rotations and Height from the Group Input node, as they are the values for the stairs.
Add Divide and Multiply nodes just like in the earlier tutorial for the Height and Rotation.
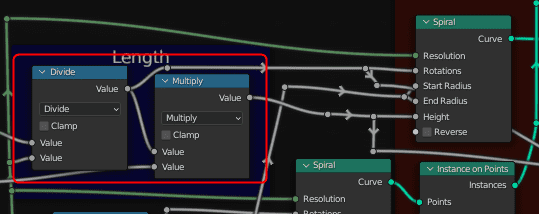
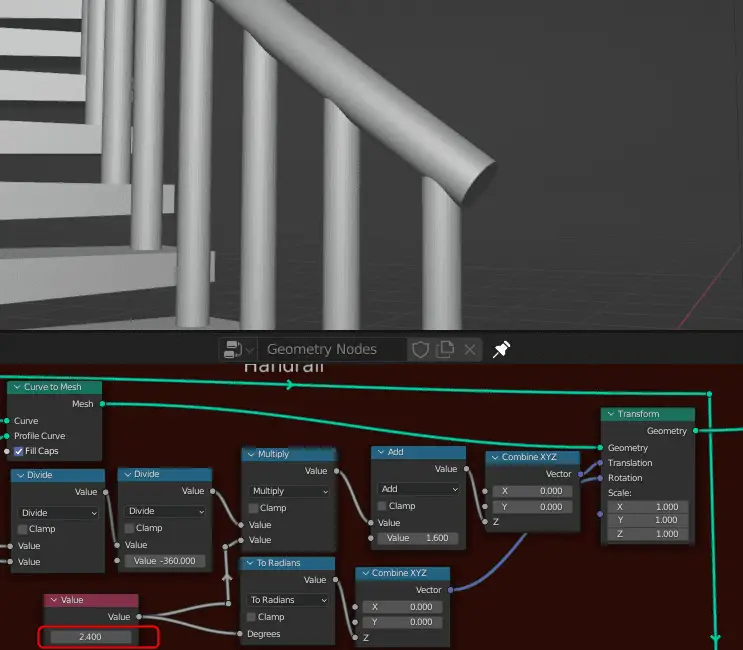
For now, everything will be exactly like before, but for increaseing the length of the curve, we add another Math node, and change the Operation to Add.

The node should be connected to the Divde node.
The length of the handrail will now have increased.
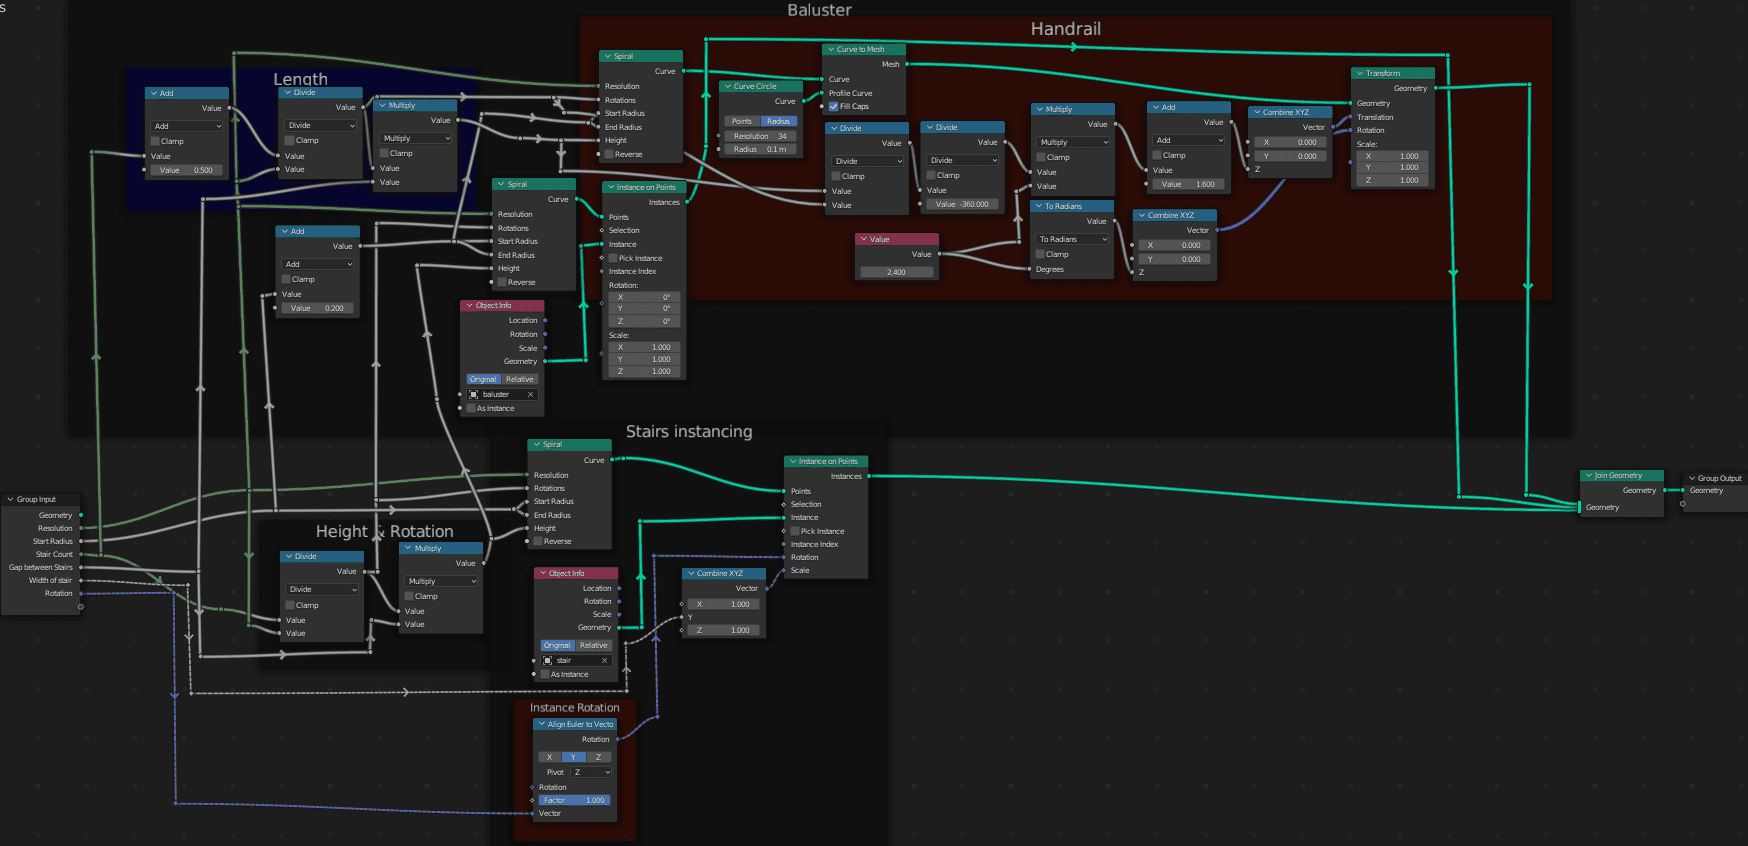
This is how the Geometry Nodes setup looks like now.
In the next tutorial, these geometry nodes will be duplicated to add another set of baluster and handrail: Adding another set of Baluster and handrail in the Geometry Node.
All the parts of the tutorial series in order:
- Instancing the objects using Instance on Points.
- Aligning the instance objects towards the center.
- Adding Count Group Input to control the number of Control points and Instance Objects.
- Adding Width as a Group Input.
- Adding Baluster or staircase support.
- Extrude a profile curve in Geometry Nodes.
- Move the curve along its path for adjusting and increasing the length of the curve.
- Adding another set of Baluster and handrail in the Geometry Node.