In this tutorial, we will learno how to use Align Euler to Vector node in Geometry Nodes to change the rotation of the instances towards a certain object. Blender version 3.0 is used.
This is the second tutorial of the Procedural Spiral Staircase tutorial series, in the previous tutorial, we instanced objects using Instance on Points node.
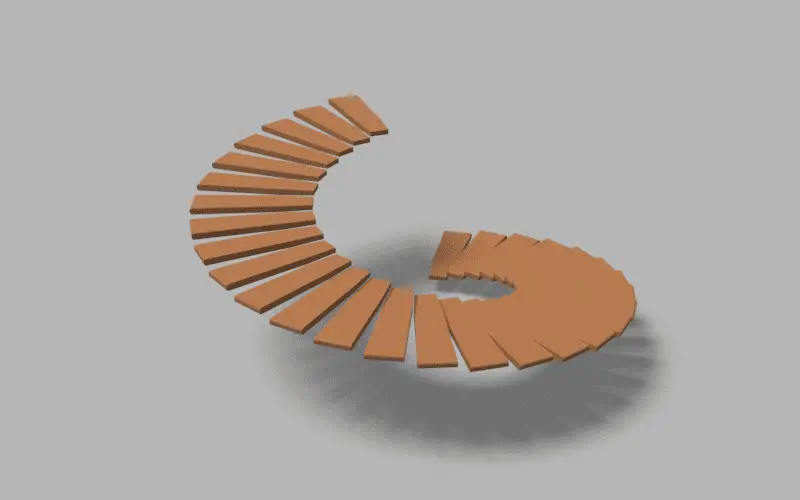
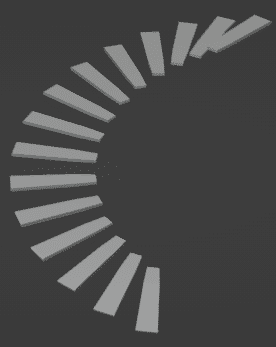
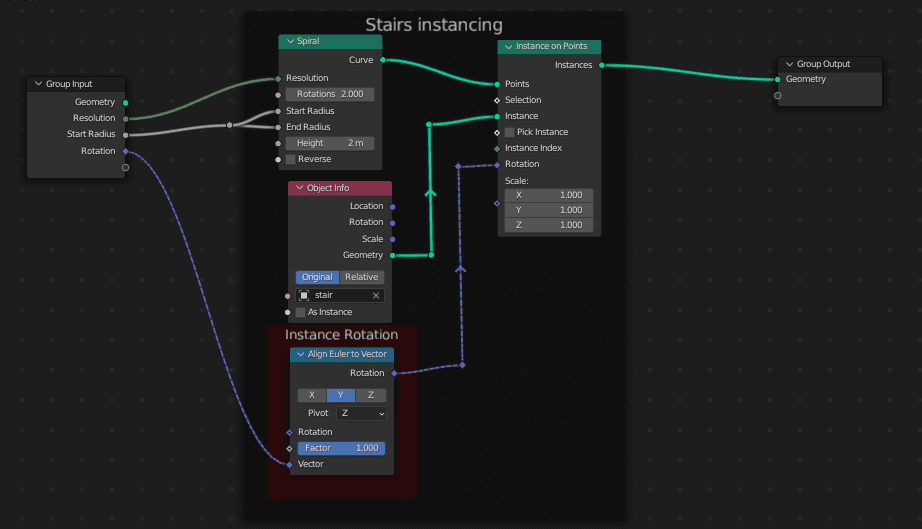
We see that the rotation of the stair objects that have been instanced is not correct. All of them should be facing towards the center. This can be done by adding a Align Euler to Vector node.
Add Align Euler to Vector
Add Align Euler to Vector node by clicking Add > Utilities > Align Euler to Vector node.
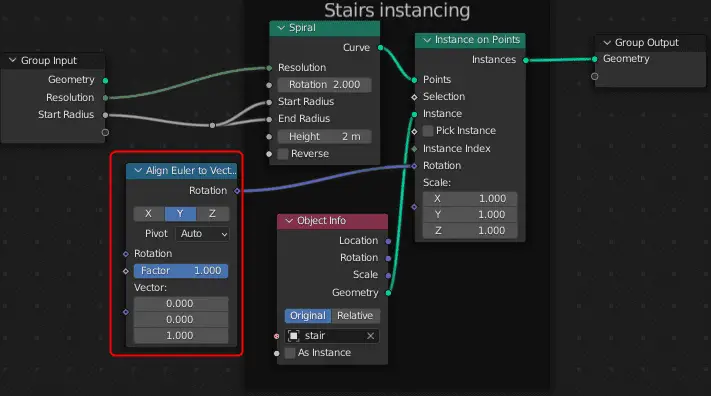
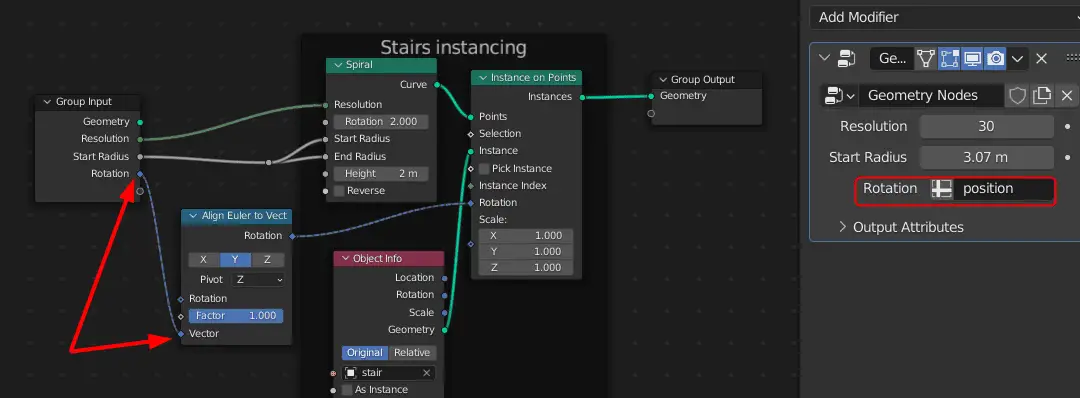
Connect the Rotation output to the Rotation input of the Instance on Points node, so that it can change the rotation of the instances. The stair object’s orienetation is along Y axis. So, the Y axis should be selected on the node.
Connect the Vector input of the node to Group Input, toggle the Input attribute from the Modifier properties. We want the stair objects to only rotate on Z axis, change the Pivot to Z.
From the Modifier properties on the right side, click Input Attribute Toggle and type position. The instance objects will change their rotation towards center, which is the position of the original object.
By doing this, stair objects will change their rotation towards the center, which is basically the position of the object.
So, this is how, the Geometry Nodes setup will look like.
In the next tutorial, Count parameter will be added in the Group Input so, we the number of Stair Objects can be changed: Adding Count Group Input to control the number of Control points and Instance Objects.
All the parts of the tutorial series in order:
- Instancing the objects using Instance on Points.
- Aligning the instance objecsts towards the center.
- Adding Count Group Input to control the number of Control points and Instance Objects.
- Adding Width as a Group Input.
- Adding Baluster or staircase support.
- Extrude a profile curve in Geometry Nodes.
- Move the curve along its path for adjusting and increasing the length of the curve.
- Adding another set of Baluster and handrail in the Geometry Node.