Modeling the Feather
Now, we will add feather to it, but first lets disable the Realtime option in Array Modifier.

Select the feather stick and go to Edit mode by pressing Tab key.
Add a plane by clicking Add > Plane.

Move the plane upwards using the Move tool.

Rotate it on the X plane by 90 degrees.
Press R key, then press X key and finally press 90.

Scale it down appropriately using the Scale tool.

To make it look like a feather, we need to increase the number of vertices. This can be done by subdividing the mesh.
Press Right Mouse Button, in the Vertex Context Menu, click Subdivide.

Now enable the X ray by clicking Toggle X-ray on the top right OR press ALT + Z.

Adjust the vertices so that it looks like the shape of a feather.

We need to rotate the vertices, to do that select the leftmost vertices.

Select the Rotate tool and rotate the vertices using the green (Y-axis) circle.

Do the same with the rightmost vertices.

Now we need to extrude them.
For this we need to select the whole feather mesh and not the feather stick. To do that click on any single vertex of the feather.

Make sure that your Mouse cursor is on the feather mesh and then press L key.

Press E to extrude.

Use the Move tool to move closer to the feather stick.

Once appropriately close, click on X-axis to go to side view.

Choose the Rotate tool and rotate it on the X-axis.

Move it closer to the feather.

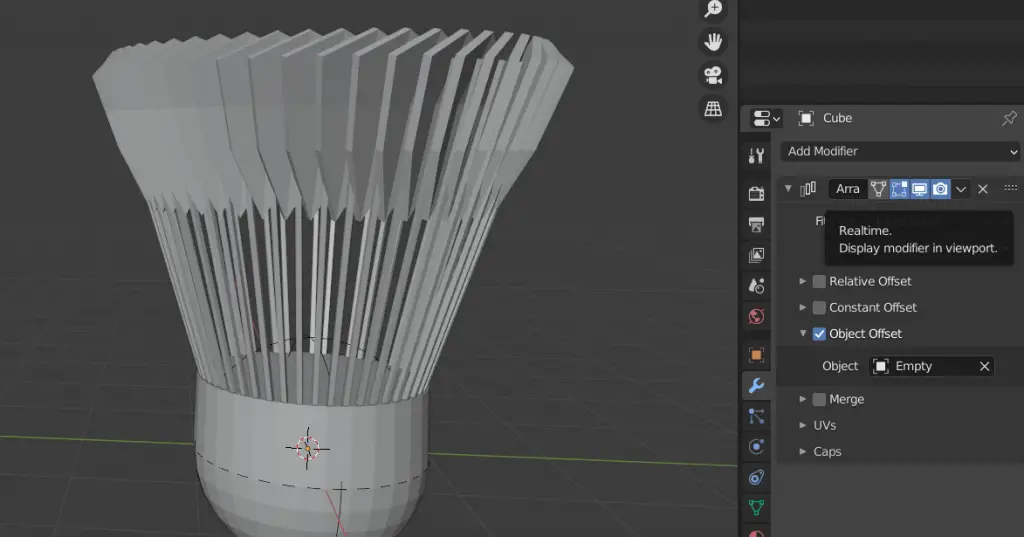
Enable the Realtime display for the Array modifier.

We see that mesh seems to be mixed and jumbled.

To fix this, first disable the Realtime display for Array modifier.
Select the feather, go to Edit mode, select the feather only and go to top view by clicking Z axis.

Select the Rotate tool, and rotate it on the Z-axis.

Go to Object Mode. Enable Realtime display for the Array modifier.
You now see the problem is resolved.

If you still think that the Count number is too high and the feather do not look appropriate, decrease the Count.

Select the Empty, go to Object Properties and increase the rotation on Z axis.


