Use Geometry Nodes instead of Particle system. Procedural scatter objects on the mesh. In this tutorial, we will learn, how we can scatter objects in Geometry nodes just like in Particle System.
You can also do this by using a Particle System; click here to learn more.
In this tutorial, we will use Geometry Nodes, because it is a node based system, that gives us more flexibility.
We will discuss the following:
- Add Vertex Group for selection based instancing.
- Distribute Points on Faces for instancing.
- Join using Join Geometry Node.
- Instancing based on a Vertex Group.
- Add Instance on Points node for instancing.
- Fixing the orientation of the instances.
- Randomizing orientation of the instances.
You can watch the Youtube video or read this detailed tutorial.
In an another tutorial, we made this ice-cream cone, we are going to use the same ice-cream cone for this tutorial, to distribute objects like particle system.
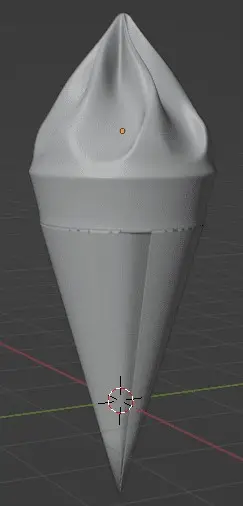
For this tutorial, we are going to scatter some sprinkles, on the top of ice-cream. To do this, we need to make a Vertex group for the top of ice-cream cone. So that only this area has Sprinkles and the others do not.
Add Vertex Group
To do this, select top part of the ice-cream, go to Object Data properties, add a Vertex group, name it “top”, and keeping the vertices selected, click Assign.

This will assign the selected vertices to the “top” vertex group. Learn more.
This will be specially useful in Geometry Nodes, when we assign the region for the sprinkles to be scattered.
Adding Geometry Nodes Modifier
You can go to Geometry Nodes from the top of the ribbon, and click on New to add a new Geometry Nodes Modifier in the Geometry Nodes window.
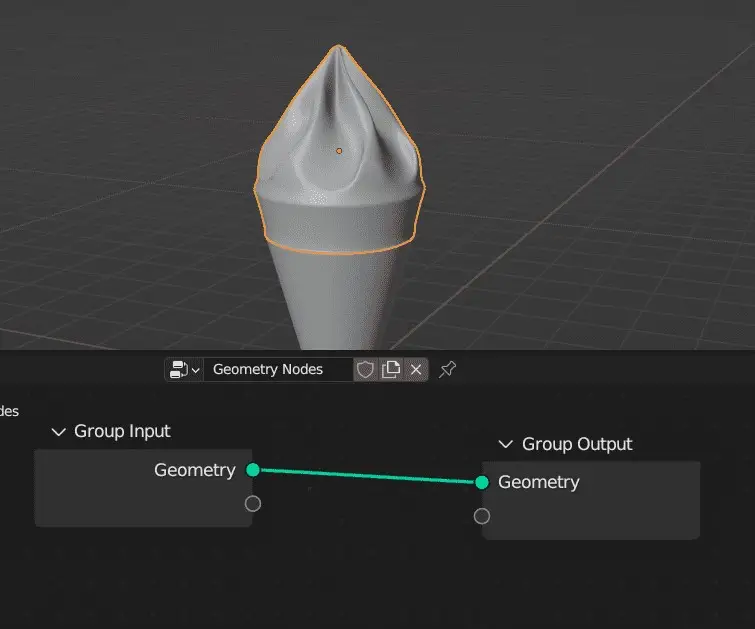
This will look something like the above image.
There are two Nodes, one is Group Input, and the other is Group Output. They define the geometry of our mesh. Deleting any one of them, will make our mesh disappear.
Distribute Points on Faces node
First, of all, we need to distribute points on our mesh. Points are the places where are sprinkles will appear, right now, we don’t have any points on our mesh. This can be done by adding a Distribute Points on Faces node.
Add a new node, by clicking, Add > Point > Distribute Points of Faces. Place the New node, between Group Input and Group Output, as shown.
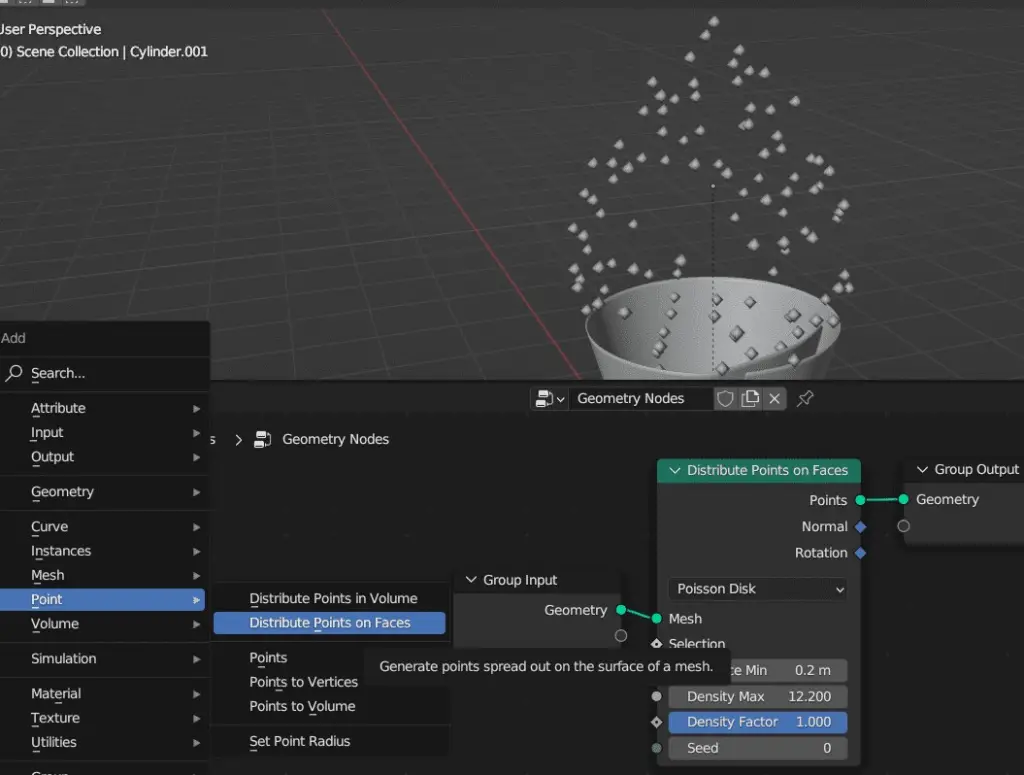
Change the Distribution type from Random to Poisson Disk. By doing, this we can put distance, between points themselves. You may change the Density.
Join using Join Geometry node
Now as you can see, we have distributed the points on the faces. but the ice-cream has vanished. This is because, we have replaced the geometry with points. We need both the geometry and the distributed points.
To solve this problem, add a Join Geometry nodes by clicking Add > Geometry > Join Geometry.
The input of the Join Geometry node, can be connected by multiple nodes. Connect the Group Input, and Distribute Points on Faces, to the Join Geometry node, and connect its output to Group Output.
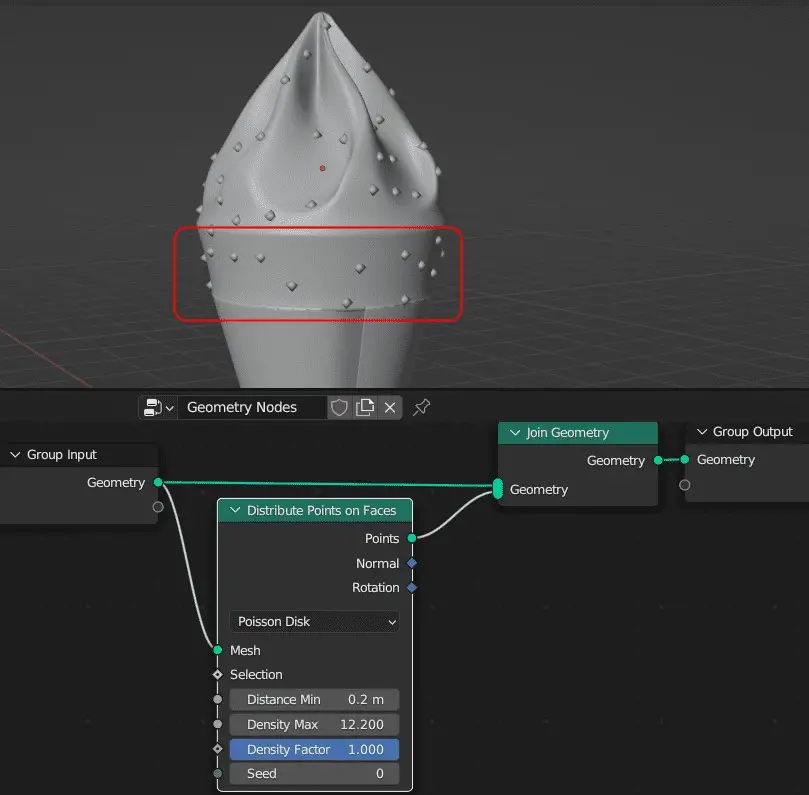
As we can see, we have our geometry back, but, there are points distributed, where we don’t want them, such as on the lower part of the ice-cream as highlighted.
Instancing based on a Vertex Group
We only want the sprinkles on the top part of the ice-cream, on which we made our vertex group.
To solve this problem, we need the vertex group we made earlier. Do the following:
- Connect the
Selectioninput, of theDistribute Points on Faces, and connect it to theOutputof Group Input. - This will make a new Boolean Parameter for our Geometry nodes in the
Modifierstab on the right, it will be a Check Box. - Click the
Togglebutton, immediately on the right side, to change it to the text box. - In the text box, enter the name of the vertex group, in this case, “top”.
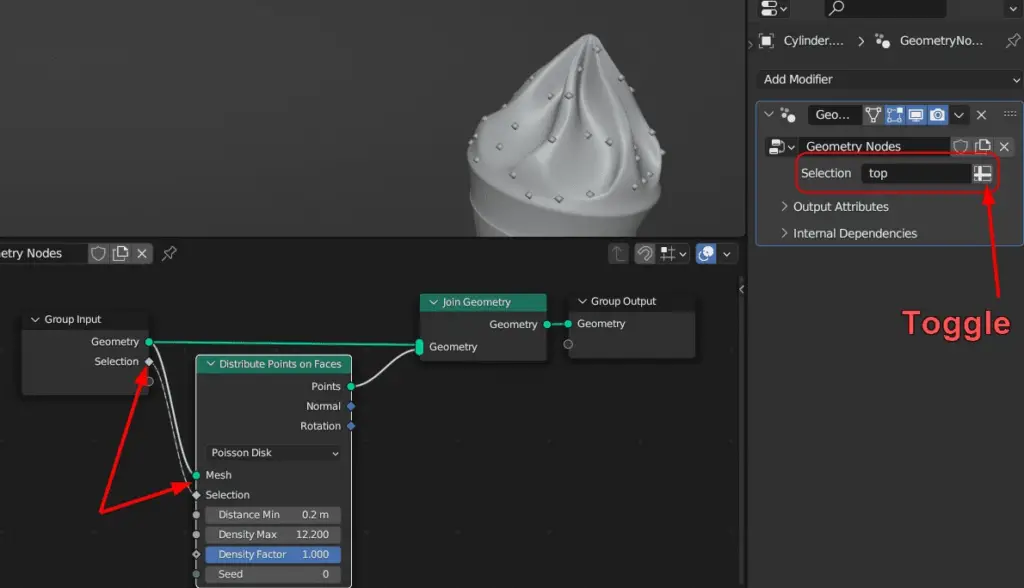
Now, you will notice that, the points only remain at the top of ice-cream.
Instance on Points node for instancing of objects
We will instance on points. Add Instance on Points node, by clicking, Add > Instances > Instances on Points. Place it after the Distribute Points on Faces.
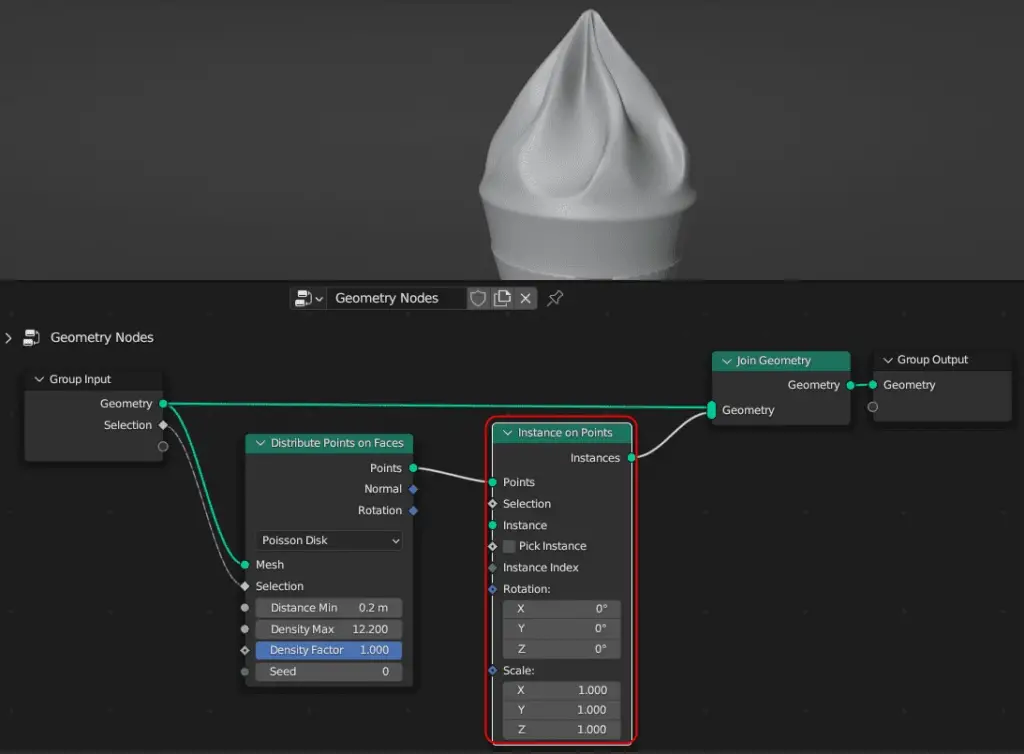
Initially, it will not do anything, and even the points have disappeared, this is because, we have not told it what to instance, we have to instance the sprinkles, this will be done using another node.
The sprinkles are already made for this tutorial, we are just going to add them using the Object info node.
Remember that, the object, that needs to be instanced should be present in the scene.
Learn more about instance on points.
Object Info node
Click Add > Input > Scene > Object Info. Change the Object to the sprinkle, and connect the Geometry output, to the Instance input of the Instance on Points node.
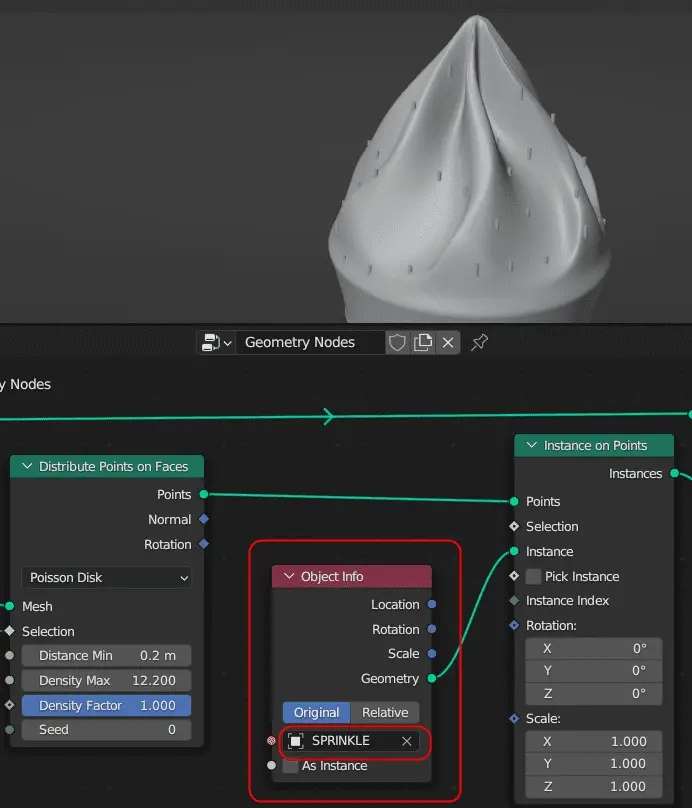
We see that, the sprinkles have appeared, but their orientation is not correct.
Fixing the orientation of the instances in Geometry Nodes
The orientation of the sprinkles or Points should be in accordance with their distribution, so we are going to connect the Rotation output of Distribute Points on Faces to the Rotation input of the Instance on Points node.
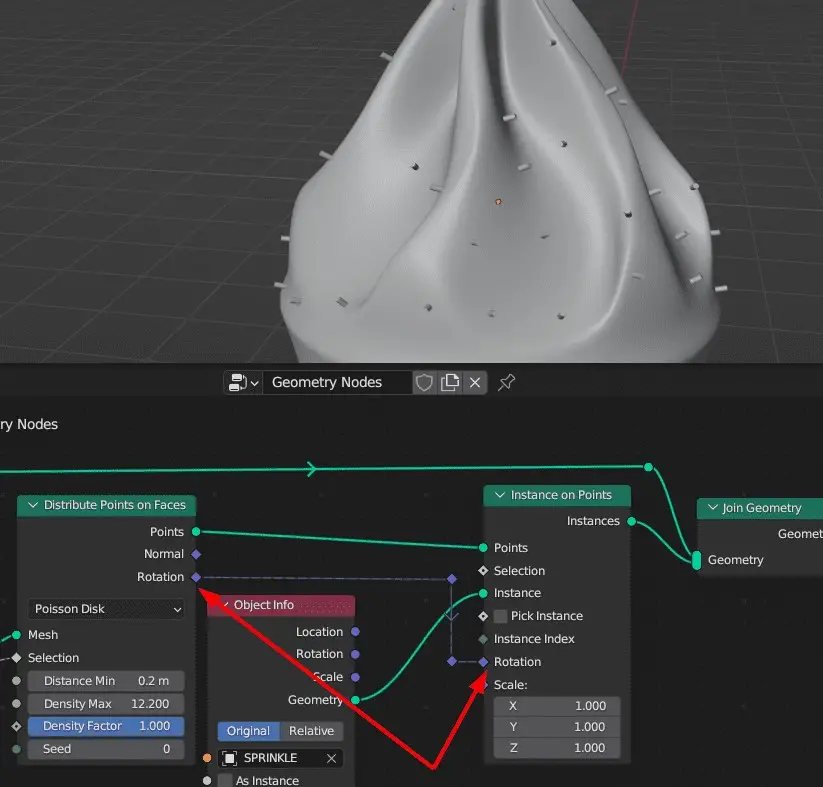
This will correct the instance orientation, but in the wrong axis, depending on the orientation of the original object.
There are two ways to fix this.
- Changing the orientation of the original object.
- We can fix this by adding a Rotate Instances node in Geometry Node.
We are going to use the latter approach in this tutorial.
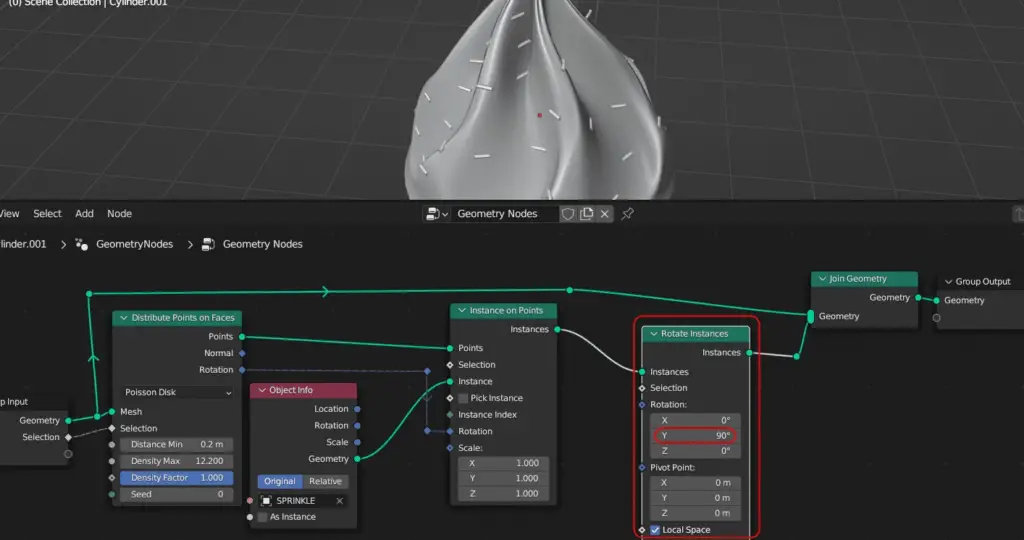
Add Rotate instances node
Add a Rotate Instance node, after the Instance on Points, in the and change the Rotation on Y axis, to 90 degrees.
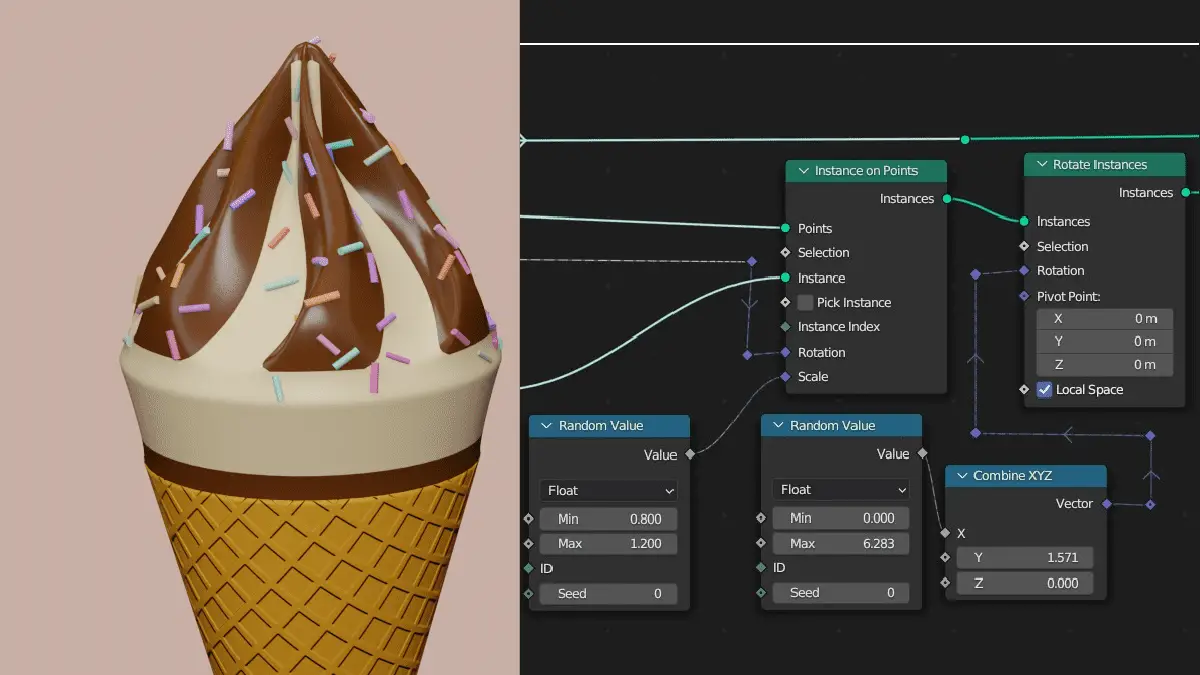
You can randomize the rotation, by Adding Combine XYZ and Random Value and connect it to the Rotation input of the Rotate instances.
Add Combine XYZ, by clicking Add > Utilities > Vector > Combine XYZ, by doing this, we can deal with X,Y and Z separately. But, we still have to add the 90 degrees angle here, but we will add it in radians.
90 degrees = 1.571 radians.
Randomizing orientation of the instances
Add a Random value, between 0 degrees and 360 degrees on the X- axis. To do this add a Random value node by clicking Add > Utilities > Random value.
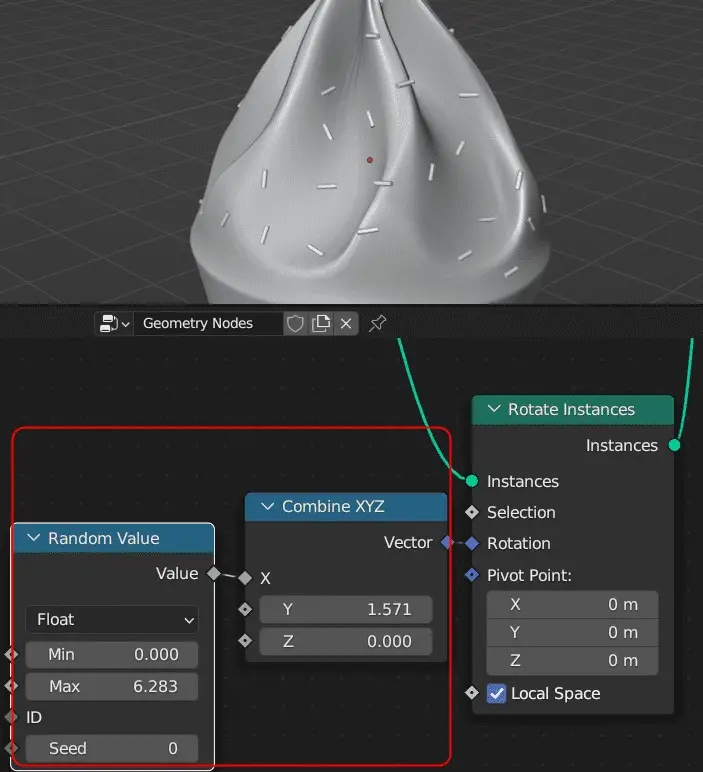
Connect Random value to the Combine XYZ, and then connect it to the Rotation of the Rotate Instances node.
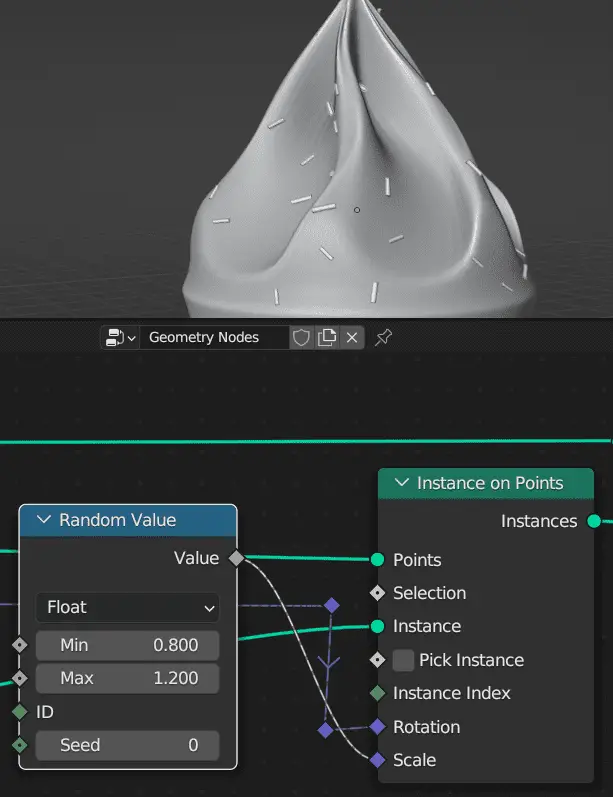
Similarly, we can randomize the Scale of the sprinkles, by adding a Random Value node, and connect it to the Scale of Instance on Points.
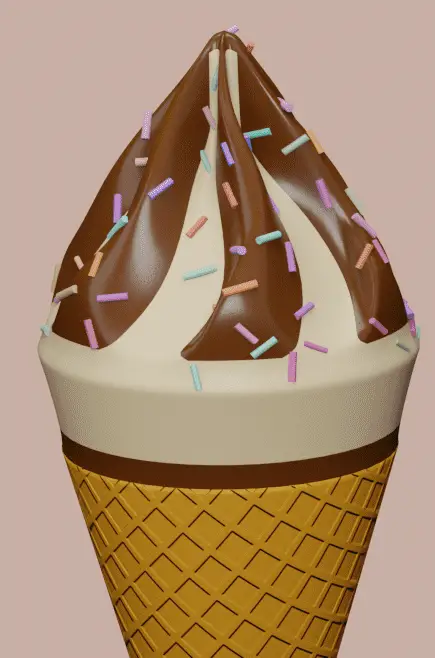
This is the whole setup, for adding Sprinkles on the Ice-cream.
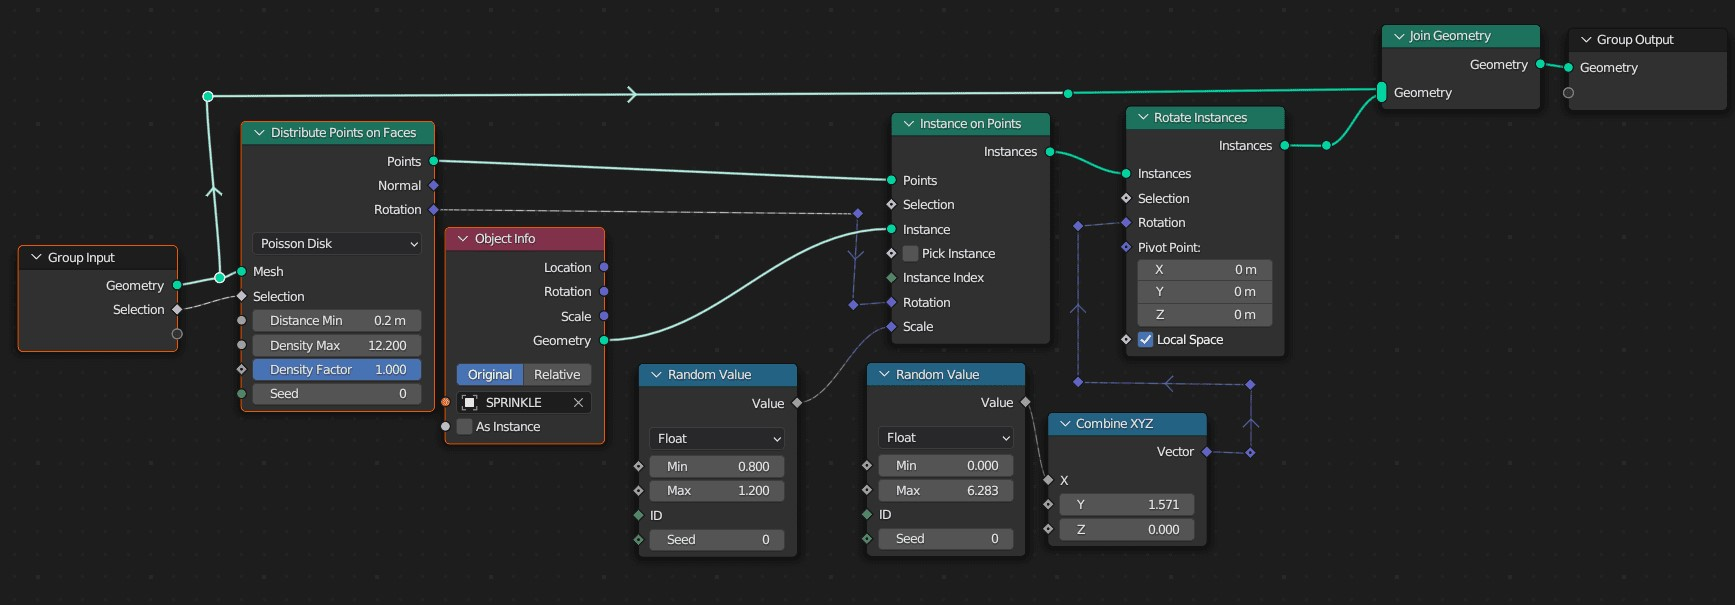
This will be the final result.