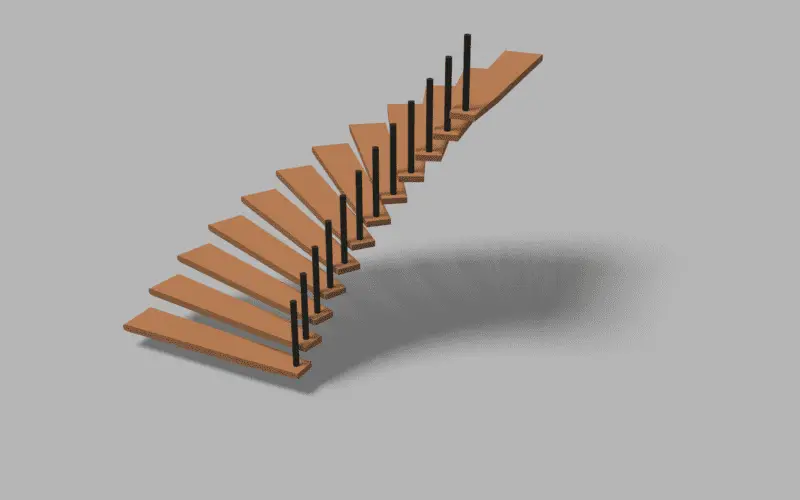
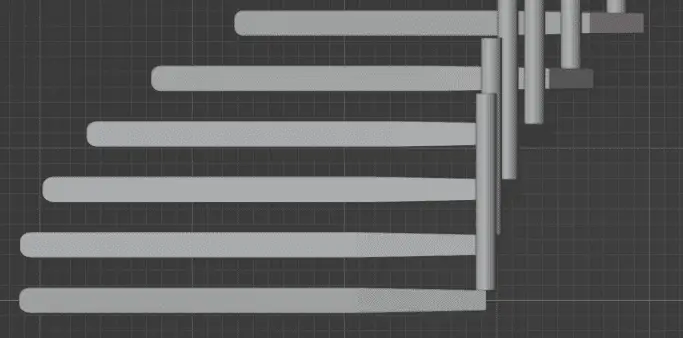
In this tutorial, we will learn how to add baluster or support for the staircase using Geometry Nodes. New Geometry will be added and then joined with the previous geometry. Blender version 3.0 is used.
This is the fifth tutorial of the Procedrual Spiral Staircase tutorial series. In the previous tutorial, width parameter was added in the Group Input.
We will learn how to add balusters using the Geometry Nodes. By adding balusters, there will be adding a new Geometry.
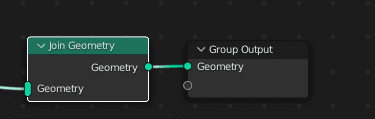
Add Join Geometry
Join Geometry node in Geometry Node is used to join multiple geometries.
To join those geometries, Join Geometry node is used. Add the node by clicking Add > Geometry > Join Geometry.
Adding Baluster or Staircase support
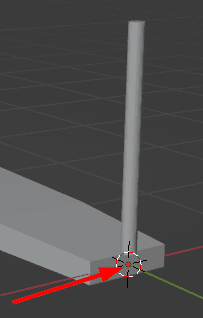
Model the Baluster and name it “baluster”, the geometry origin of the baluseter is at the bottom, so that when the baluster object is instanced, it is placed on top of the stairs.
Instancing Baluster
Just like in the previous tutorial, add another Spiral curve, Instance on Points and Object Info nodes, and connect them to Join Geometry. In the Object Info, use baluster object to instance.

Connect the Group Inputs to the Spiral curve node of the baluster exactly as they are connected with Spiral curve node of the stairs.
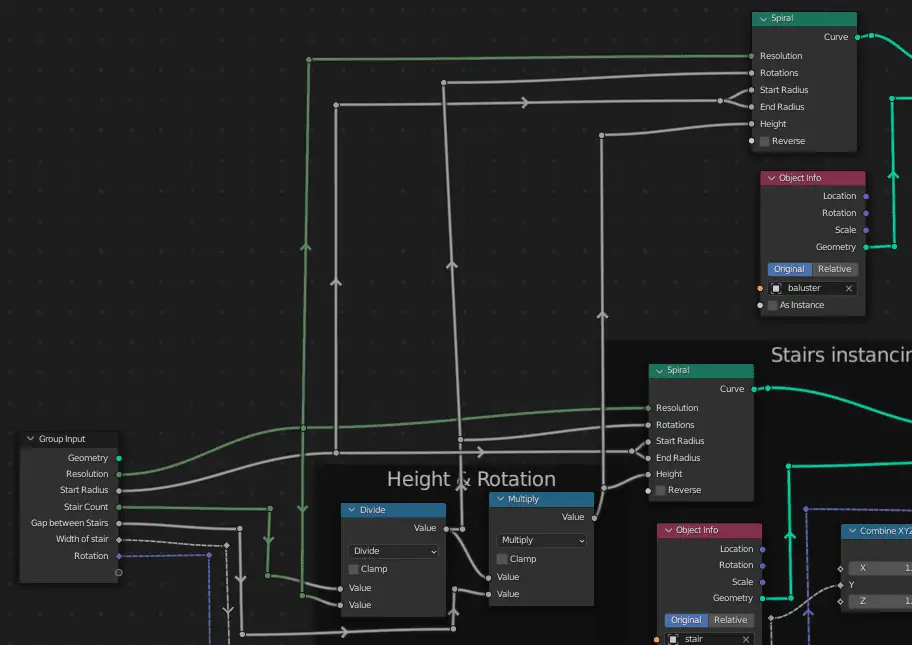
Increase Radius of the Instances
When the Group inputs are connected, it can be seen that they baluster are not properly on the top of the stairs, they are a little on the edge.
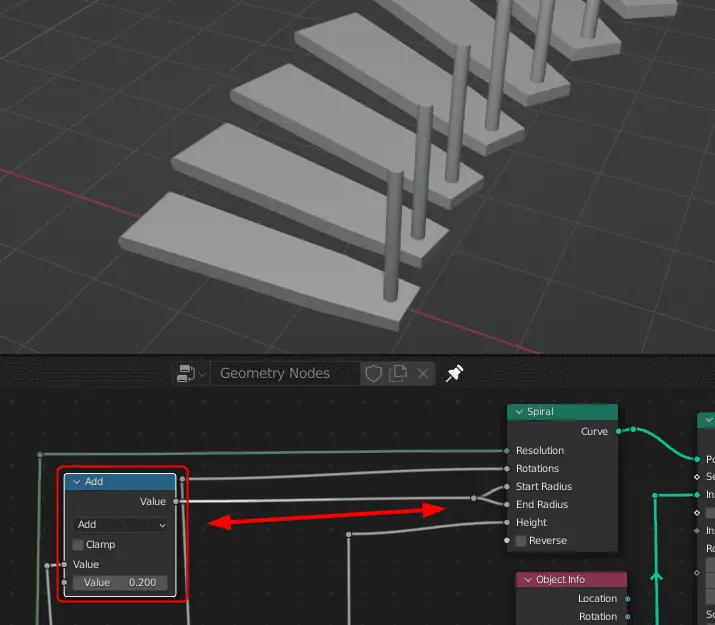
This is because the baluster and stair have exactly same Spiral curve radius. This can be resolved by changing the radius of the baluster.
Add a Math node to Start Radius and End Radius ( the start and end radius are kept same), change the operation to Add, in this tutorial, a value of 0.2 is added.
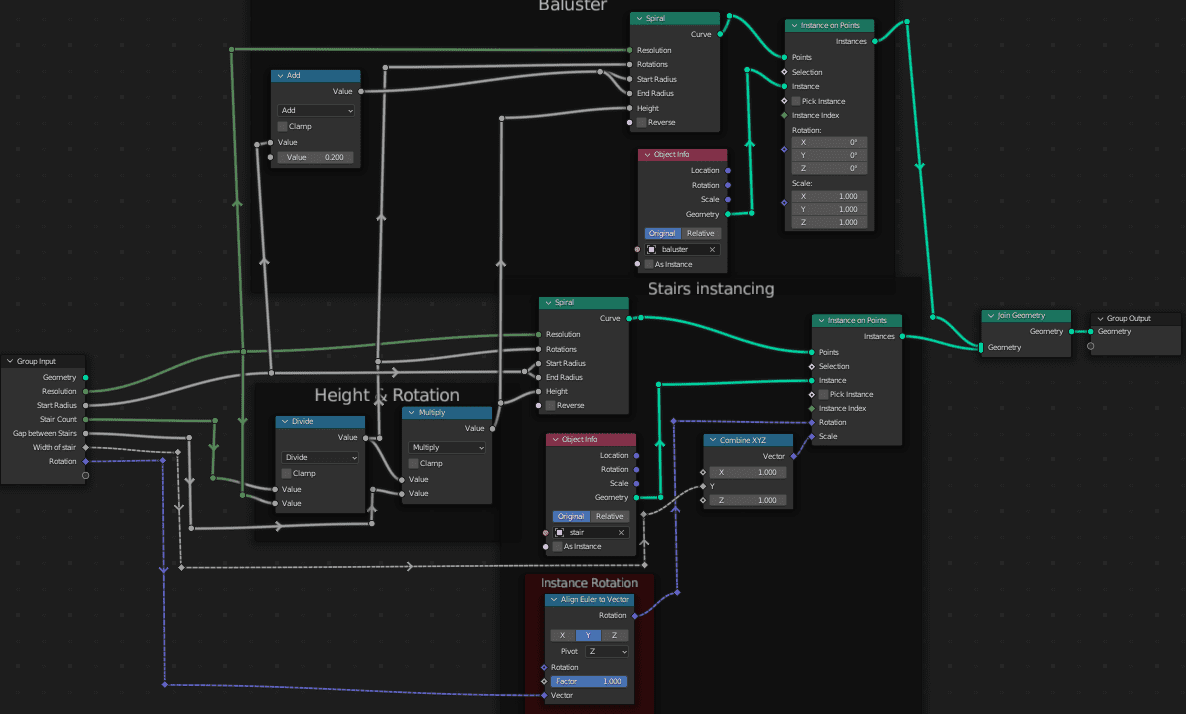
This is how the geometry nodes setup looks like.
In the next tutorial, handrail will be made by extruding the profile curve along the same curve as the one used for stair: Extrude a profile curve in Geometry Nodes.
All the parts of the tutorial series in order:
- Instancing the objects using Instance on Points.
- Aligning the instance objects towards the center.
- Adding Count Group Input to control the number of Control points and Instance Objects.
- Adding Width as a Group Input.
- Adding Baluster or staircase support.
- Extrude a profile curve in Geometry Nodes.
- Move the curve along its path for adjusting and increasing the length of the curve.
- Adding another set of Baluster and handrail in the Geometry Node.