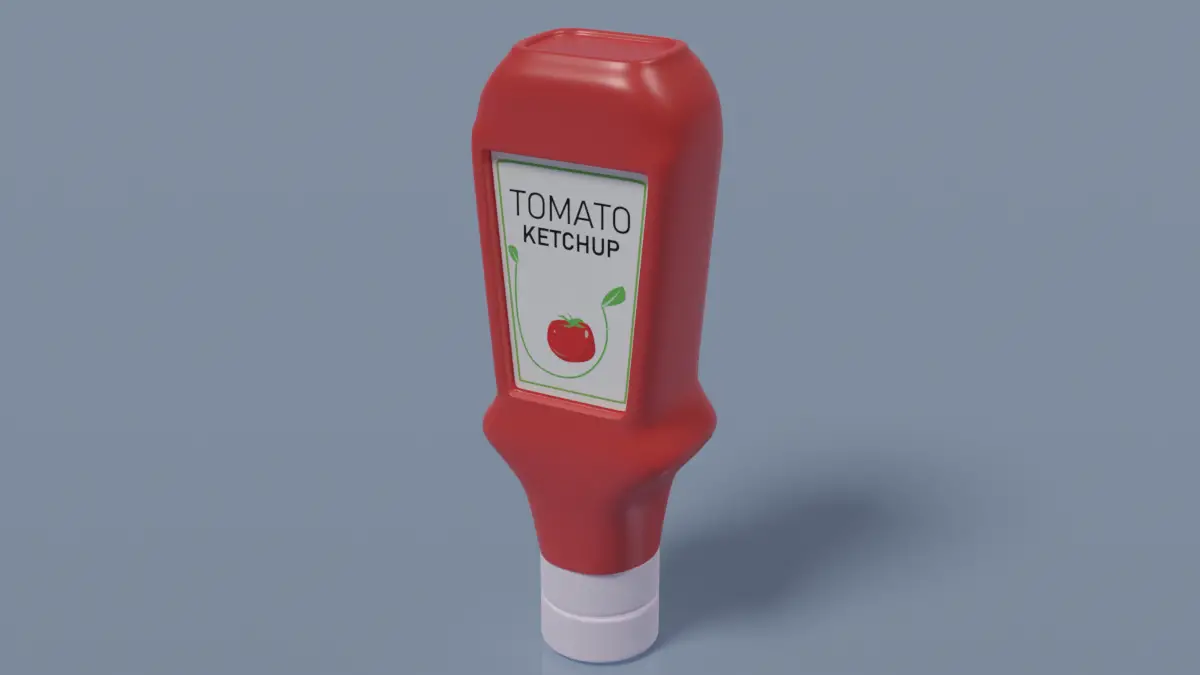
In this tutorial, we will learn how can we UV Map for Blender. We will see how we can UV Map any UV layout using External Graphics Editor. Blender 3.3.1 is used.
This is the final part of the tutorial series:
- UV unwrap anything.
- Fixing Stretched UVs due to scaling problem.
- UV mapping using External Graphics Editor.
For this tutorial, we will External Graphics Editor that uses layer. We will rearrange islands of the UV layout in the Blender and see how they affect the texture of the model.
Export UV layout
First of all, we should export the UV layout: Export UV Layout.
UV mapping using External Editor
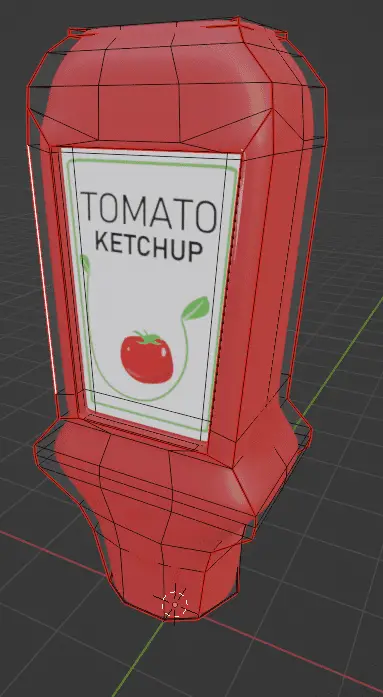
Now, we will apply texture to the UV layout. Before applying any texture to the model, first, we need to export the UV layout, so that we can edit the UV map with an external Graphics Editor like Illustrator or Photoshop.
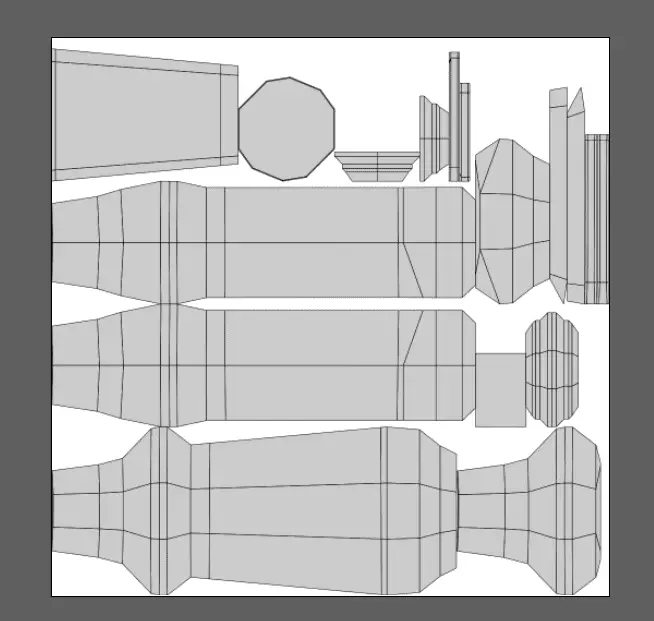
This is the UV layout, but, we do not know, which part should we apply texture to, so that there is a Label in the middle of the bottle.
Finding out the UV island for adding Graphics
Keeping the UV Sync Selection enabled, we can select the part where the ketchup, label will be placed.
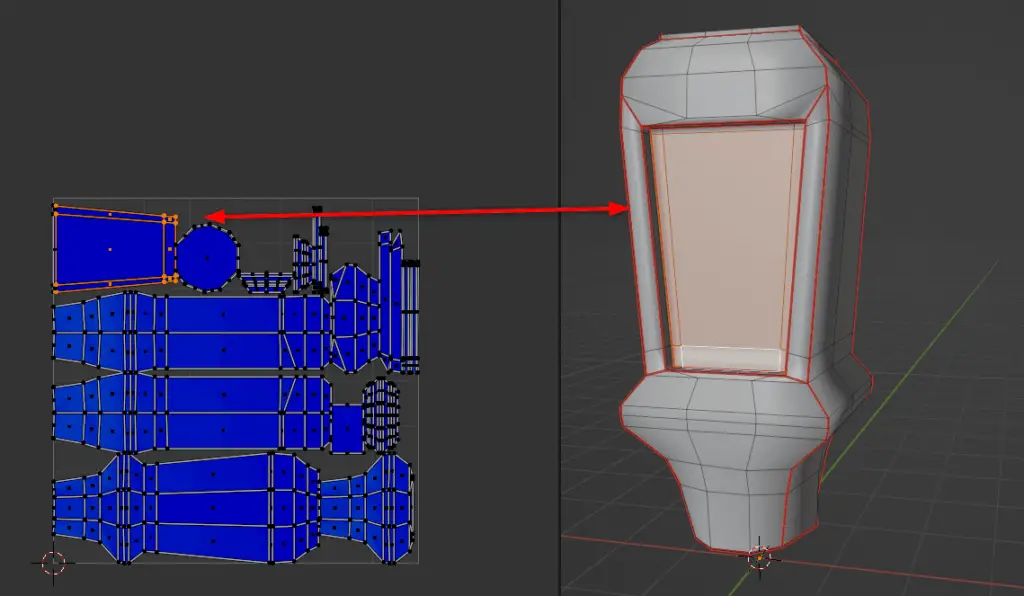
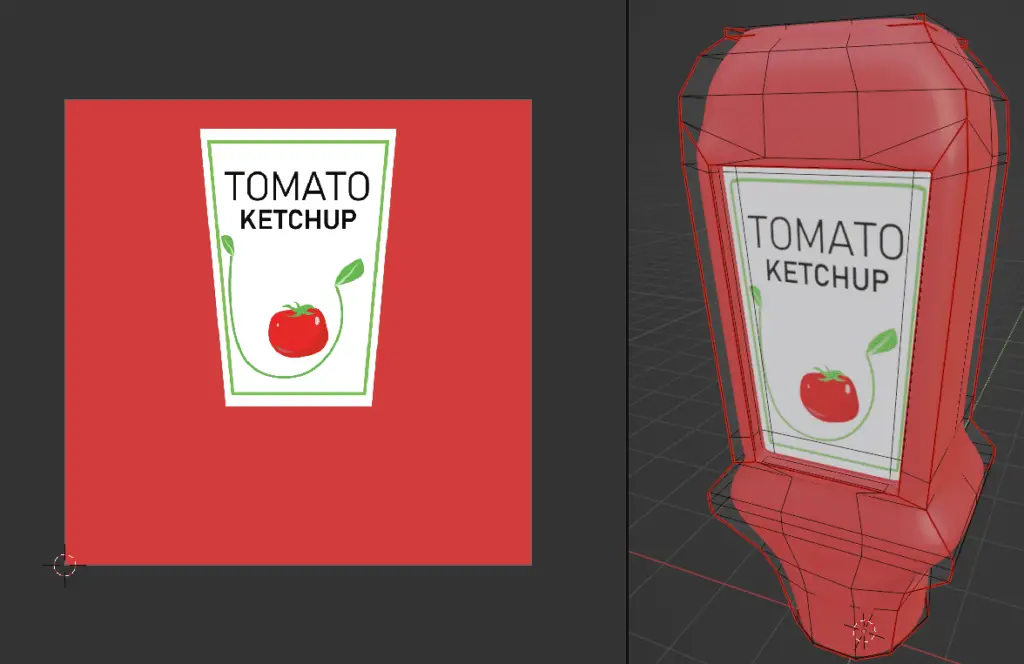
For this model, we can see that the part where we want to add the label is in top left corner of UV layout. So, we will add the label there.
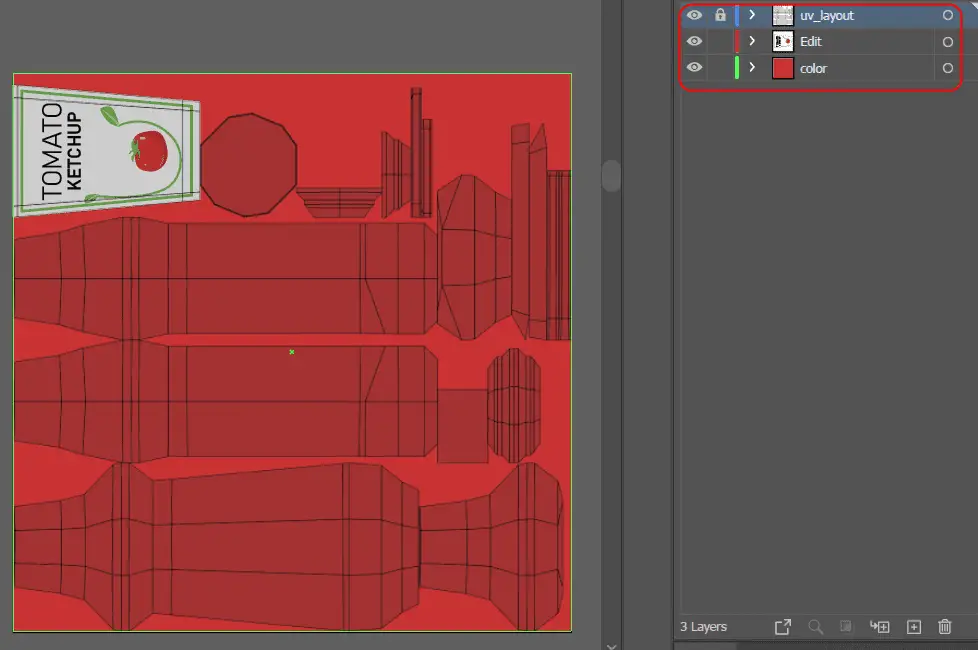
Since the ketchup bottle is red, we have filled the whole area with red color, and added the label at top left corner. The label is tilted by 180 degrees.
We save the image as .png or .jpeg and add it to the model.
We can see that the we have successfully UV Mapped the model, but remember that applied a texture that was 1024×1024, and there was only a small portion for the label. Pixels start to tear up when we look at the model closesly.
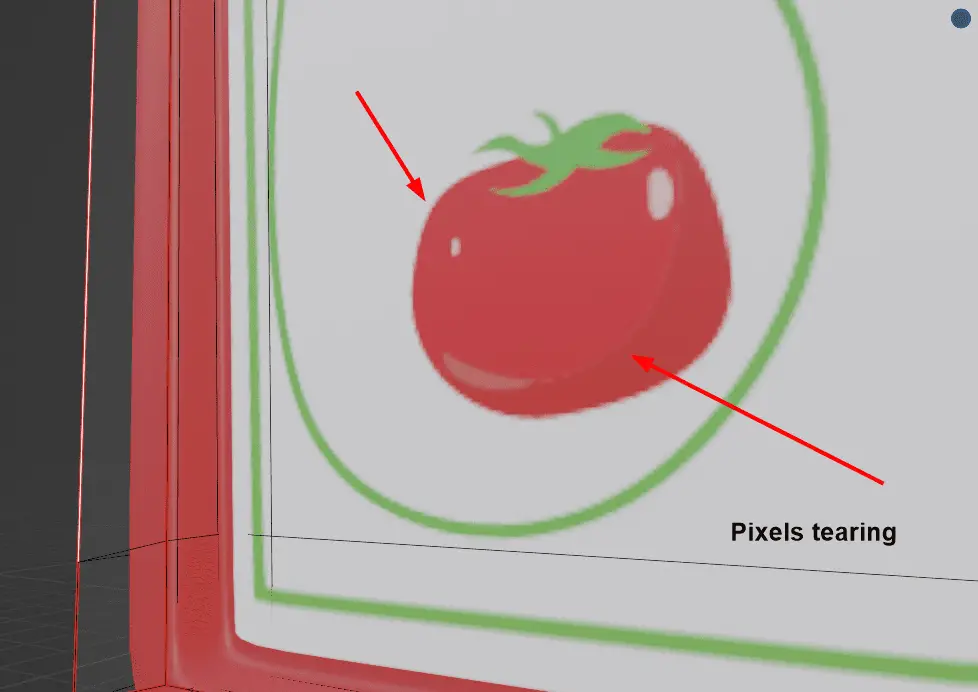
This can be fixed by increasing the scale of the island (UV region) that contains the label part.
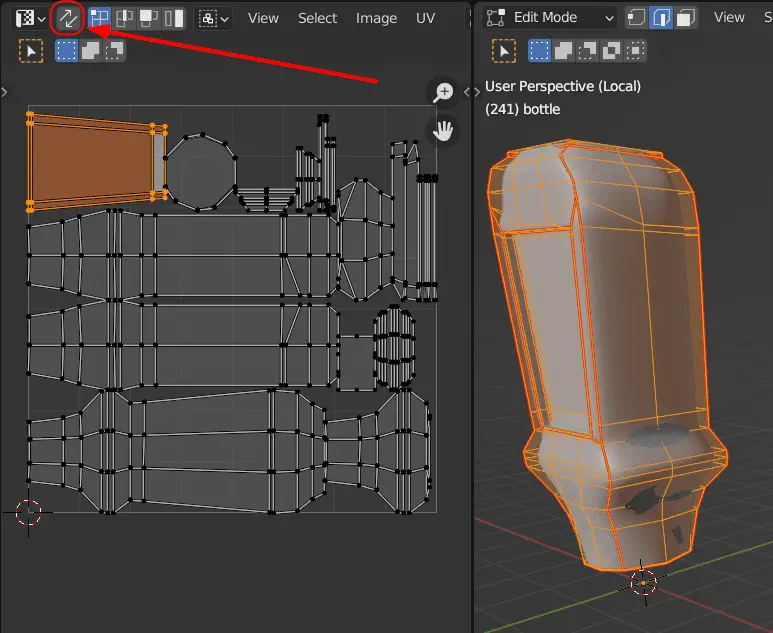
First select the whole model, disable the UV Sync Selection.
Rearranging the UV islands
Select the part, which has the middle part for the label and increase its size. Decrease the size of other islands (UV regions).
You can rearrange the UV layout by clicking UV > Pack Islands.
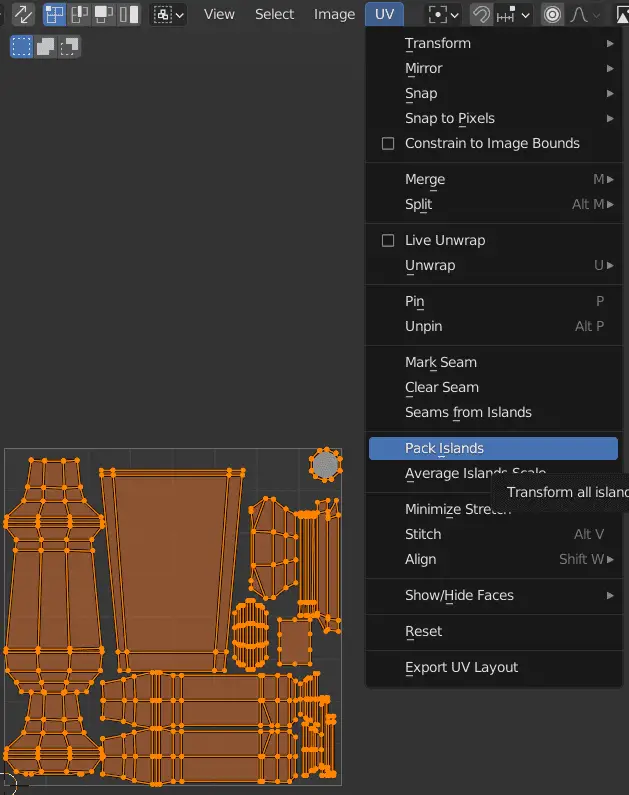
Remember that, after rearranging the UV layout, the old image file for UV mapping will not be applicable to the current model. As the UV information has been changed, you will need to make a new UV Map.
Again, export the UV layout and add the Label using an External Graphics Editor.
The UV layout has a bigger area for the label, that the quality of the label will be better and the texture will not start to tear up. We have to Edit the UV layout in the External Graphics Editor again and then apply the new texture like in this image. Here’s how you can apply an image.
More parts of the tutorial series: