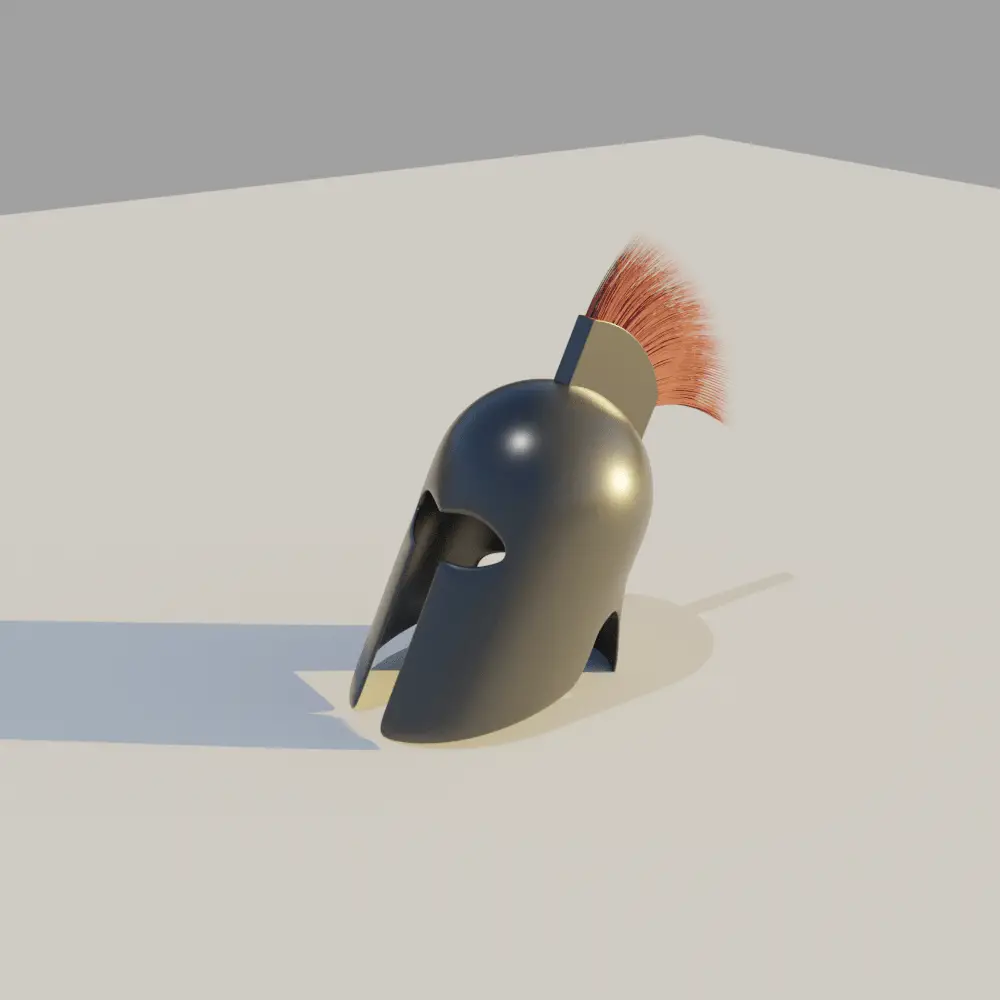
Making of Crest or Hair
Now, we are going to add Crest or hair on top of the Crest holder
This will be done by duplicating the top part of the Crest holder, separating that part from the Crest Holder and use the particle system.
Duplicating and separating faces
In the Edit Mode, select the top surface of the Crest holder using face selection.
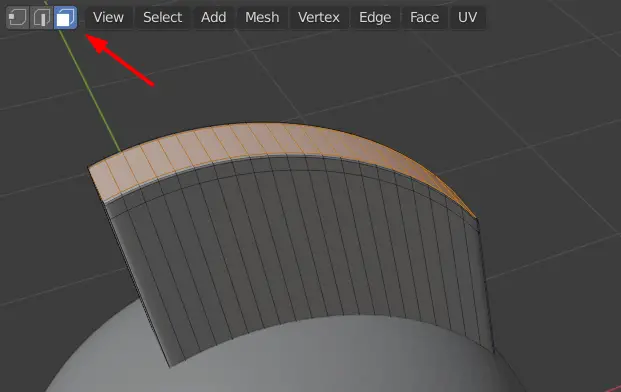
Press Shift + D to duplicate it, and press Right Mouse Button to let go. Now press P, a Separate menu will appear, click Selection.
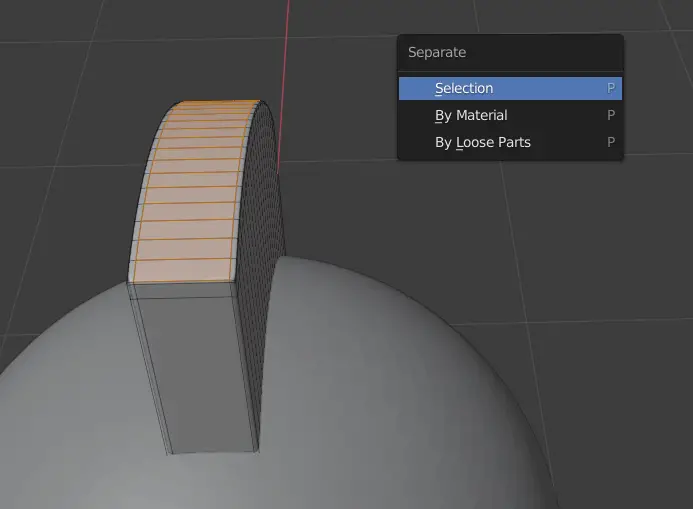
Now go to Object Mode, now there will be the separated part on top of the Crest Holder.
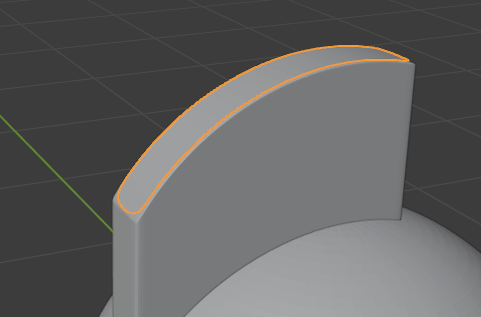
Adding Particle System
Go to Particle Properties, add a new Particle system and change it to Hair.
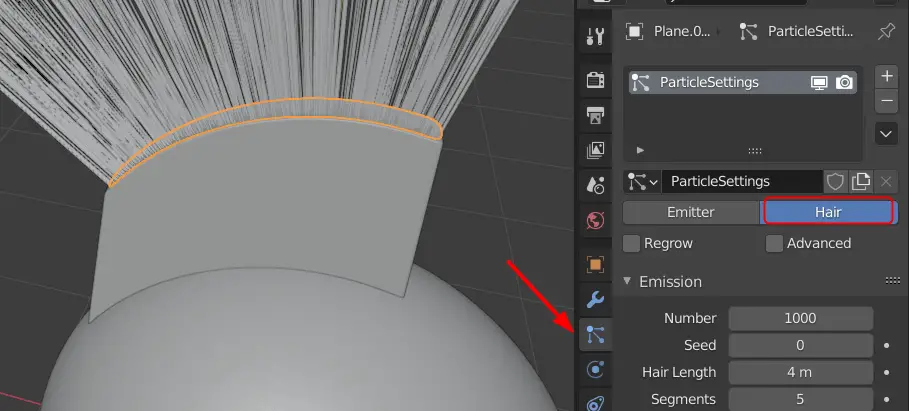
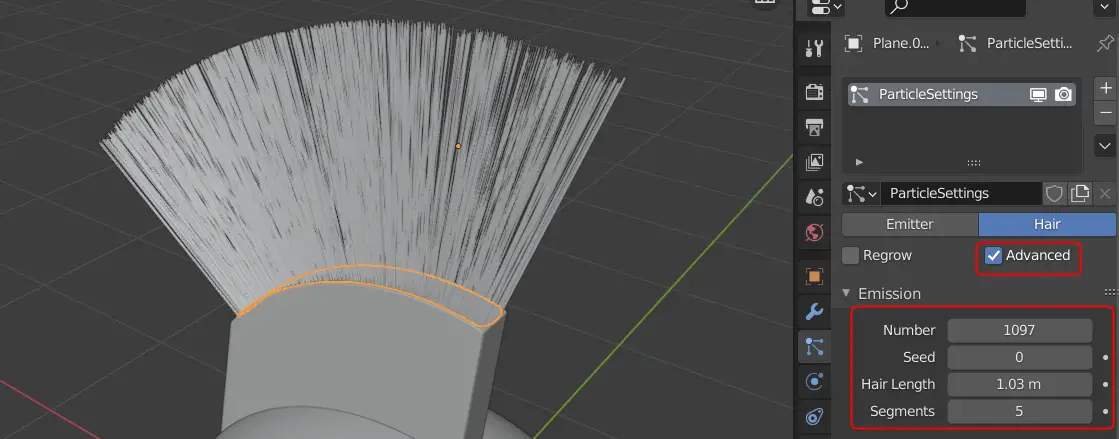
Enable the Advanced option, you can change the number of hair, and the Hair length.
We want the hair to look good, so enable the Hair Dynamics and make the following changes.
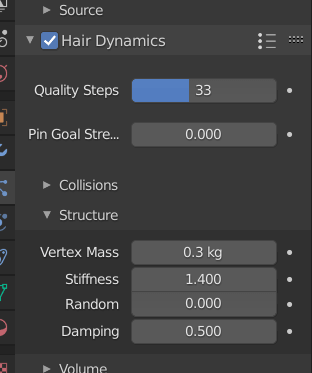
Make sure that the stiffness is not too high because it will make the hair look stern.
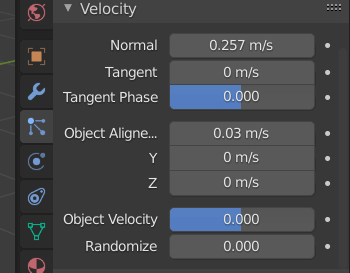
Add some velocity to the hair.
Animating the hair
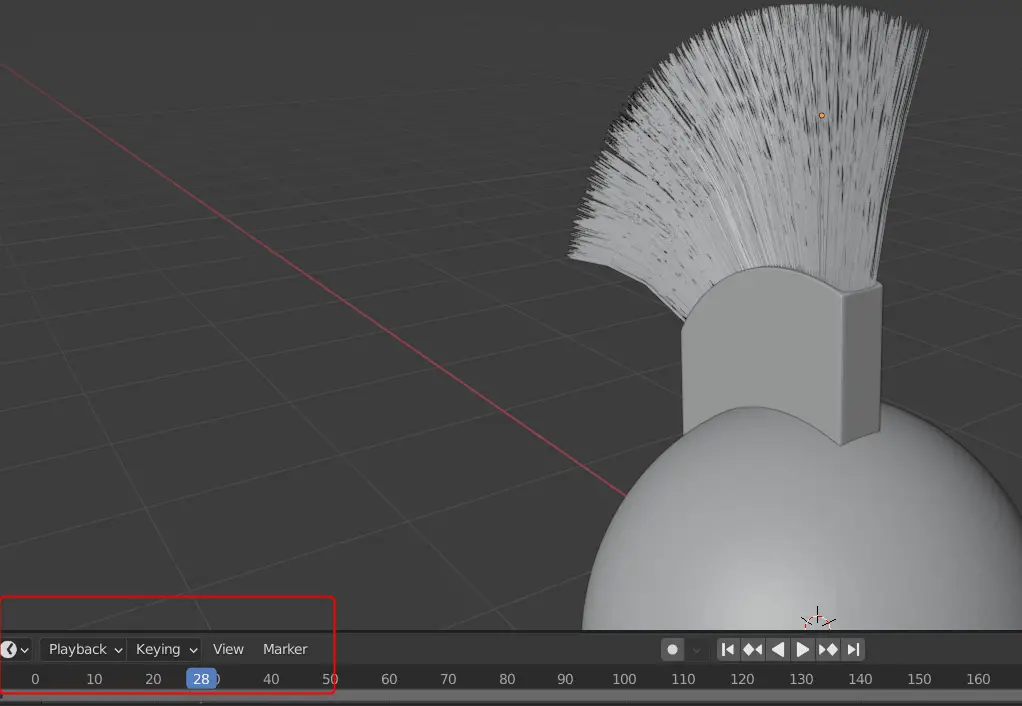
Now press Space key, you will notice that the timeline cursor will start moving and the hair will start animating, stop the animation where you think the result looks satisfactory.
Final Render
Now, add material to it and render the Scene.


