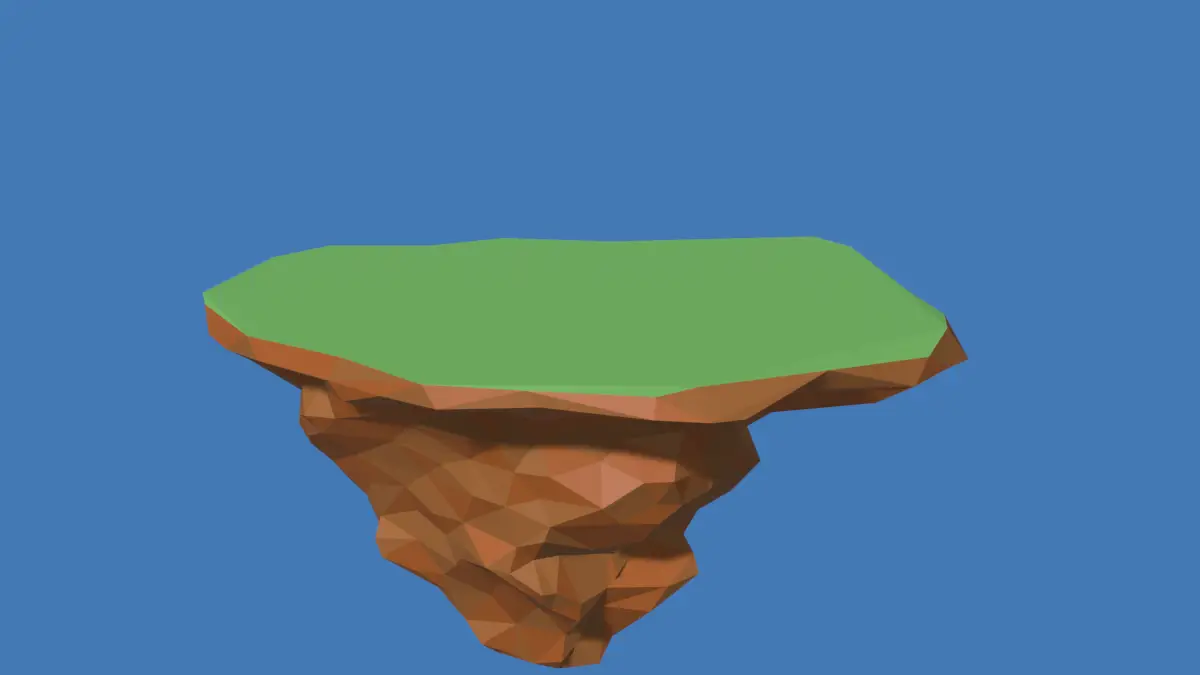
In this tutorial, we will learn, how to make a Low Poly Floating Island. We will start by creating a basic shape of the island, and then manipulate the vertices to make it low poly. Blender 3.4 is used.
Time-lapse video of the TUTORIAL SERIES:
This is the first part of the tutorial series:
- Make a Low Poly Island.
- Adding Multi Color texture on Each face, on Low Poly Island.
- Make Low Poly Mountains.
- Make Low Poly Trees and Low Poly Clouds.
- Setting up Lighting and Environment for Low Poly Scene.
Basic Shape of Island
We will use primitive shapes to make our model. First, we will make the island then, the mountains and trees.
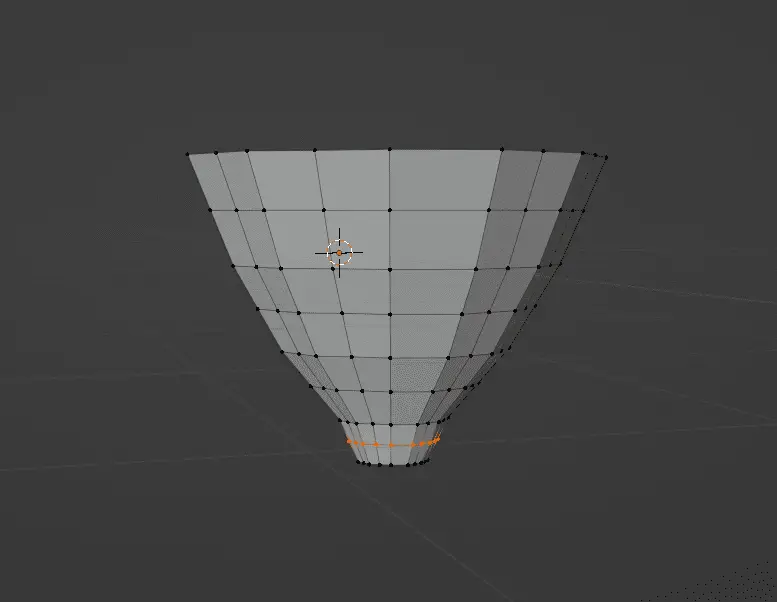
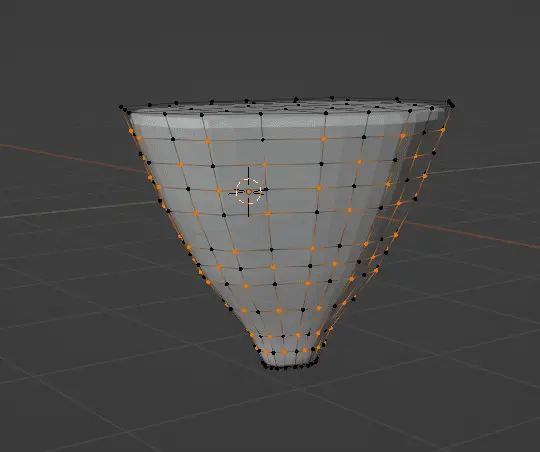
To make the island, start with a cube.
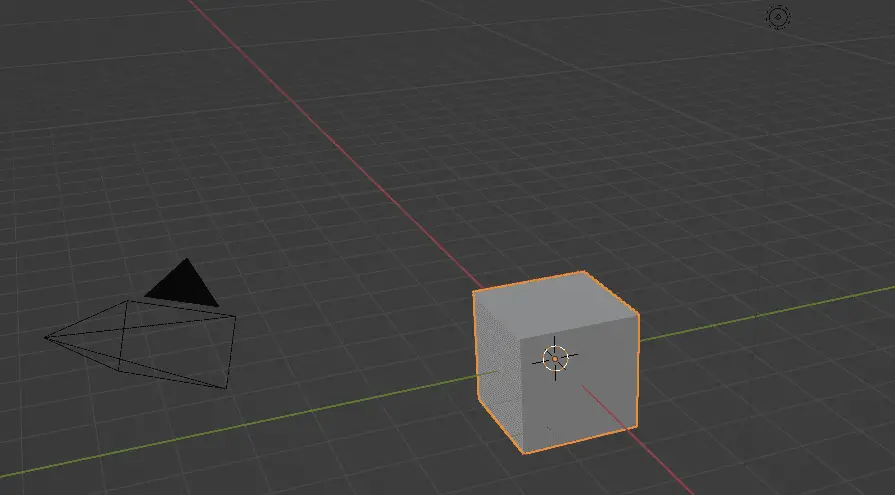
Make the shape of the cube, so that it looks like a floating island, it does not have to be a specific shape. You draw any shape, you like. You may look for references online.
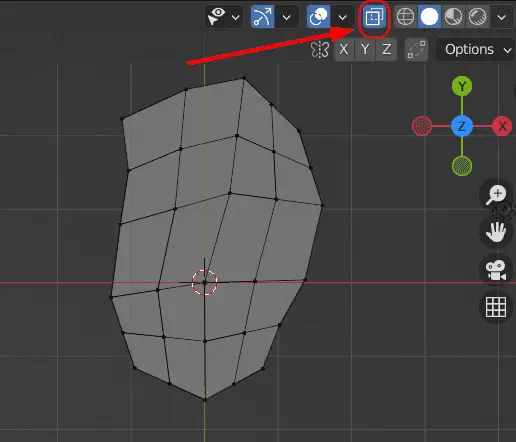
Just like in the above image, it is recommended to make the shape of island in the Top view, you can switch to top view for the 3D Gizmo on the top right.
With X-ray enabled, you can, click on the X-ray icon on the top right or press Alt + Z. to enable X-ray.
In the Edit mode, add Loop Cuts by pressing Ctrl + R, and manipulating the shape of cube.
Now, we work on the lower side of the island.
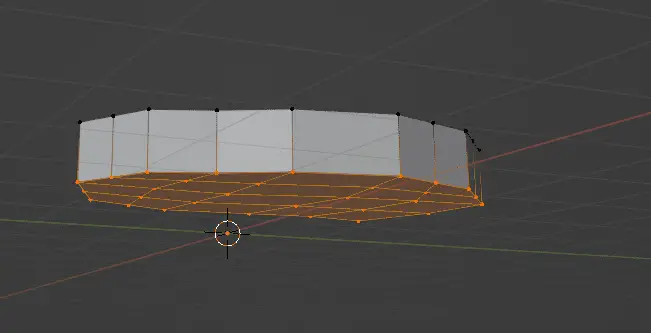
Make sure that you add enough Loop cuts for the lower side of the island. Try to make the shape of island.
At this point, our mesh is low poly, but it does not look low poly, rather it looks like something uncomplete. We can use modifiers to make our mesh look better.
Use Modifiers to make the mesh look Low Poly
To make the mesh look low poly, first, we increaser the faces of the current mesh , we then triangulate the mesh, meaning that every face will have three vertices. And finally, we decrease the number of faces for our mesh.
- Add
Subdivision Surfacemodifier from modifiers tab. - Add
Triangulate modifierfrom modifiers tab. - Add
Decimate modifierfrom modifiers tab. This will decrease face count.
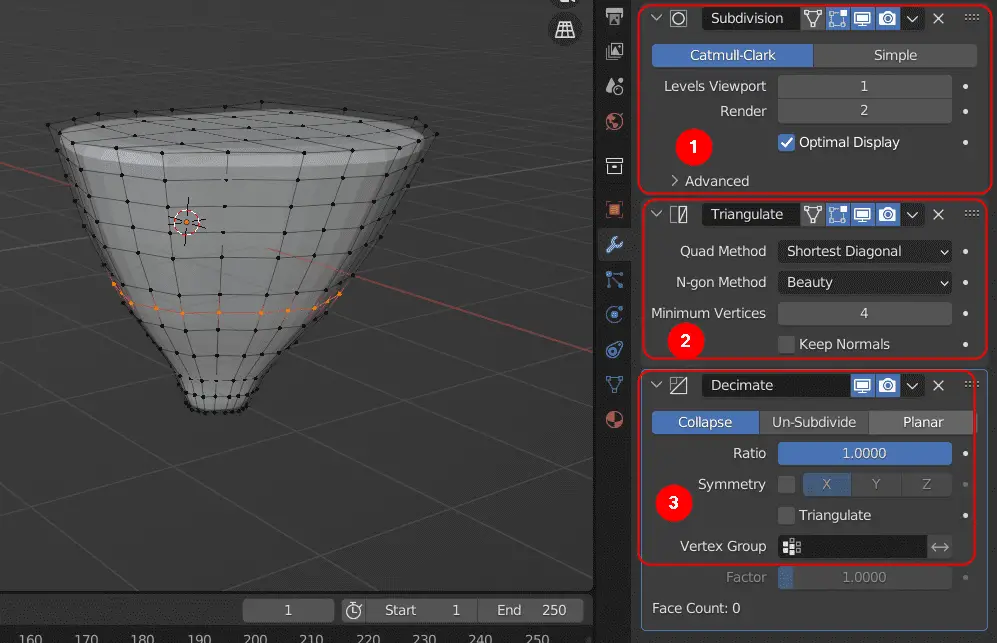
Modifiers should be added in a specific order that pertains to the work flow.
Right now, if we look at the model, we see that it has become high poly instead of low poly. That is because of the Subdivision surface. We will use Decimate modifier to decrease polygons of our model.
Decrease the Ratio on Decimate modifier. You should be in Object Mode to see this.
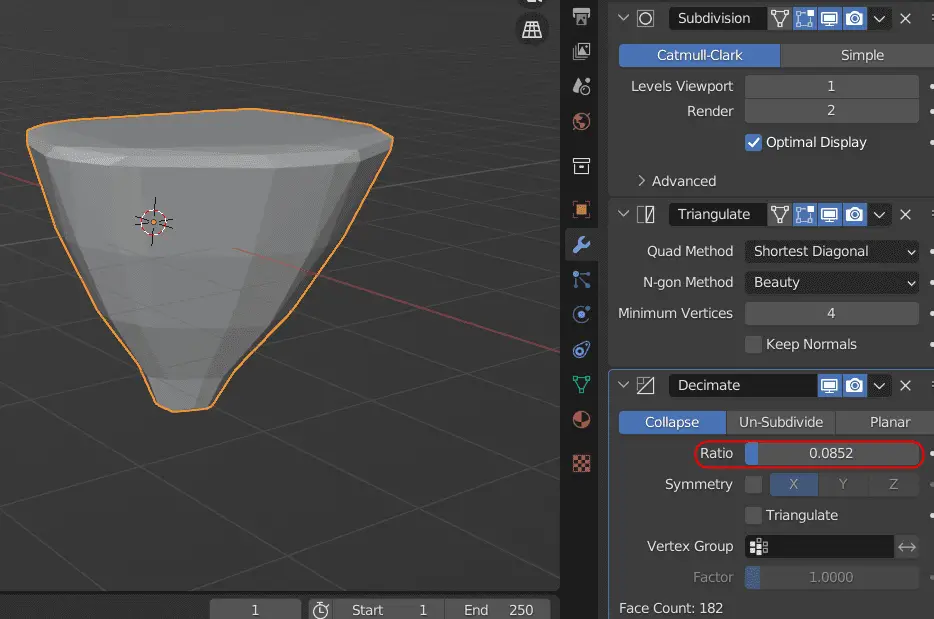
When we go to Edit mode, we cannot see the decimated mesh. We see the subdivided mesh in the Edit mode. That actually makes our work easier.
It is optional to add Subdivision Surface modifier, you can make the mesh low poly even without the Subdivision Surface modifier.
Like in the Featured image of this post, we want a rough edgy look for the island. To do that, we need to manipulate the vertices of the model.
Checker Deselect for unselecting some vertices
In the Edit mode, with X-ray enabled, select all vertices except top and bottom. Then click Select > Checker Deselect.
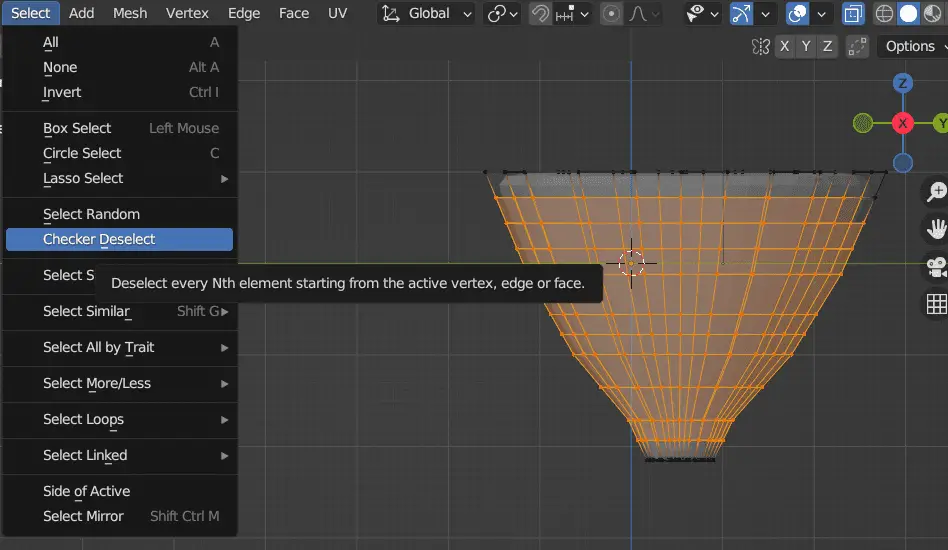
Since, we want a rough edgy look, we do not want to manipulate every vertex of the model. Rather we leave some and select others.
We enable Proportional Editing, and then manipulate the vertices by scaling them and checking in the Object mode, if we have achieved the desired shape.
By manipulating vertices, we can get this result.

In the next part, we will add Texture to the island. Click here to learn about the texturing of low poly island