In this tutorial, we are going to make the Instance objects face the center. We already have made a circular Array. We are going to use a mathematical formula to find out the value of angle. Blender version 2.93 is used.
In the previous tutorial, made a simple circular array using Geometry nodes. This is the continuation of that tutorial.
Mathematical formula for angle
To make the instance objects face the center, we are going to use the following Mathematical formula:
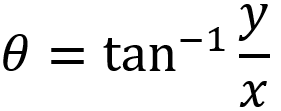
θ is the angle which we have to rotate. y and x are the positional values of the Cartesian Coordinate system(XYZ). Arctangent is the mathematical operation being performed. All of this can be done using geometry nodes.
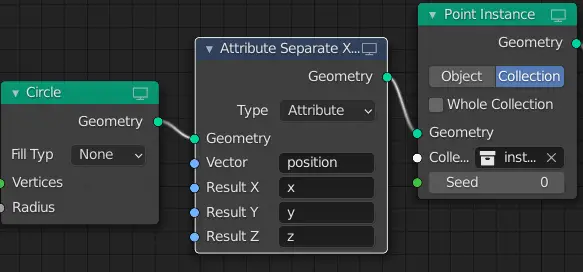
First, we have obtain x and y values. To do this, we are going to use Attribute Separate XYZ node. It separates the value of X,Y and Z from the Vector.
Add Attribute Separate XYZ
Add the Attribute Separate XYZ by clicking Add > Attribute > Attribute Separate XYZ. Place it between Circle and Point Instance Node.
In the Vector attribute of the node, type position, and type x, y and z in the Result X, Y and Z parameters. position is a built-in attribute that shows the position of the points.
We have obtained x and y position values for every instance. Now, according to the formula, we need to divide y values by x.
Applying Mathematical formula using Geometry Nodes
We are going to apply the mathematical formula step by step.
- Divide y by x
- Obtain the angle using arctangent mathematical operation.
- Rotate the objects.
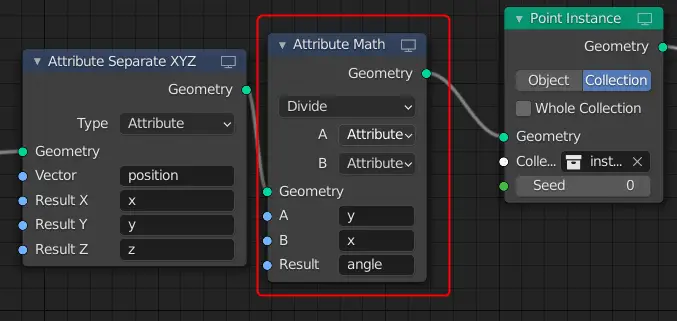
Add Attribute Math for Division
For this purpose, we will use Attribute Math node. Add an Attribute Math node by clicking Add > Attribute > Attribute Math. Place the node between Attribute Separate XYZ and Point Instance nodes.
Change the Operation to Divide. Both A and B values should be set to Attribute. In this case, A is the numerator while B is the Denominator.
As it is in formula, we are going to divide Y values by X values. So, in the A attribute, we write y, and in the B parameter we write x. Finally, we store these values in another parameter, which we call “angle”.
angle is not a built in attribute, rather it is a custom attribute.
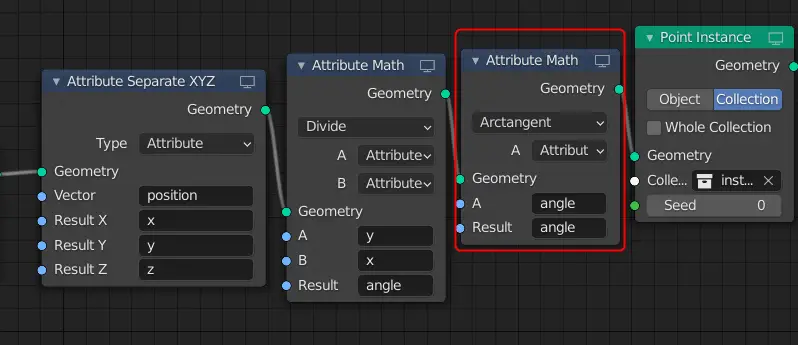
We need to perform Arctangent mathematical operation on the angle attribute.
Add Attribute Math node for Arctangent operation
So, we add another Attribute Math node, change the operation to Arctangent. We type angle in A, so the mathematical operation is performed on the attribute A.
We type angle in Result attribute so, that the output value is stored in the same attribute angle.
Add Point Rotate for Rotation of objects
Now, we need to rotate the instances, to do that, we add Point Rotate node. Click Add > Point > Point Rotate. Place it between Attribute Math node and the Point Instance node.
Choose the Axis angle to be Z. The Value of Z in the Axis Vector should be 1 and the other values should be 0.
Type angle in the Angle attribute.

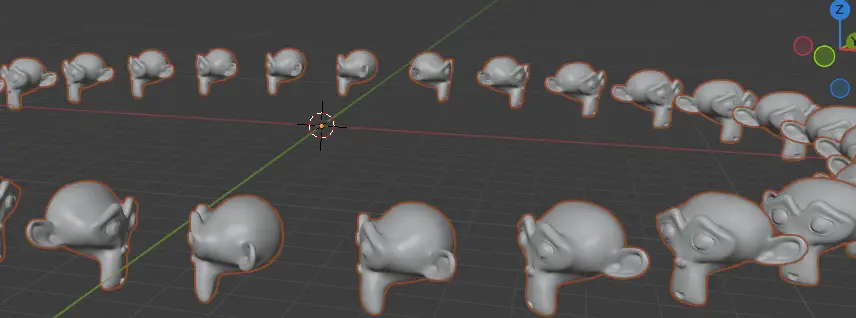
We see that the instances do not face the center, rather they face the adjacent instances. Basically, the angle is off by a 90 degrees. So, to fix this, we add 90 degrees to our instances.
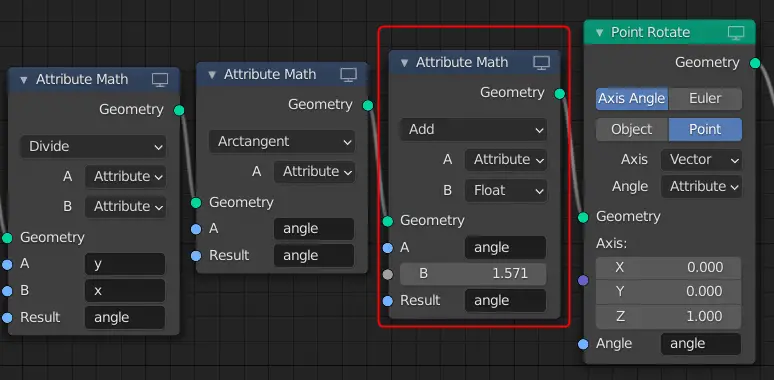
Add 90 degrees using Attribute Math node
We add another Attribute Math node just before the Point Rotate node, select the operation to Add, choose A to be an Attribute while B is a Float. We add 90 degrees.
In the A attribute we type the angle attribute, in the B, we type 1.571 radians which is equivalent of 90 degrees.
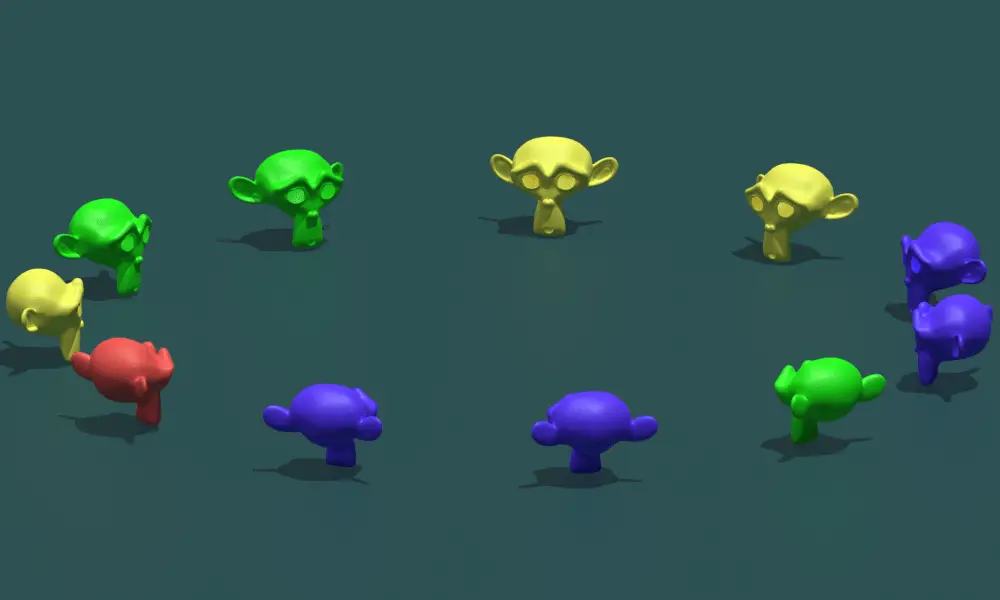
Half the objects not facing the center
We see that half of the instances are facing the center while the other half is off by a 180 degrees.
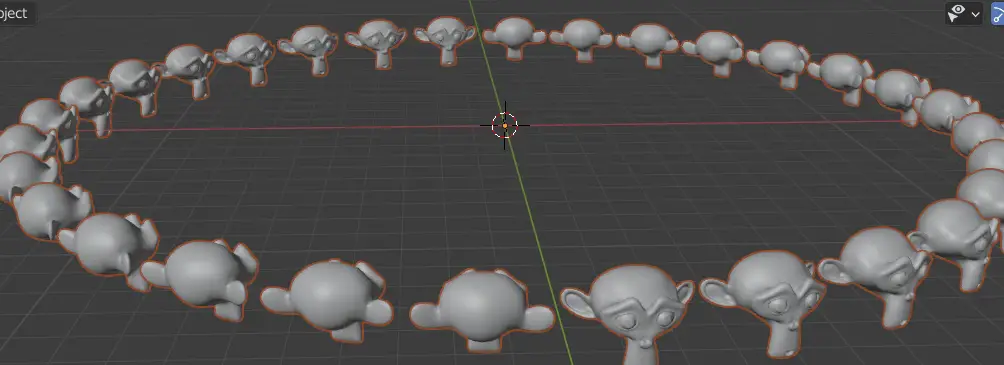
This problem is because when of the negative value of x. Half of the instance objects are on positive X axis while half of the instances are on negative X axis.
When there is an instance object that is on the negative X axis. It gets off by a 180 degrees.
To fix this, we need to add 180 degrees to those instance objects.
This is the Geometry node setup so far.

In the next tutorial, we are going to add a Frame nodes in Geometry Nodes. We are going to do this to stay organized in so many nodes. And after that tutorial, we will fix Circular array for X value less than 0 using Geometry Nodes.
Here are more parts of this tutorial series: