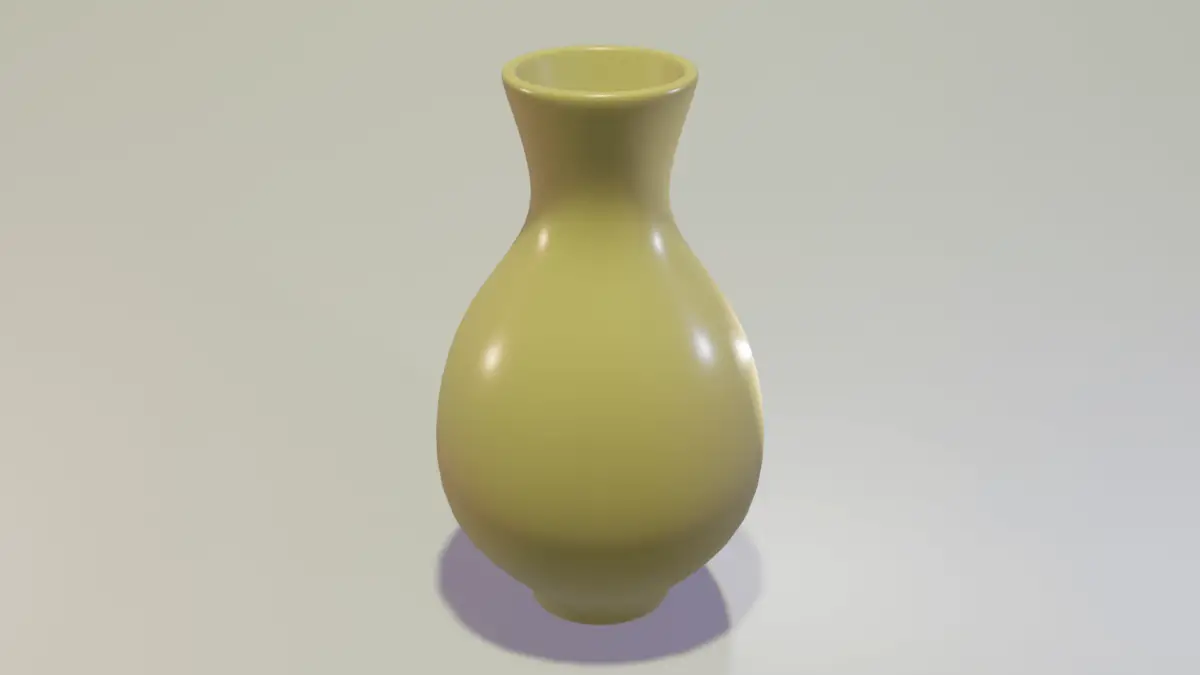
In this tutorial, we are going to make a vase using the Screw modifier, we will make it smooth using the Subdivision Surface modifier. Blender version 2.91 is used for this tutorial.
Making the Object Profile
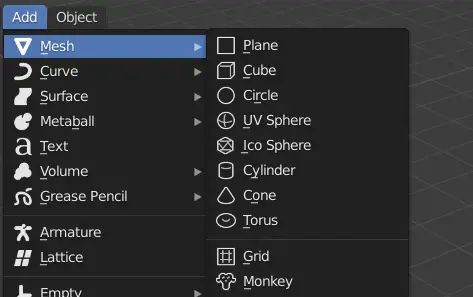
Open Blender, delete the Default cube by pressing Delete key.
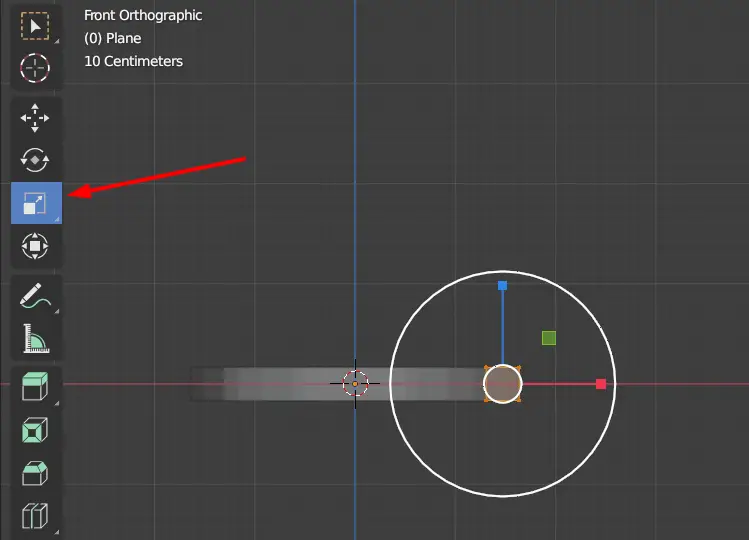
Add a Plane by clicking Add > Mesh > Plane.
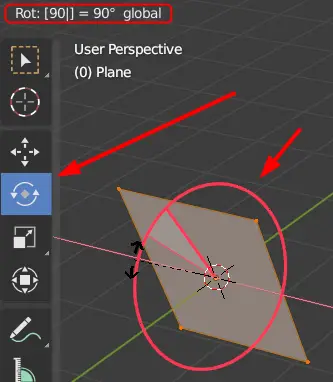
Go to Edit Mode by pressing Tab key.
In the Edit mode use the Rotate tool, and rotate the plane by 90 degrees on X axis.
Select the tool, click and drag the Red Circle( X axis circle), type 90 on the keyboard and finally press Enter key.
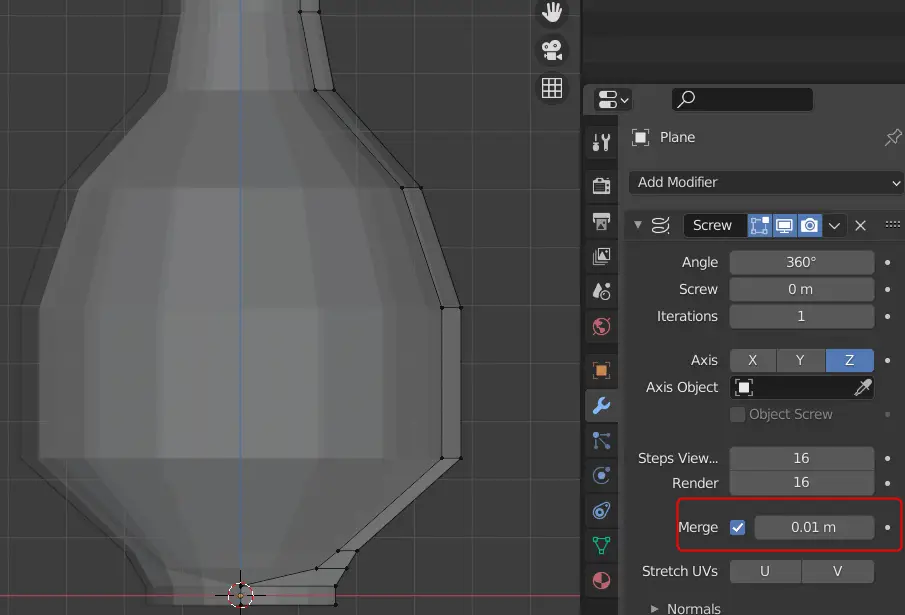
Adding Screw Modifier
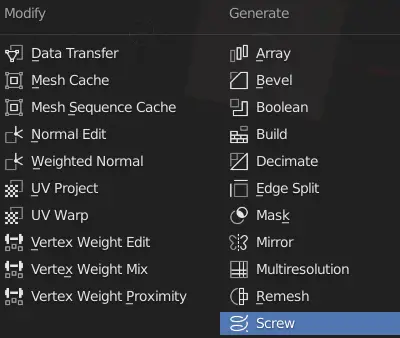
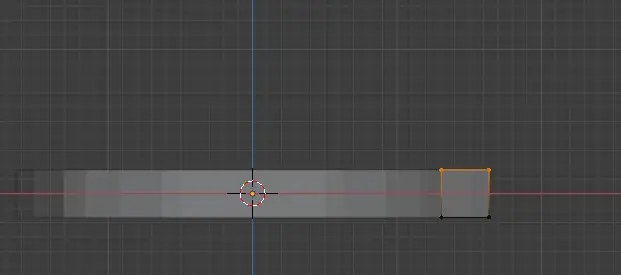
Now, go to Modifier properties and click Add Modifier.
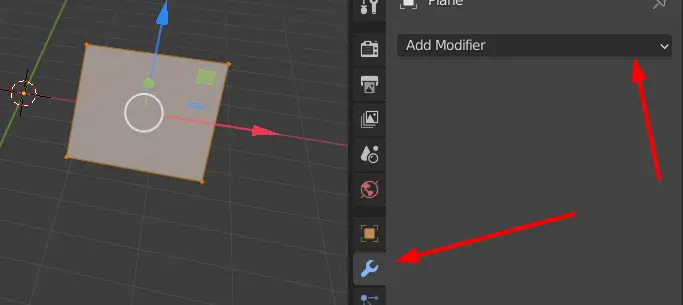
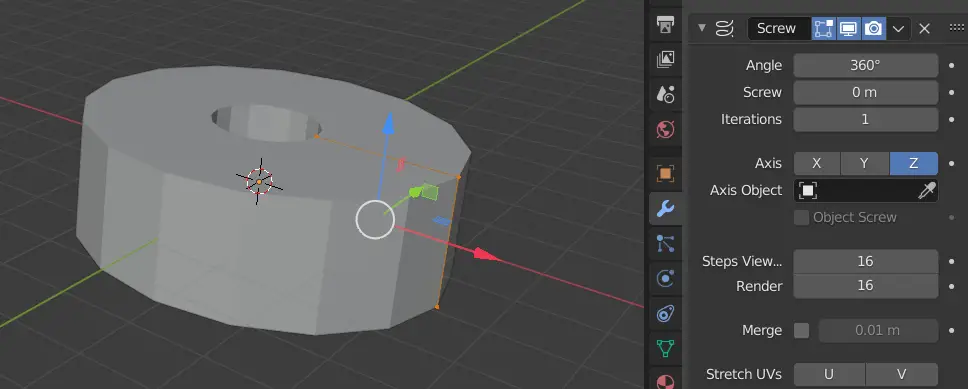
Add a Screw Modifier.
The whole mesh will be screwed around the Z axis.
Now, go to side view by clicking Y on the Coordinate Gizmo. This will help us in making the Vase while we can see the object profile.
Click Toggle X-ray or press Alt+Z. This will help us see through the mesh.
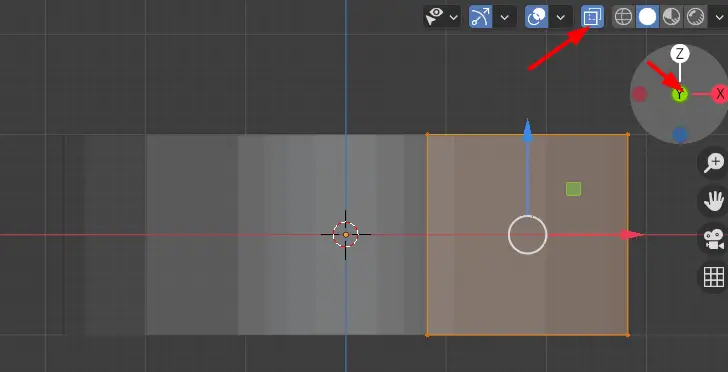
Use the Scale tool to make the mesh smaller .
Now, we will extrude the top vertices and make the shape of a vase.
Select the top two vertices.
Press E key to Extrude.
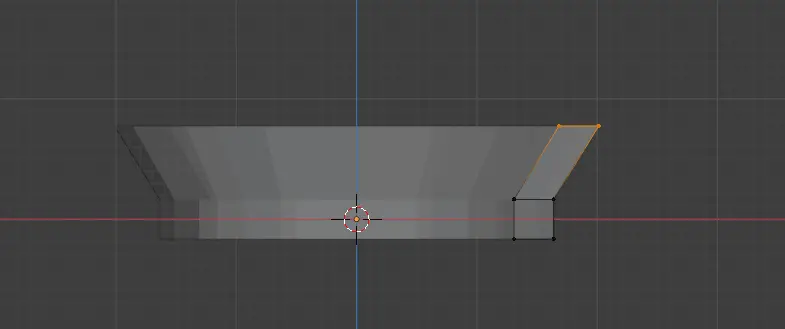
Keep extruding until shape of a vase is formed.
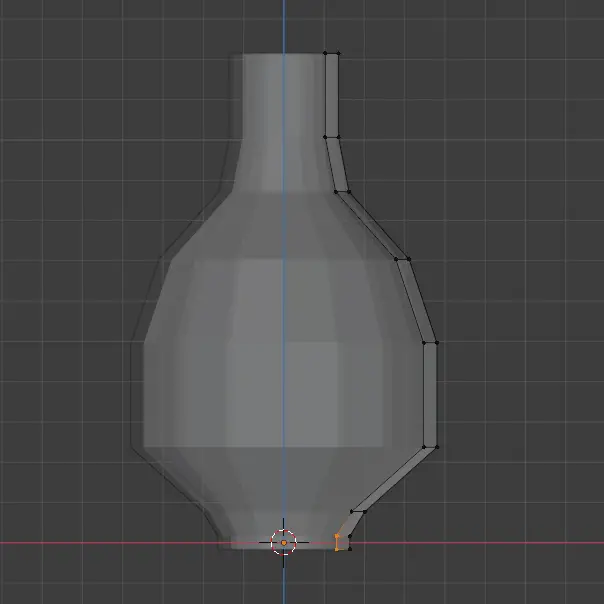
We want the bottom of vase to be filled, so, select the bottom vertices or vertex, and bring them closer to the center.
Enable the Merge option so that they will be merged.
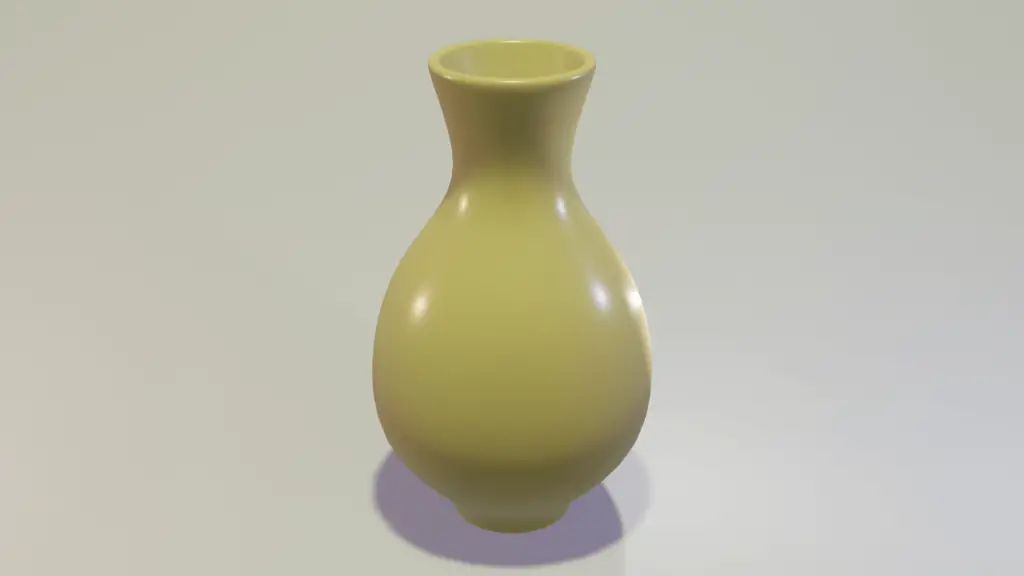
Disable X-ray by pressing Alt+Z. As we can see shape of a vase is formed.
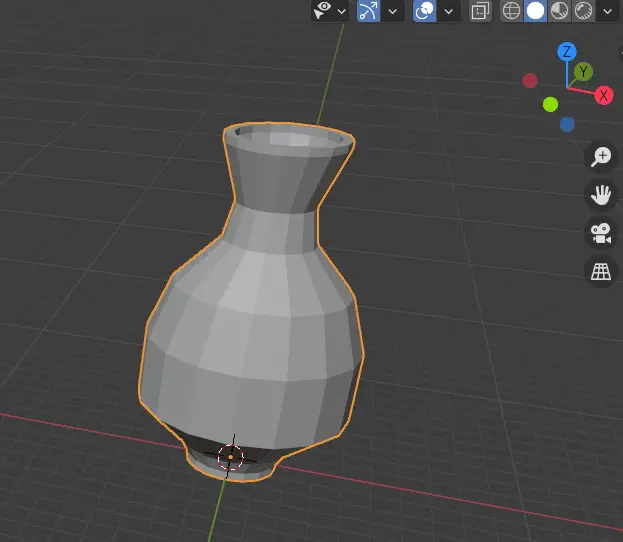
But it needs to be smooth.