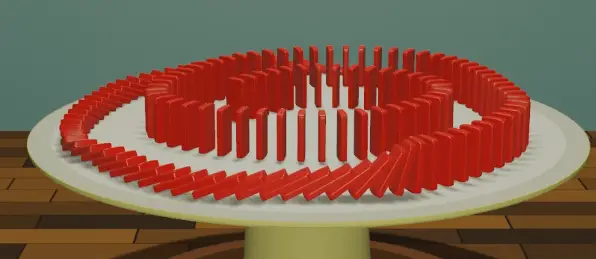
Use Curve to create Domino Run
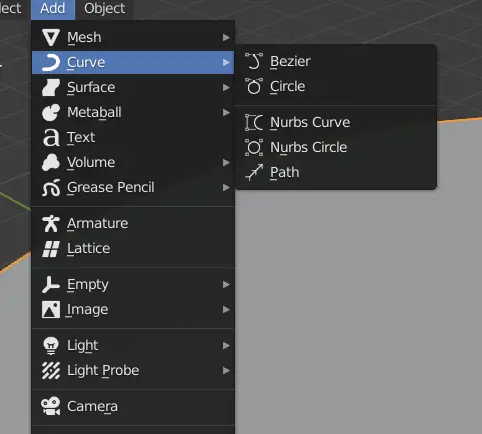
Add a Bezier curve by clicking Add > Curve > Bezier.
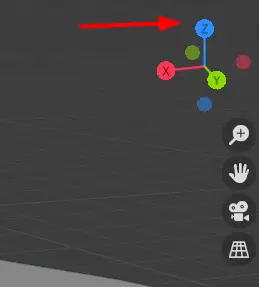
We are going to change the shape of Curve, switch to Top View by clicking Z on the Coordinate.
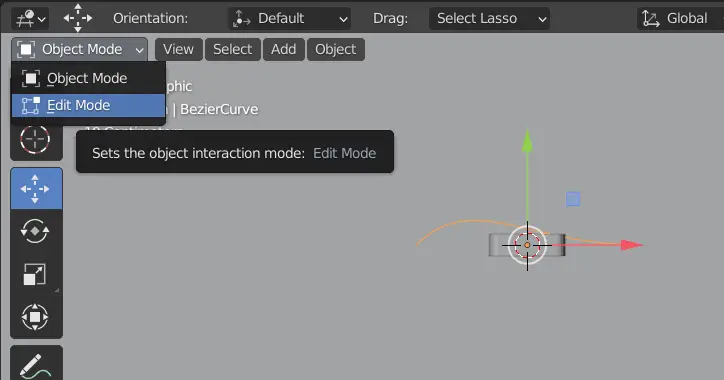
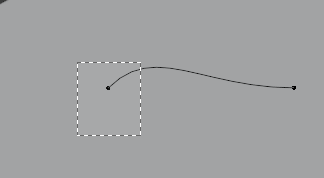
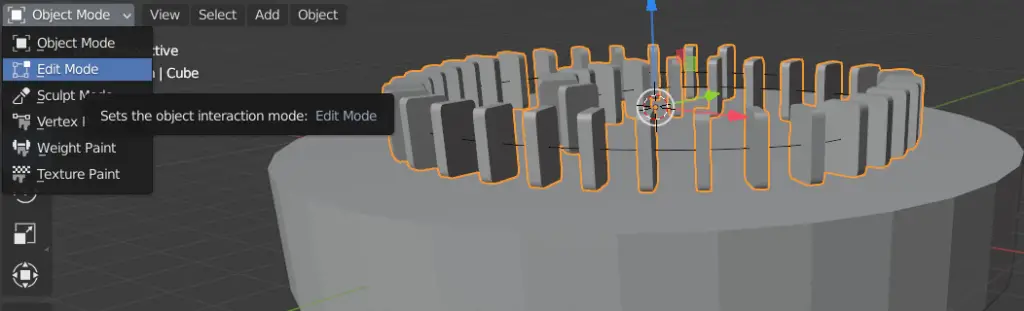
Keeping the Bezier Curve selected, go to Edit mode by clicking drop down menu from top left corner. OR press Tab key.
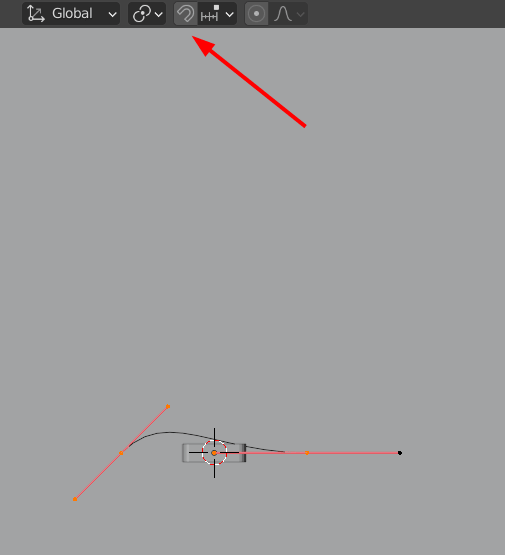
Turn off Snapping as it will be difficult to move the curve with snapping turned on.
Move the curve to the edge of cylinder with Move tool.
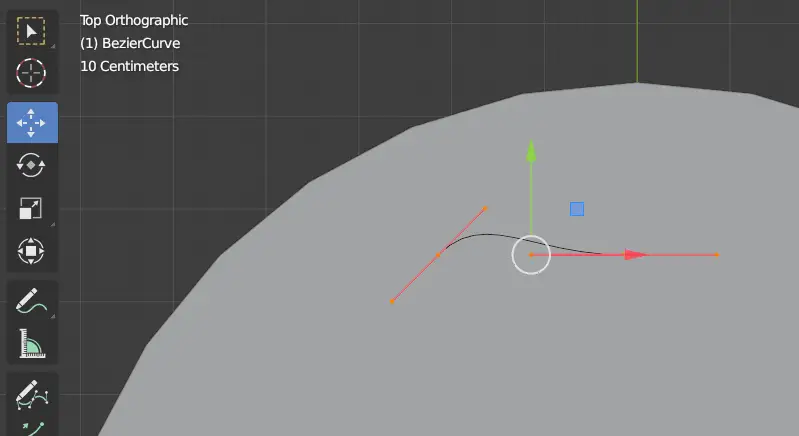
Select one Control point of the Curve and move it to change the shape.
Press E to add more vertices while one Control point is selected.
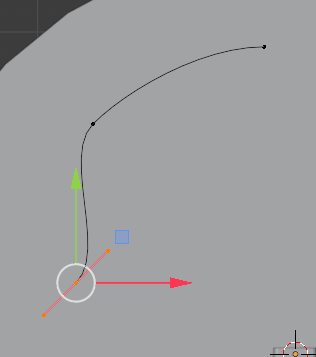
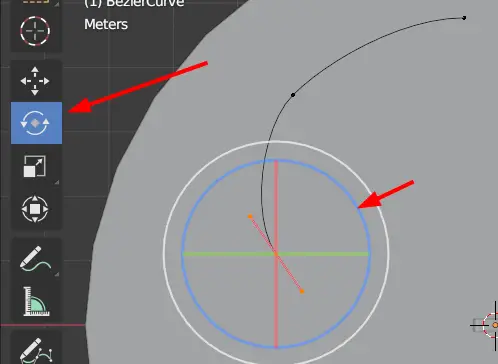
Click on Rotate tool to select it. Drag the Blue circle to rotate the curve.
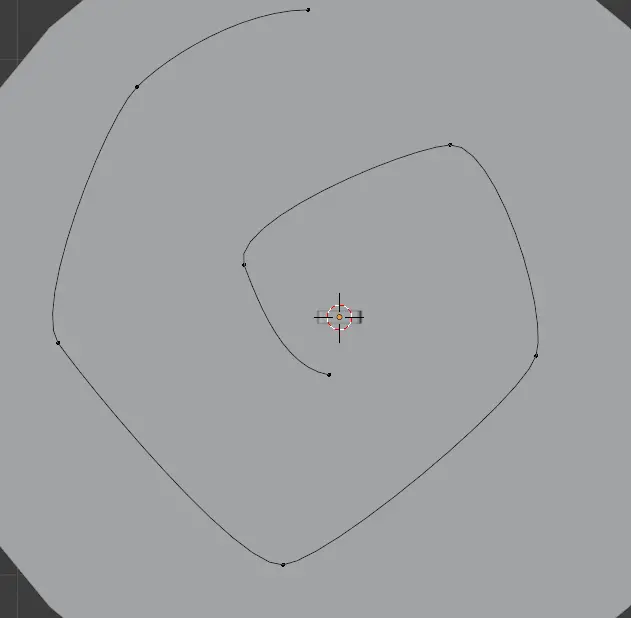
Make a spiral path by adding more vertices. Press E to add Control point.
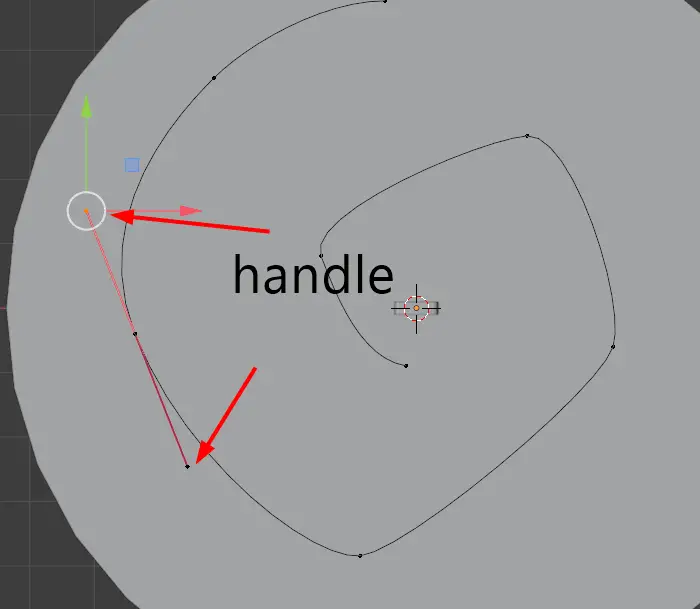
Smoothness of the curve can be increased by moving the Handles away from the Control Point.
Go to Object Mode by pressing Tab key.
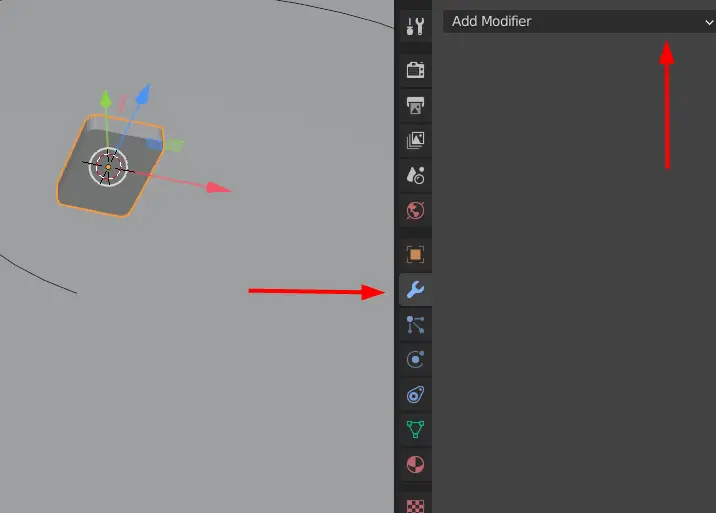
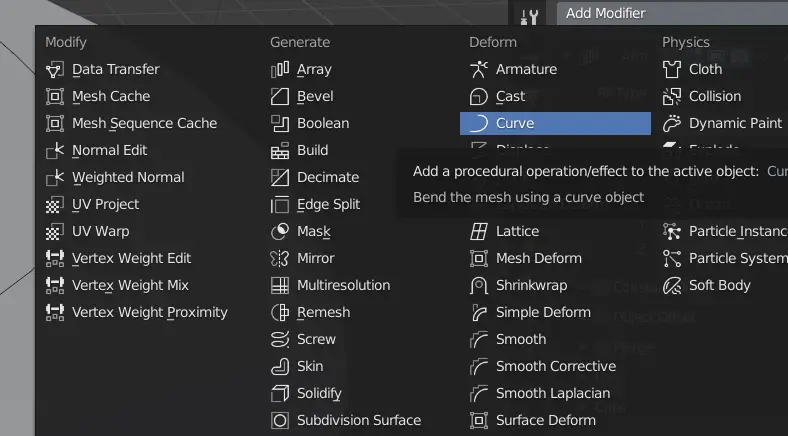
Select the domino, click Modifier Properties and click Add Modifier.
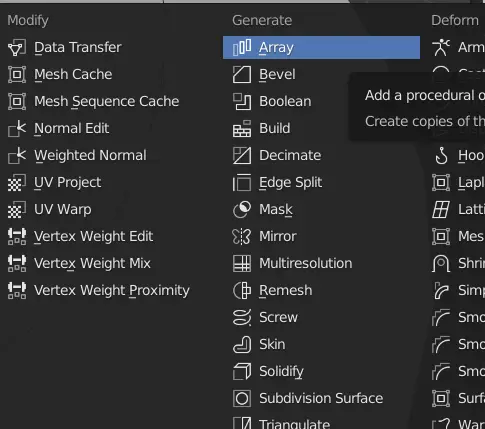
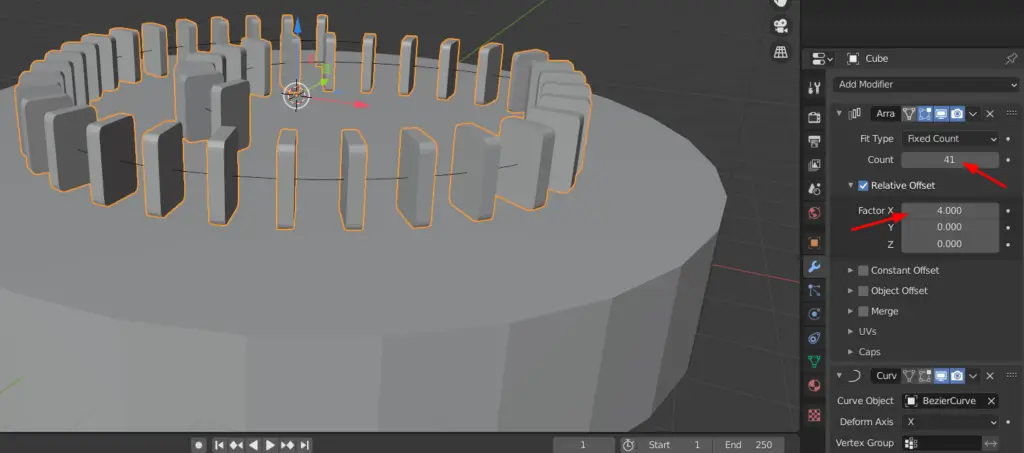
Click Array. This modifier can make multiple copies of our selected object.
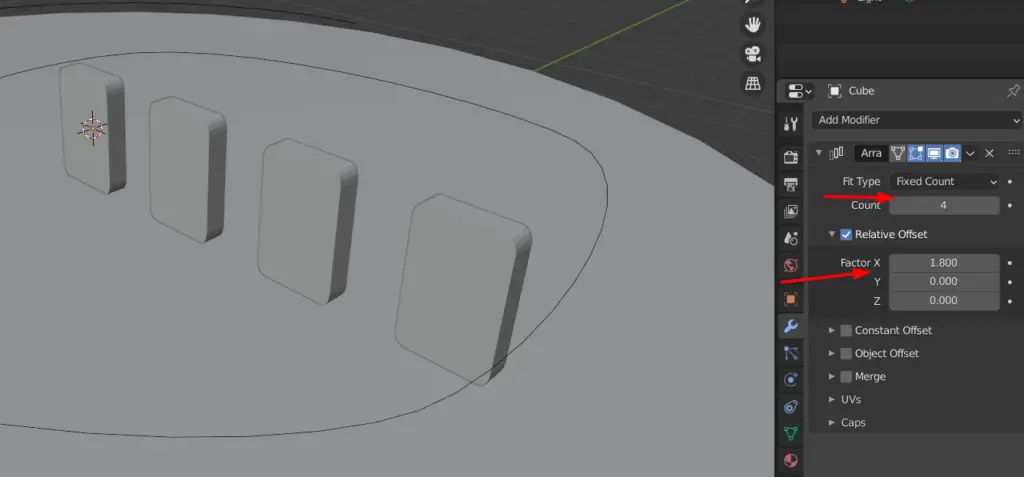
When the modifier is added, we can change the number of duplicates it makes by changing the Count and we can change the distance by changing Factor X.
In this case, the dominoes are being added sideways, we want the dominoes to be added in front of each other.
There are multiple ways to change the orientation of the Array objects, but in this case, we will change the orientation of the original domino.
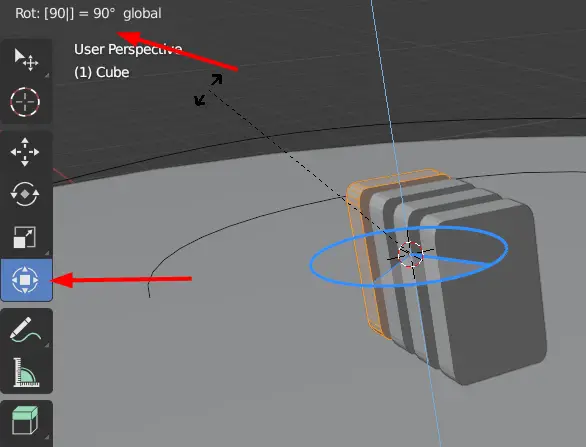
While selecting the dominoes, go to Edit Mode by pressing Tab key. Make sure that every vertex of the object is selected, if not, press A key. Click Transform or Rotate tool, click and drag the blue which will rotate the object along Z-axis, and type 90. The orientation of the dominoes is now fixed. The domino will rotate 90 degrees around the Z axis.
Go to Object Mode by pressing Tab key.
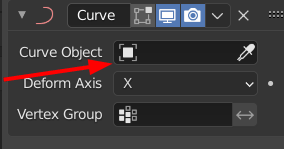
Select the dominoes and add a Curve modifier from Modifier Properties.
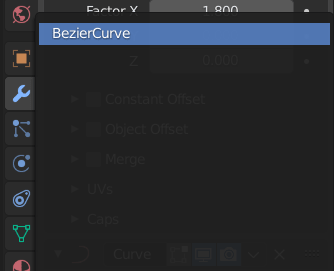
Under the curve modifier properties, click Curve Object.
Select BezierCurve.
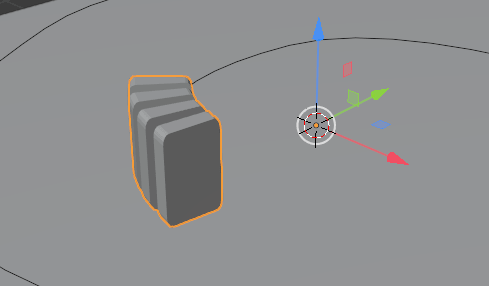
We can see that the dominoes are now being added along the curve.
Increase the Count and adjust Factor X.
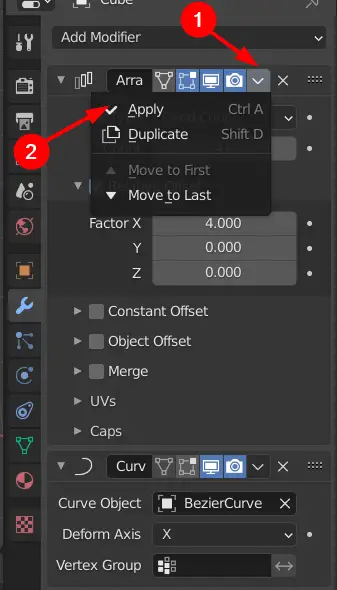
Now, apply both modifiers by clicking on the drop down menu button and clicking Apply.

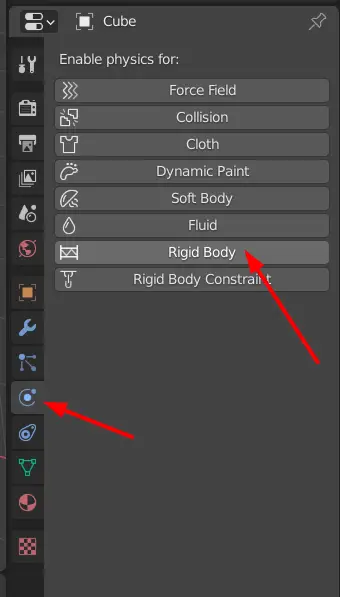
To make the animation, we need to add Physics properties to the dominoes, in this tutorial, we are going to add Rigid Bodies to run the simulation.
Select the dominoes, click Physics Properties from the properties panel and add a Rigid Body.
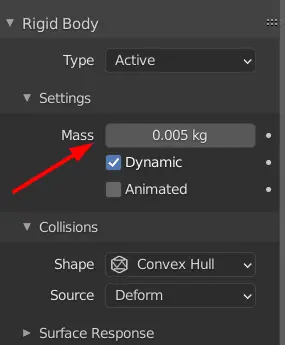
For our own convenience, change the mass to 0.005 kg.
All the dominoes are one object right now, they need to be separated and should be individual objects.
Select the dominoes, and go to Edit Mode.
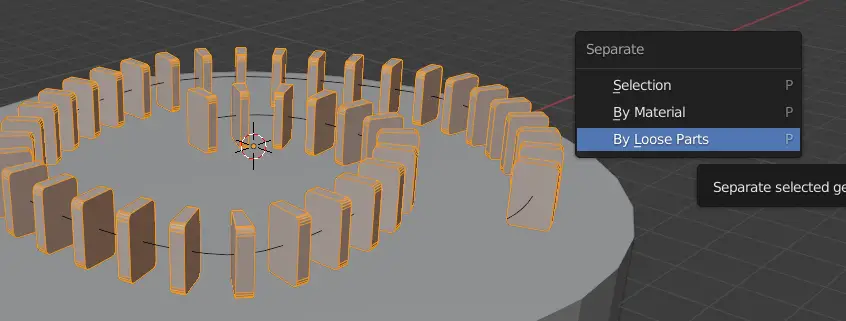
In the edit mode, select all the dominoes, by pressing A key
Press P key, a Separate menu will appear. Click By Loose Parts.
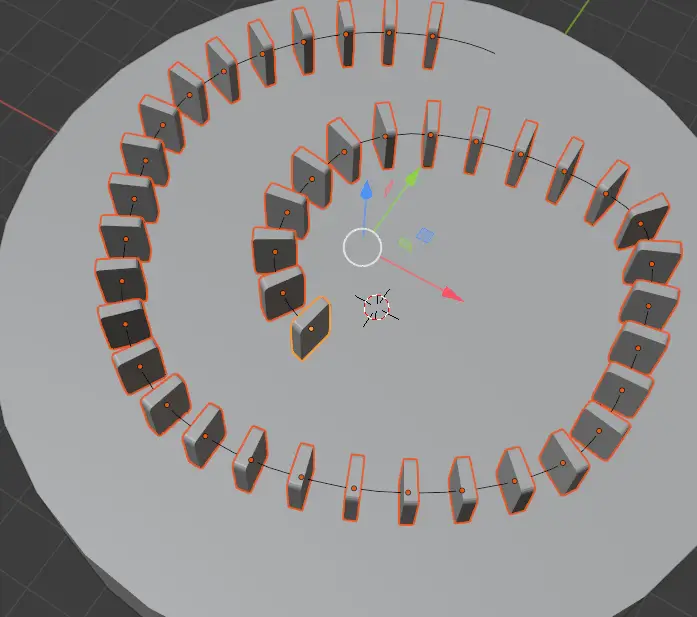
All the dominoes are now be separated objects, but their origins are not at their centers.
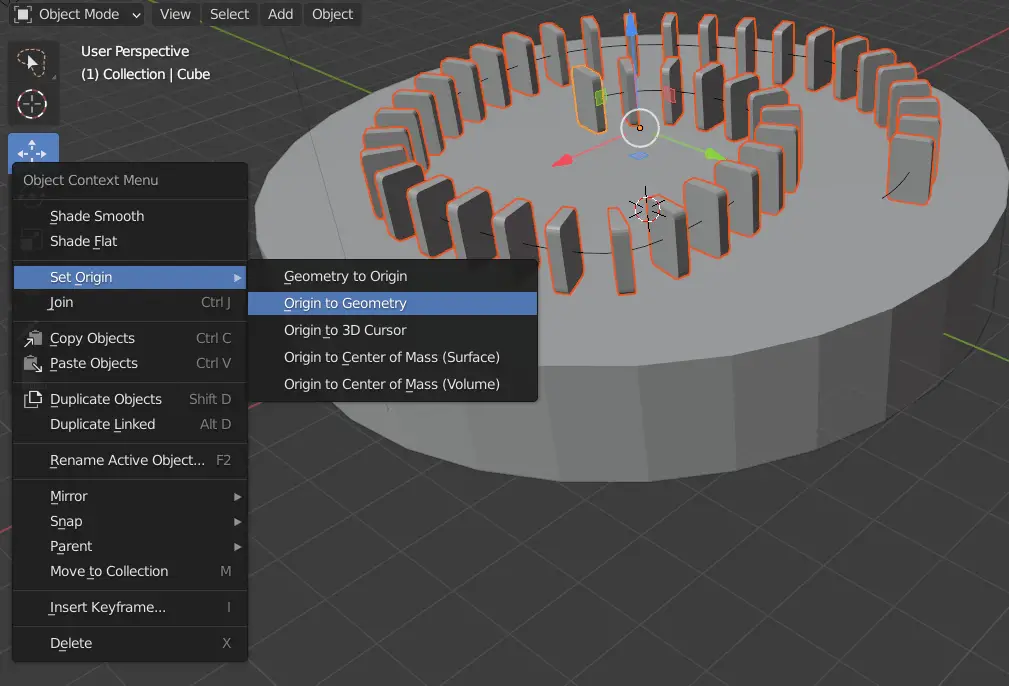
To change this, click Right Mouse Button anywhere on the screen while the dominoes are selected, a Object Context Menu will appear. Click Set Origin > Origin to Geometry.
Each of the dominoes will have their own center.
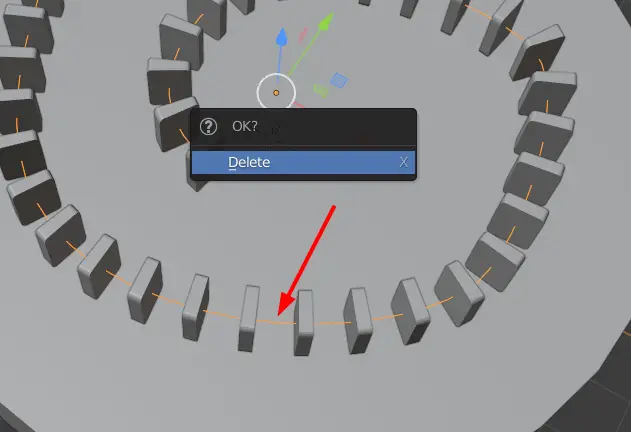
Bezier Curve is not needed now, delete it pressing Delete key.
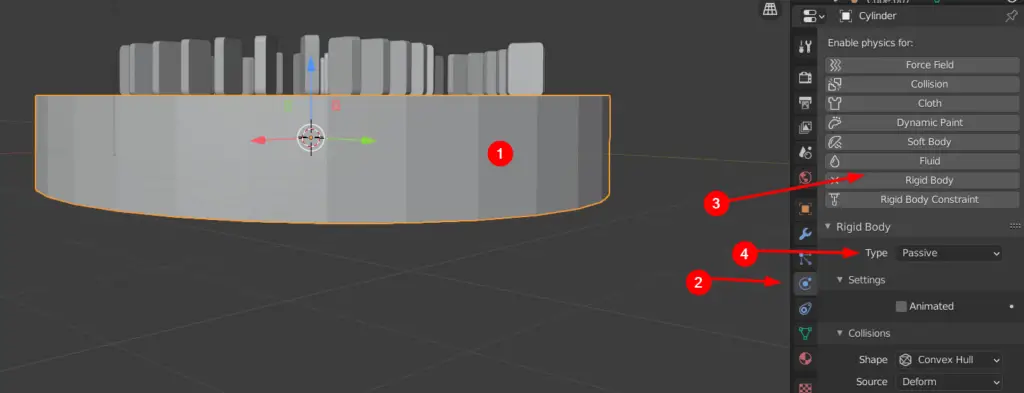
We need to apply Rigid body to the cylinder, because dominoes will be interacting with them.
Select the cylinder, go to Physics Properties, add a Rigid Body and change the rigid body Type from Active to Passive. Passive rigid bodies remain static.
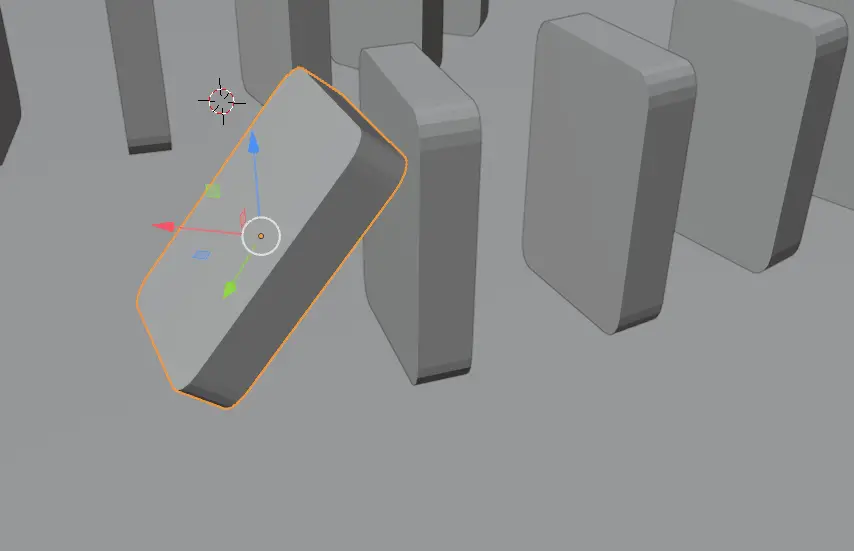
Select the one domino which will start the simulation, this domino will fall first on to the other dominoes, and then the other dominoes will start falling.
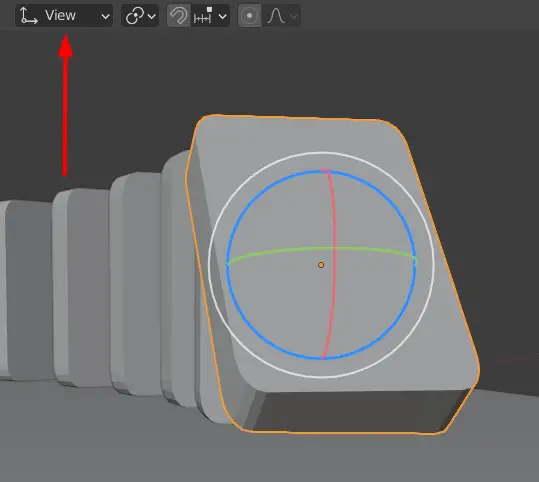
Select it, and click Rotate tool from left Toolbar and rotate the domino to the desired orientation.
If it is difficult to rotate, we can change the Transform Orientations from Orientation panel above. For this tutorial, we have switched transform orientation from Global to View. By doing this the orientation of the axis changes when we orbit or Rotate the scene.
Move the domino closer to the other domino for collision. You can move using Move tool from left Toolbar.
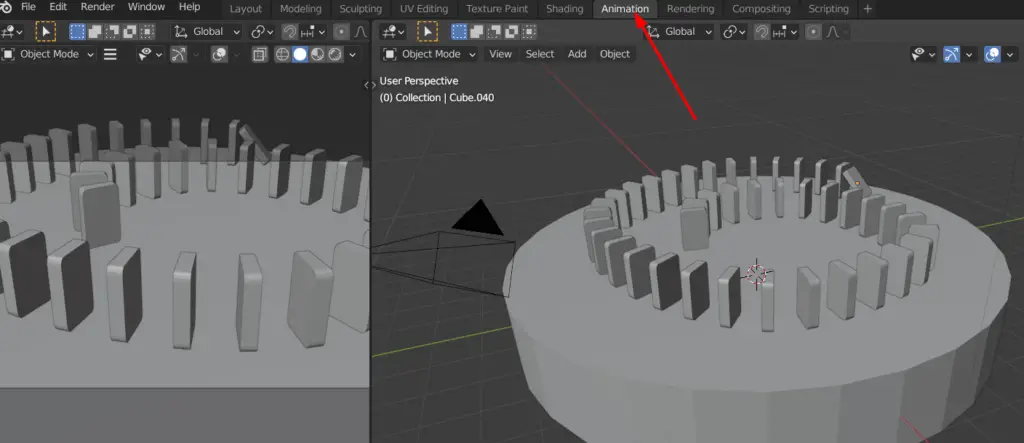
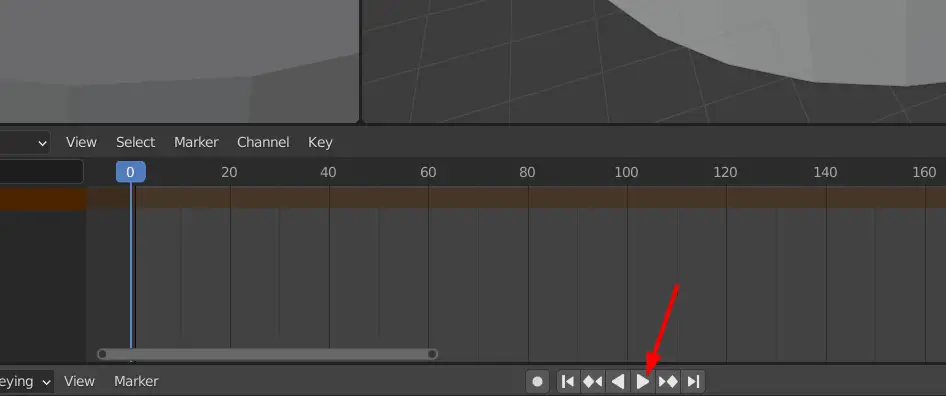
Go to Animation tab.
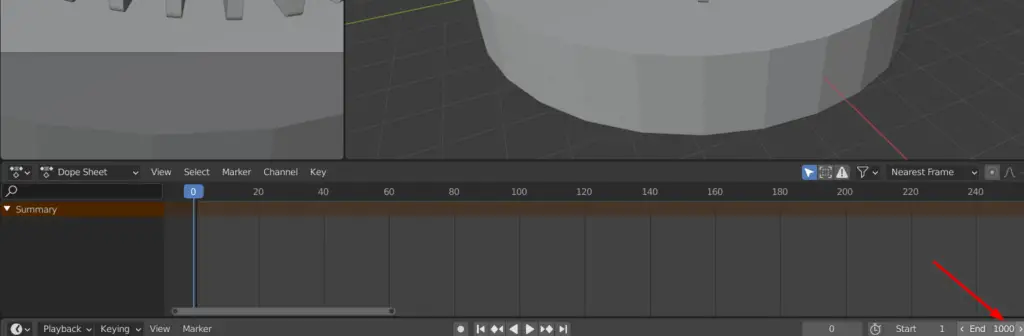
We do not know how much frames are needed for this animation, so change the End frames from 250 to 1000.
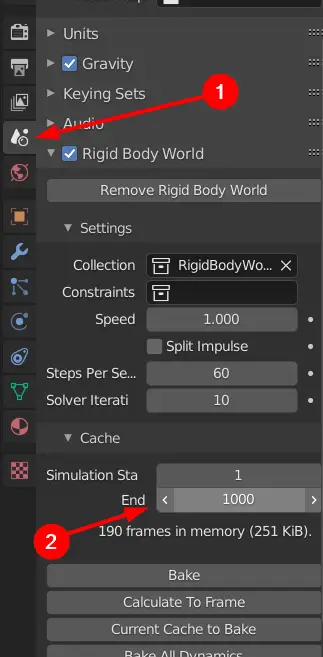
Since, we are using Rigid Bodies, we need to change the End frames in Rigid body Cache.
Go to Scene Properties, in the Rigid Body World, click Cache and change the End to 1000.
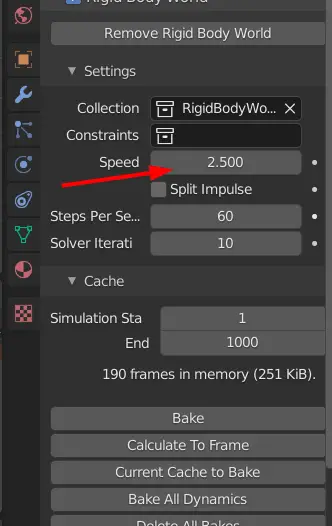
Simulations can look slow, depending on our requirement, we may change the speed. In this tutorial, we have changed the speed to 2.5.
In the Rigid Body World, under Settings, change Speed to 2.5.
Play the animation by clicking Play Animation button.
The simulation will play until it is stopped.