
Adding Attribute Randomize
Add an Attribute Randomize by clicking Add > Attribute > Attribute Randomize. Add this node before Attribute Vector Math and after the Point Distribute node.
This data will be stored in the “ran” attribute. So write “ran” in Attribute Randomize and in the Attribute Vector Math node.
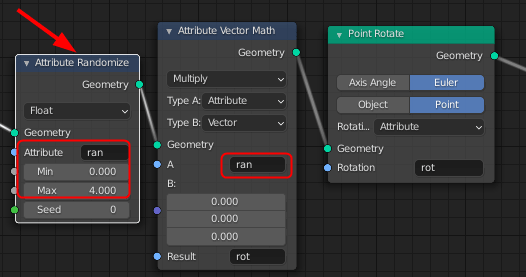
The random number or numbers will be stored in the “ran” attribute, and we are going to use the same random number in the Attribute Vector Math.
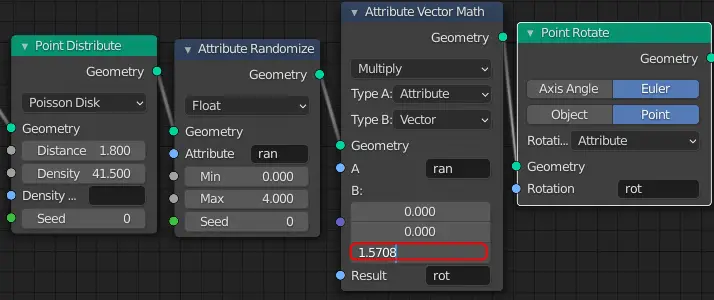
Now, we need to multiply the random number with 90 degrees on Z axis, so that the building may rotate 90, 180, 270 and 360 degrees on the Z axis.
The Attribute Vector math uses radians not degrees.
90 degrees = 1.5708 radians
So, write 1.5708 in the Z axis of vector.
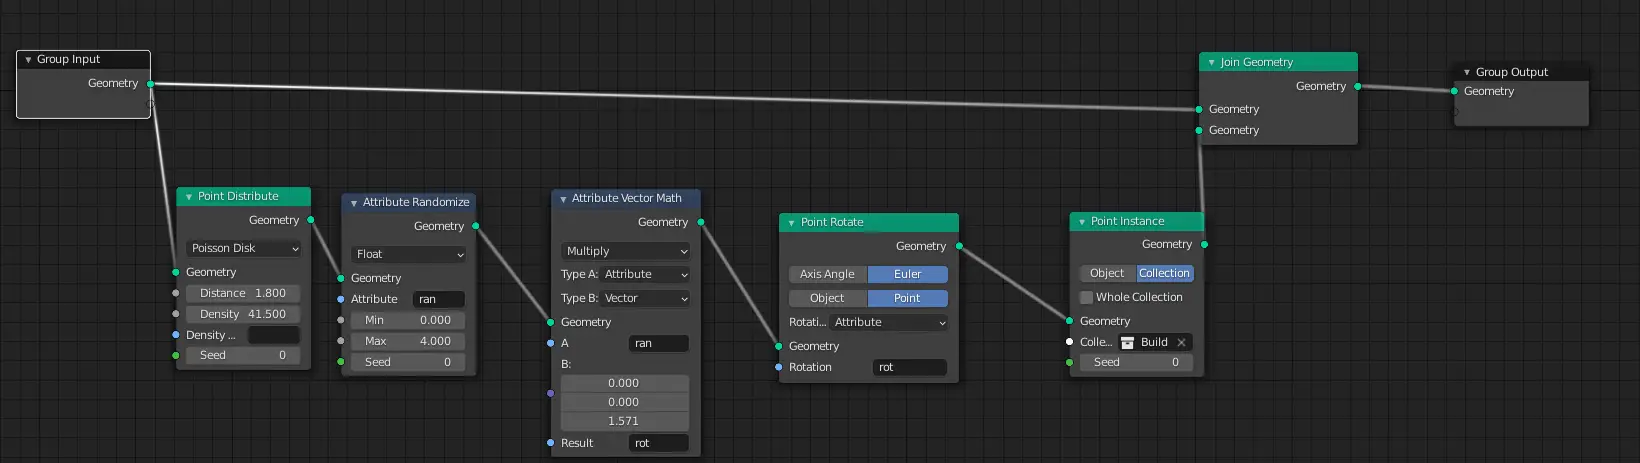
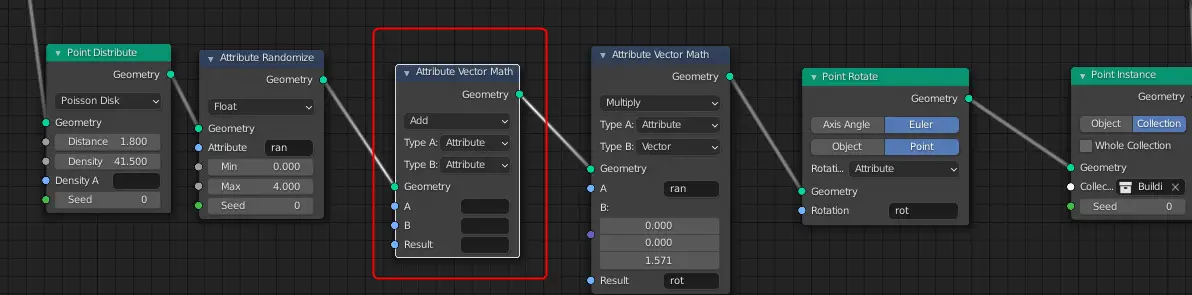
So far, this is how our node setup looks like.
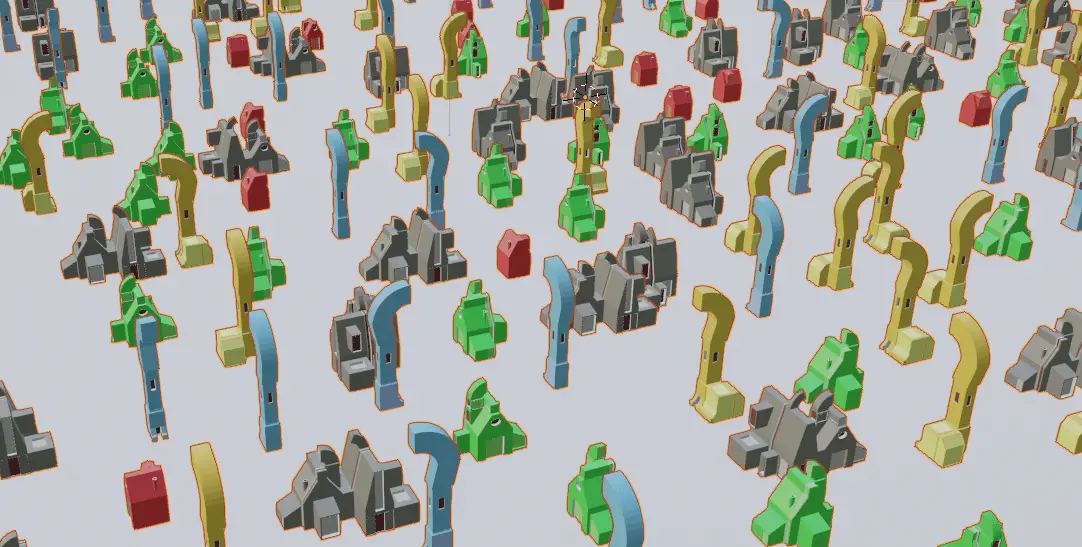
You will now see that each of the building has a different rotation, but their rotation is not organized, rather they are rotated haphazardly.
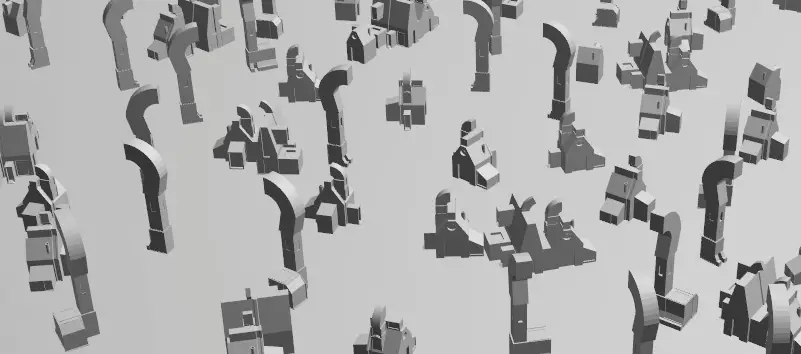
The reason is that, the Attribute Randomize node is not returning the numbers, 1,2,3 or 4. Rather, it is returning any float numbers between 0 and 4. This means that we are not getting 90, 180, 270 and 360 degrees, but we are getting every angle between 0 and 360 degrees.
This can be fixed by using ceil operation. Add another Attribute Vector Math node after Attribute Randomize node.
The ceil operation takes a real number say 2.4 and rounds up the number to the next largest integer that would be 3.
Using Ceil operation with Attribute Vector Math
Change the operation to Ceil. Type “ran” in both A (Input) and Result attribute.
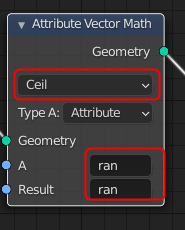
Since, we already had randomized the numbers, the data was then stored in the “ran” attribute, but they were float numbers, we applied ceil function on the same attribute and made them integers.
Now, this is how our buildings will look like.
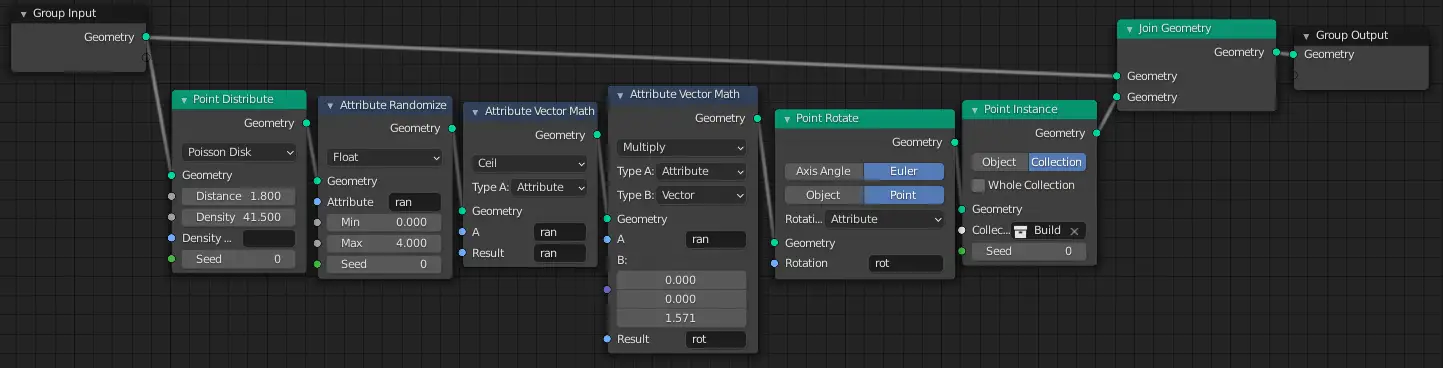
This is the final node setup in the Geometry Nodes Editor.
Final Result
This is the Final Rendered image.
