UV mapping and UV unwrapping are related to each other. Applying 2D textures on to a 3D model is UV mapping and the process of creating a UV map is called UV unwrapping. The letters “U” and “V” describe the axes of 2D textures.
We have to complete the model first, to UV map it. We cannot apply 2D textures on a 3D model without UV unwrapping it. All the High quality models are UV unwrapped and textures are applied on them. Then 2D textures can be applied on it.
By UV unwrapping a mesh, we can apply different types of textures, such as: color, normal, and displacement.
UV unwrapped
When a 3D model is unwrapped, its faces are placed flat on a 2D plane, and using this technique we can apply 2D textures.
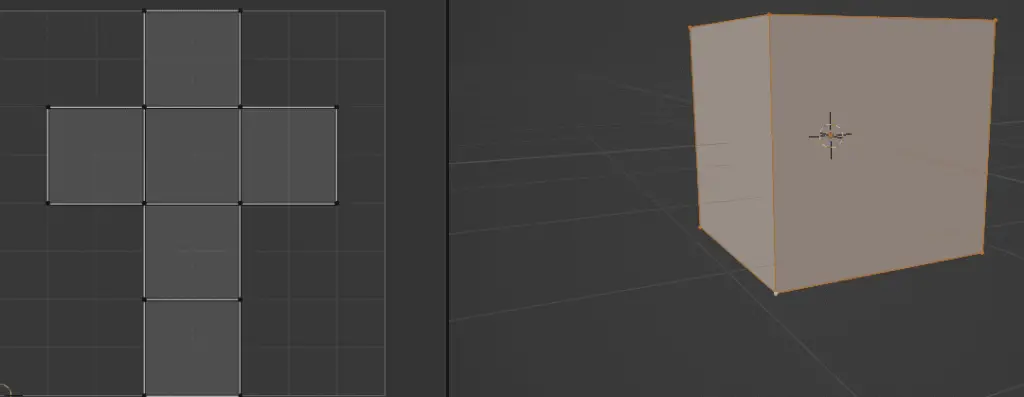
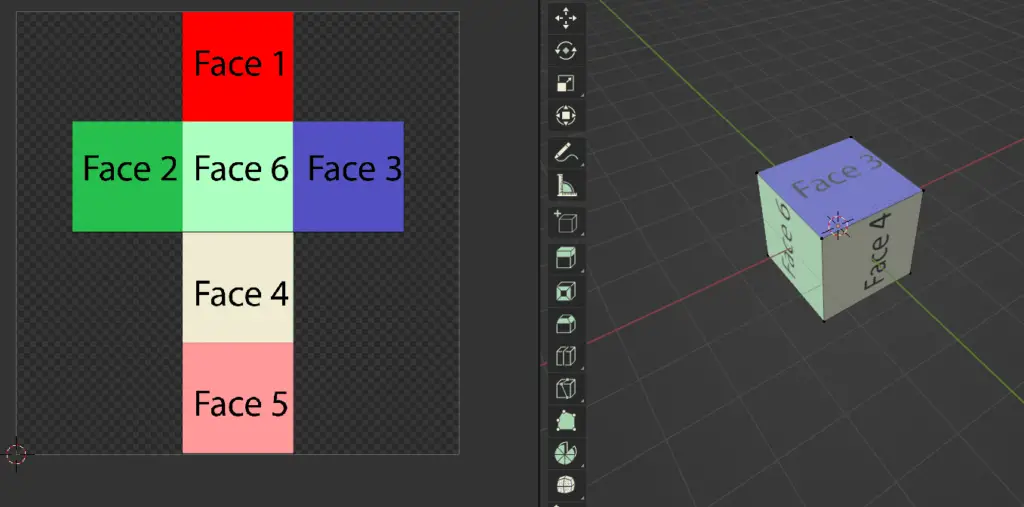
A cube has six faces, and it is a relatively simpler geometry as compared to more complex ones such as a Car or Airplane.
The cube is unwrapped in such a way that it has been divided into six distinct faces and we know we can apply separate textures on all of its faces.
UV editing can be done in Blender using UV Editor.
By UV unwrapping you can add a 2D texture, image or design onto a 3D body.
UV Mapping
The process of creating 2D textures so that they can be applied on the UV unwrapped 3D models is UV Mapping. UV mapping is typically done on a 2D Design software such as Illustrator or Photoshop.
In the image below, we have UV mapped a a simple cube and then applied the textures onto it.
For UV unwrapping and UV mapping, we need to consider that a 3D model is spread flat on a surface or plane. and then textures are applied on to them.
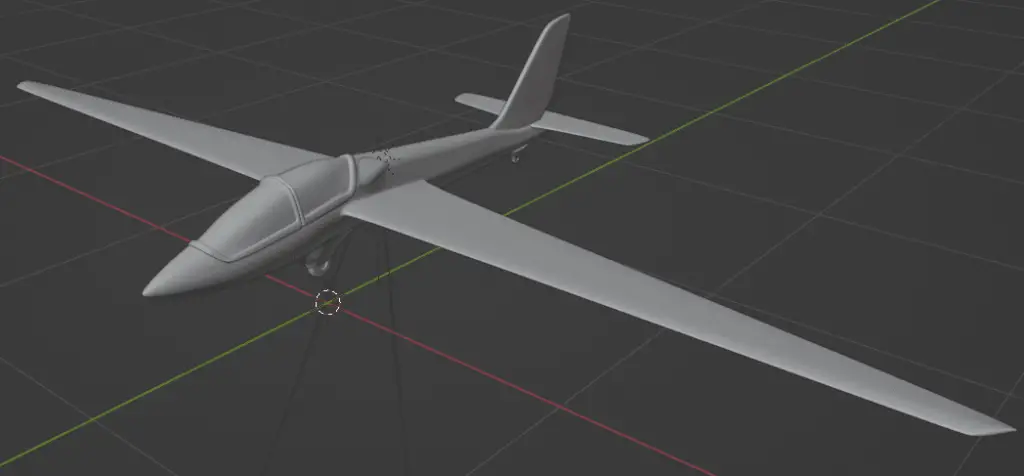
Complex models
Cube has a very simple geometry and thus it is very easy to UV unwrap it and then UV Map it. But what about the other complex Geometry.
Simply UV unwrapping Complex 3D models
This cube had only six faces, but for complex geometries, it can have more than six faces, and all of them cannot be divided like a cube.
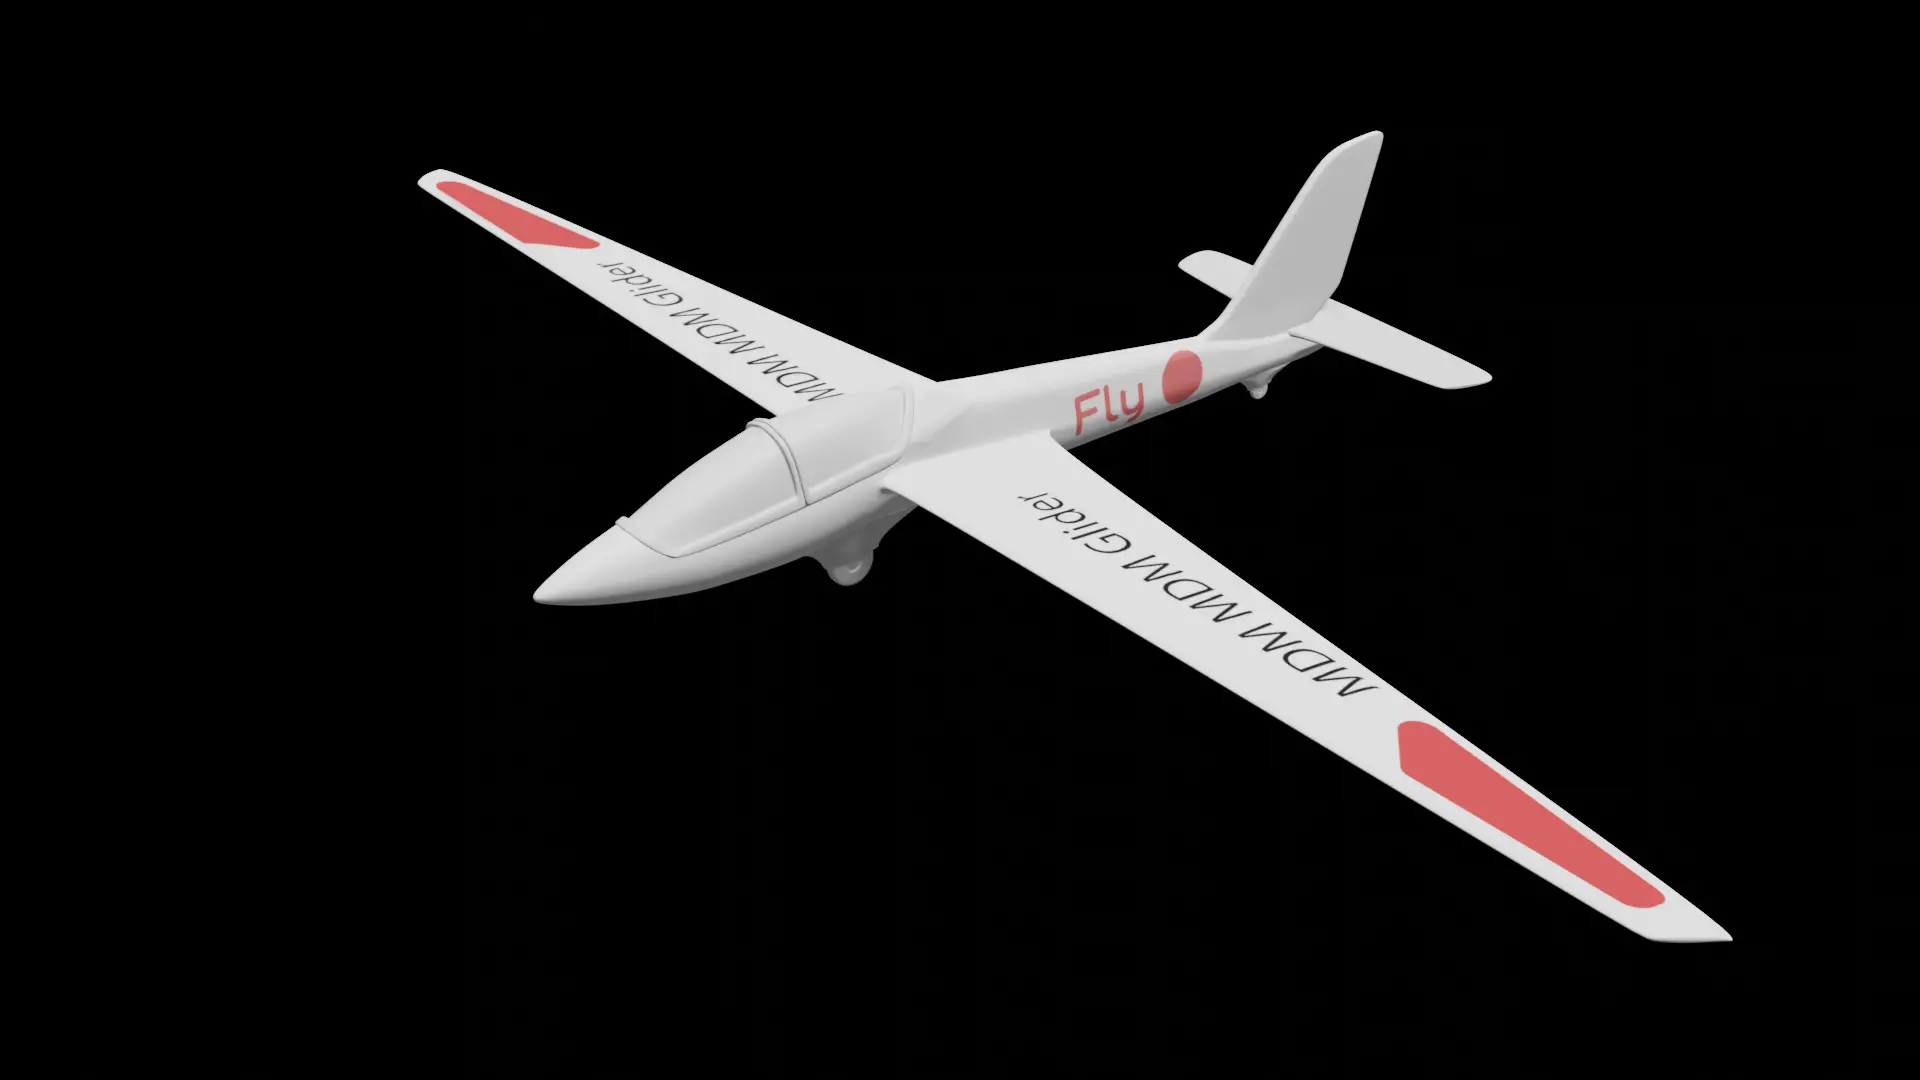
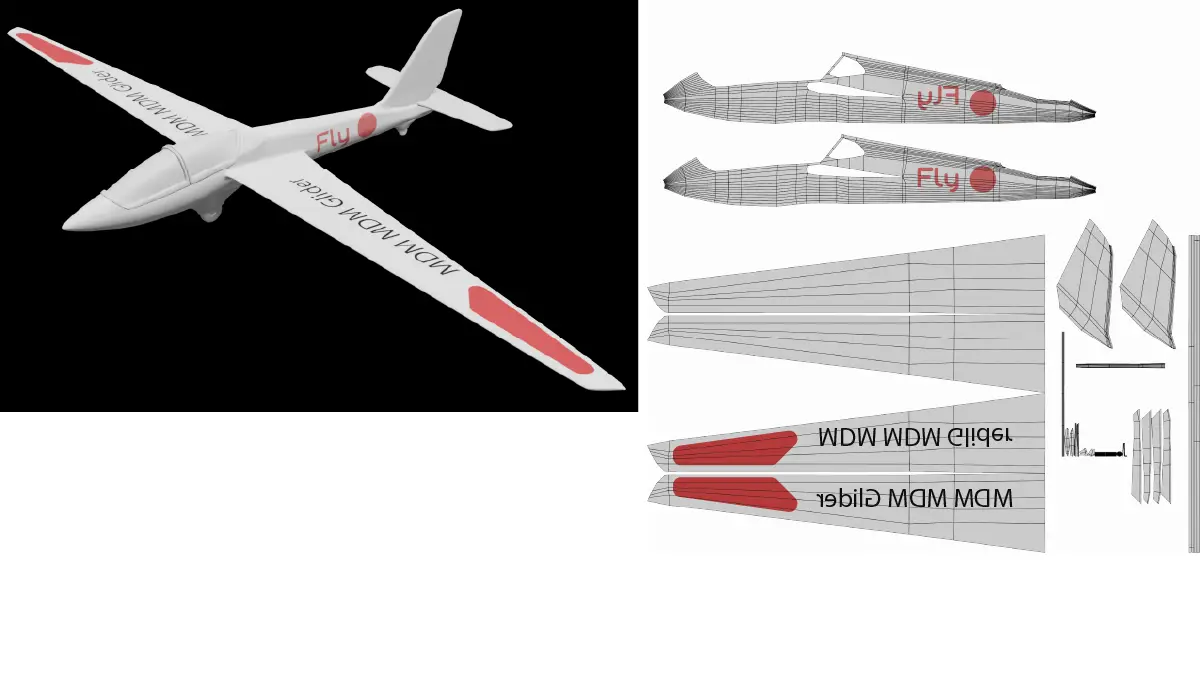
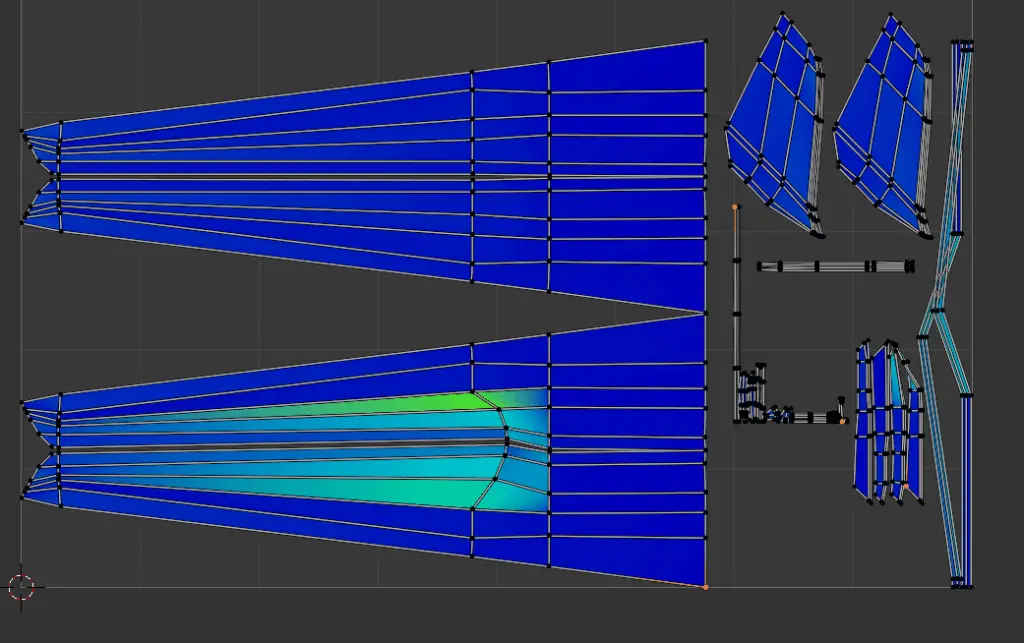
This is an image of the plane. When we UV unwrap it, it does not properly unwrap, and it creates a UV layout that is rather difficult to work with.
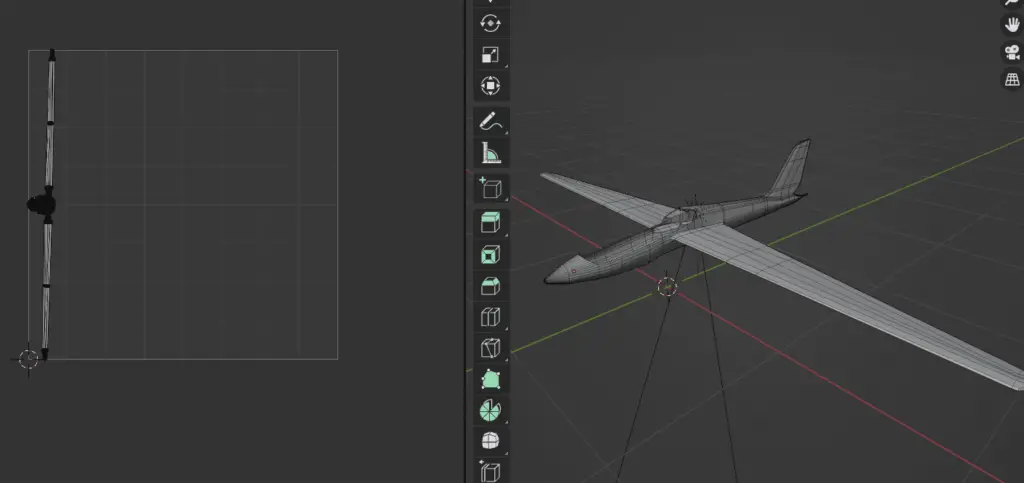
As it can be seen that when this model is simply UV unwrapped, it creates a UV layout that is simply not practical. It is almost impossible to apply any 2D texture to it. A 3D model needs to be unwrapped using some Seams. Seams can be considered as lines that can separate a 2D texture and make the UV layout better.
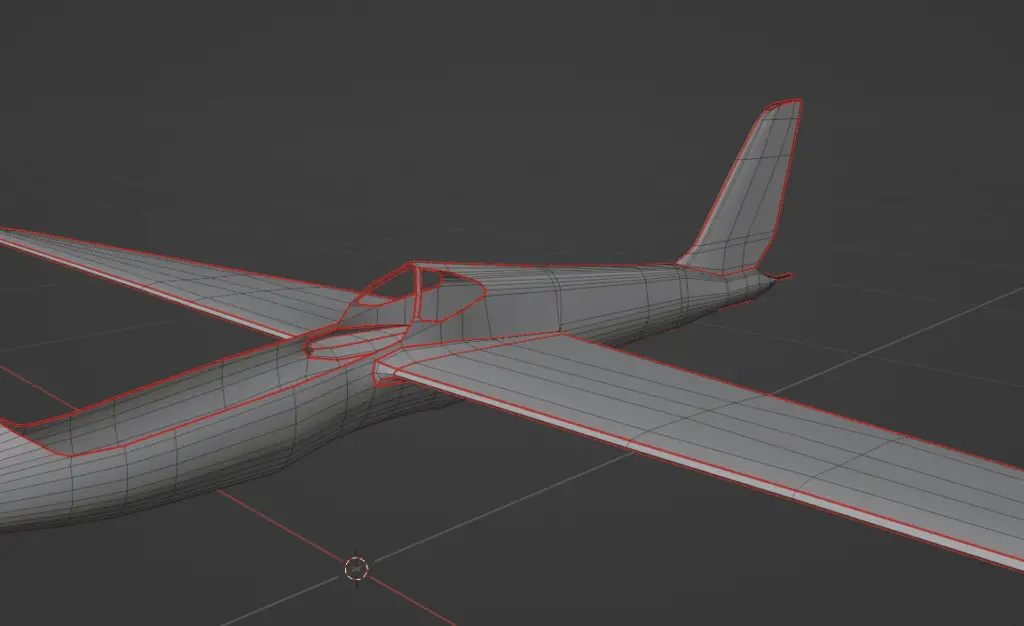
Adding Seams
Seams can be considered as border or you may consider as them cuts which separate the UV layout for better Unwrapping.
Adding Seams divides the UV layout into different sections called Islands. Each island represents a region that is enclosed with seams.
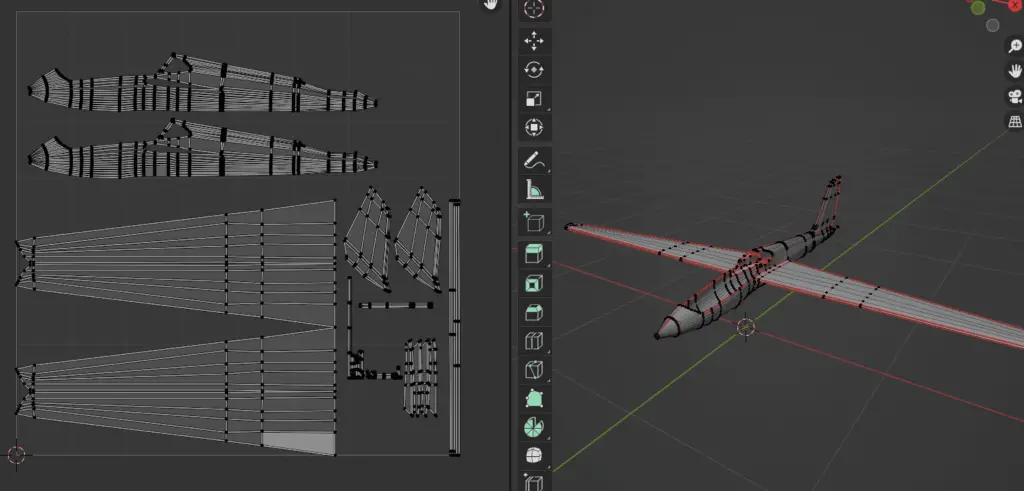
So, we add Seams to the model, and then unwrap it.
Now when we UV unwrap it, we see that the UV Layout is easier to work with.
Wings and Body of the glider is separated using Seams. The Wings and Body have Seams around which separate them in UV layout.
Stretched UVs
While UV unwrapping it is important to keep in mind that the textures do not get stretched. Because the Stretched UVs will make the model look very bad.
UV mapping Complex Models
And finally, we can apply a 2D texture on to the model by exporting the UV layout and then applying the texture or paint the UV layout using any external 2D software.
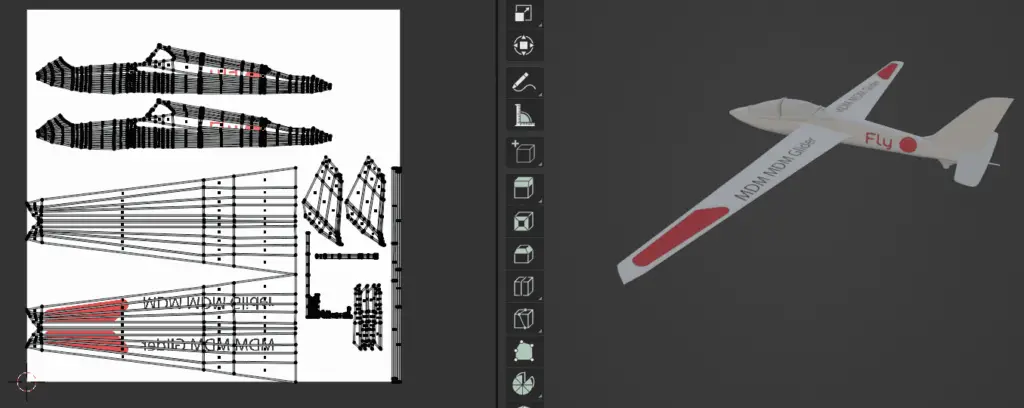
We have used Illustrator to draw texture for the UV layout. From the image above, we can see the texture is properly applied.