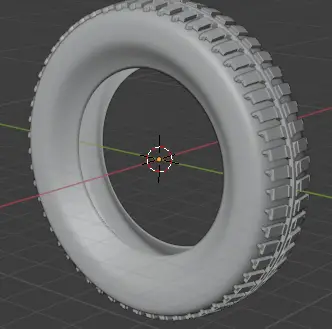
In this tutorial, we are going to rig a tire that we already made.
Link for modeling a tire in Blender: How to model a tire in Blender
Rigging is used to control objects using Armature and empty. This is usually used for animation. Any object in Blender can be rigged for animation purposes. But for this tutorial, we are going to add constraints to our tire, and use an empty to control it. Blender 2.90 is used in this tutorial.
Note that in this scene, there are two separate objects, the tire and its tread. This type of rigging can also be done if you have a single object.
Parenting the Tire to Tread
Open the scene with the tire.
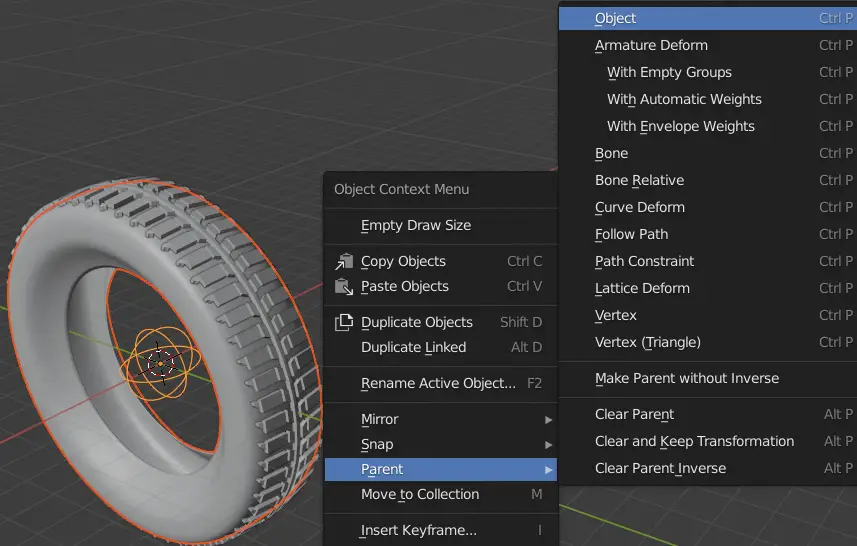
Note that in this scene, the tire and the treads are two different objects. They should be linked to each other. If one moves, the other should move as well. To do this, we shall make the tire the parent of tread.
Make sure to select the treads first, and then the tire. Press Right Mouse Button and in Object Context Menu, click Parent > Object.
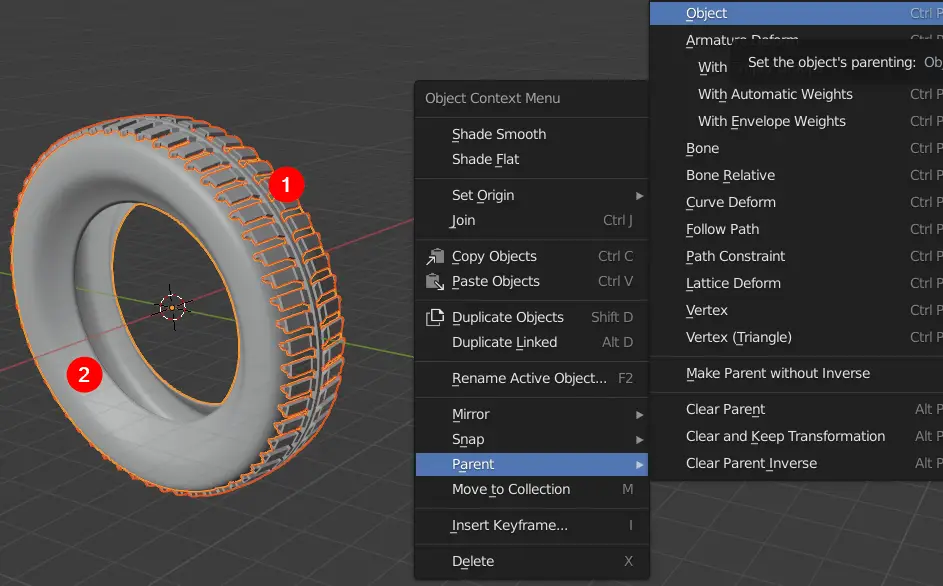
Now if you move the Tire , the tread moves along, but not vice versa. The reason is that tread is the child of Tire now
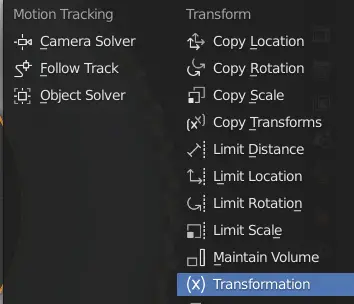
Applying Transformation Constraint
Add an empty by clicking Add > Empty > Sphere.
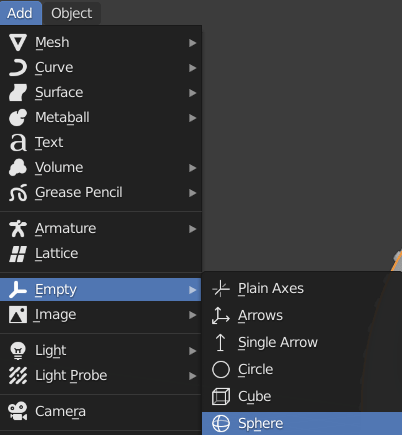
We are going to use this empty to rig the tire.
Select the empty, go to Constraints properties on the right side and click Add Object Constraint.
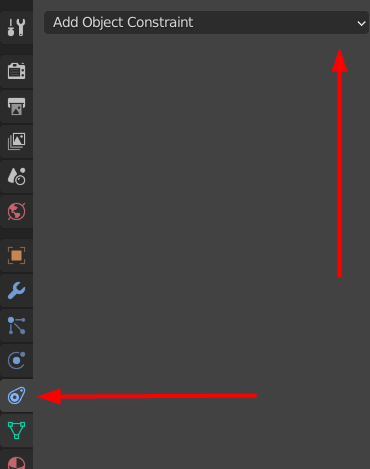
Add a Transformation constraint.
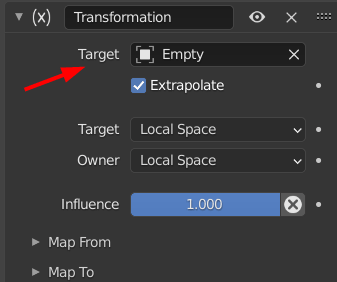
Transformation constraint lets you transfer properties (Location, Rotation and Size) from one object to another.
In this tutorial, we want the movement of the empty to be connected with rotation of tire. We want the tire to move and rotate when Empty is moved
Change the Target to Empty, Target is object whose properties will be transferred to this object. Owner is the object to which the constraint is applied.
Enable Extrapolate. By default the minimum and maximum values are bound to the input and output values, by enabling this, values greater than or less than these ranges will automatically be clipped.
Change the coordinates of Target and Owner to Local Space, now Local Coordinates will be used.
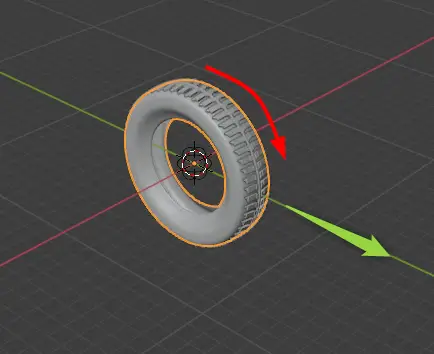
We will move the empty in Y-axis( Green Arrow), this will cause the tire to move in Y-axis and rotate in X-axis.
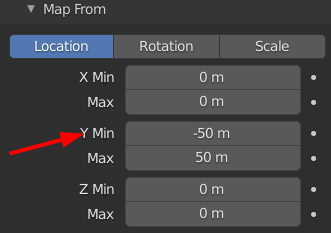
Map From is the option that defines the properties of Target, in our tutorial, the properties of empty.
Change the values of Y Min and Max to -50 and 50 respectively.
Map To, is the option that defines the properties of our object (Owner), we want our object to rotate in response to the empty.
Change to Rotation. We want X- axis to rotate, so change the values of X Source Axis Min and Max to 360 and -360. Also change X Source Axis to Y, this means that data should be mapped from Y axis of the Target.
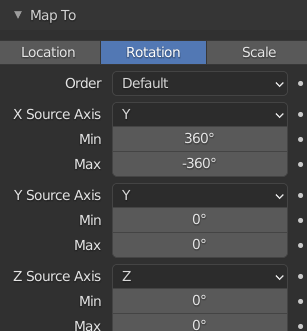
The above settings mean that for every 50 meters distance covered the tire will rotate 360 degrees.
Now, if we move the empty, the tire rotates, but it does not move with the empty. To fix, this problem, we are going to make the empty parent of the tire.
To do that first select the tire and then the empty, Click Right Mouse Button, Object Context Menu will appear, click Parent > Object.
You may drag the empty to move and rotate the empty.