
In this tutorial, we are going to see different techniques which we can use to reduce our render time. Rendering is an integral part of the 3D Modeling and Animation. Different computers have different computing powers. But with a little optimization, we can reduce the render time even on a low end pc.
In this tutorial, we will discuss:
- GPU for rendering.
- Selecting the right Render Engine
- Reduce Sample Size.
- Light paths.
- Enable the Denoiser.
- Tweaking Noise Threshold
- Change the Tile Size.
- Render for lower Resolution.
- Optimize the 3D models
- Things that increase Render time
To render an image, we click Render > Render Image.
Remember that, there are ways to optimize your scene to reduce the render time, however, the main factor in the Render time is your system ( your PC).
Now we will discuss different methods that you can use to render faster or reduce render time.
Select GPU for Rendering
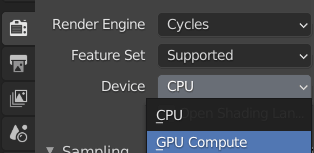
By default, Blender uses CPU for rendering. If you have a good GPU, your rendering time will considerably reduce if you select GPU Compute instead of CPU.
Select GPU by clicking Render Properties > Device > GPU Compute.

Select Eevee for faster rendering
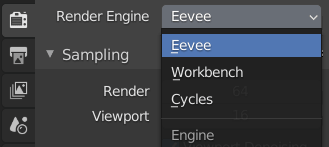
In 3d software like Blender, we use different Render engines to render our scenes. Some are faster than the others. The latest versions of Blender come with two render engines Cycles and Eevee.
While both of them are very good, Eevee is much faster compared to Cycles. The reason is that Eevee is a Real time Render Engine while Cycles is a path tracing Render Engine.
Eevee can be used for a quick result or you can even get a decent Render image using it.
In Render properties, change Render Engine to Eevee.

Reduce Sample size
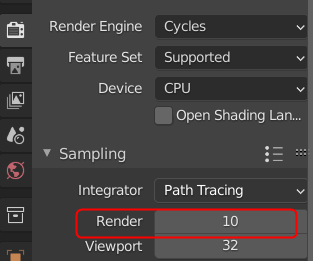
Render Sample size is the number of paths, blender has to calculate for each pixel, smaller the number, faster will be the Render speed.
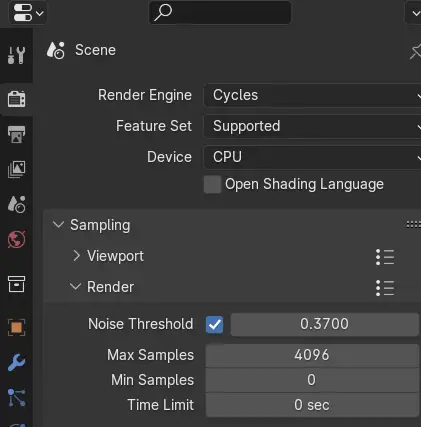
Decrease the number of samples from Render properties > Sampling.

We increase the number of Sampling for Render to get better results and get less amount of noise.
Keep in mind that, reducing the number of samples can result in a render image that has a lot of noise.
However, in the latest versions of Blender, Denoiser are also playing a big part for reduced number of Sampling and noise-less Rendered image.
Light Paths
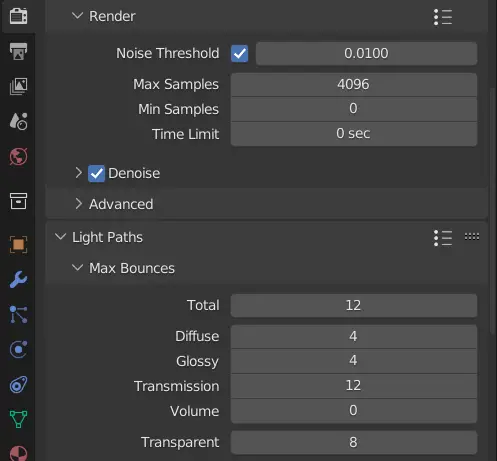
You can reduce the number of bounces for the light paths for the scene to render faster.
Click Render Properties > Light Paths > Max Bounces to change the settings.

From the following images, we can see that how number of bounces can affect our final Render images.

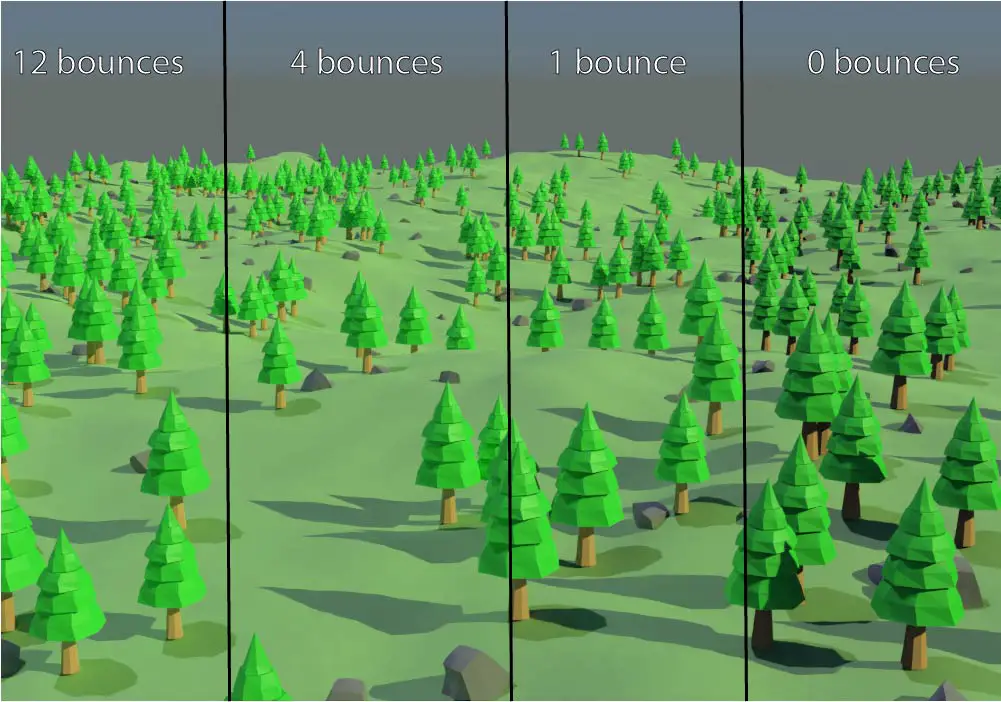
Remember that, it can affect the final render image. It may not look as desired but you can tweak with the number of bounces to see which number fits the best.
This can only be done for Cycles Render Engine.
Enable the Denoiser
You can use the Denoiser to remove the Noise from the final render. You can enable the render, by clicking Render properties > Sampling > Render > Denoise.

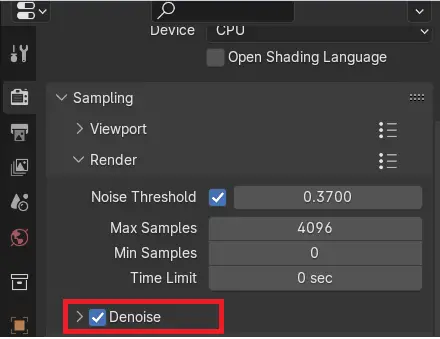
By using the denoiser, you can reduce the render time considerably.
Tweaking Noise threshold
You can adjust the Noise Threshold to get a better rendering time. Lower the Noise Threshold, higher will be the render time.
If you increase the Noise Threshold, your scene will have more noise, but it will render faster.
Noise Threshold can be adjusted by clicking Render properties > Sampling > Render > Noise Threshold.

This can only be done for Cycles Render Engine.
Change the Tile size
In Blender, while rendering the square boxes you see are the tiles. Their size can be changed and can affect the Render time.
You can change the Tile size by clicking Render properties > Performance > Memory >Tile Size.
If you are rendering with CPU, the Tile size should be smaller and if you are rendering with GPU, the tile size should be larger.
This can only be done for Cycles Render Engine.
Render for a Lower Resolution
If the final render image has a high resolution, it will take more time compared to the one that has a lower resolution.
Many times, you do not want a high resolution Rendered image, this is specially true when you testing or experimenting with your work.
Lower Resolution Rendered images are rendered faster.
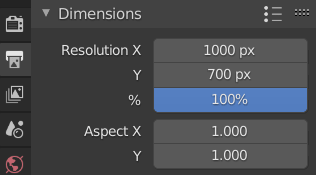
You can change the Resolution dimension from the Output properties.

Optimize the 3D models
3D models that have higher poly count can take more amount of time to render in the Render image.
Sometimes, the 3d models have unnecessarily high amount of polygon faces, this can affect your work in a negative way.
There are many ways that you can optimize your objects. For Example, you can Retopologize them or you can use a lower value for a Subdivision modifier.
Things that increase the render time
Following are the things that can increase the render time.
- Volumes
- High Poly Models
- Environment textures
- Fluids
- High Quality texture maps
- Hair