

Add depth using Solidify modifier
Our mesh does not have any depth, we need to add depth. We use solidify modifier for this purpose.
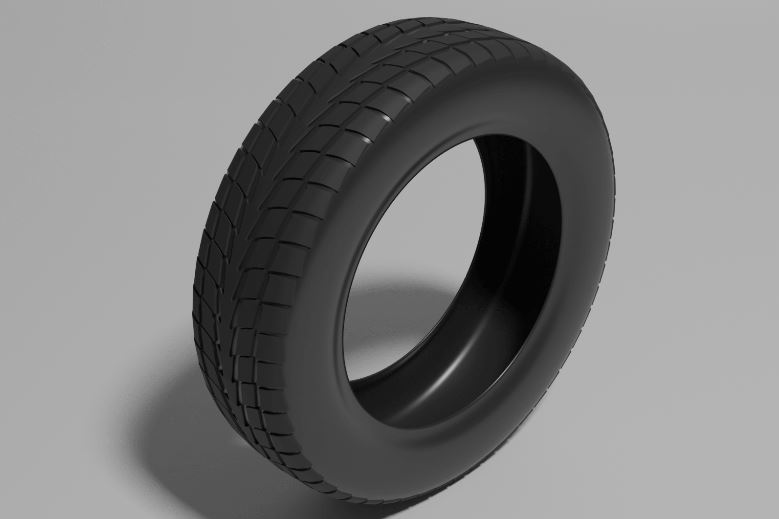
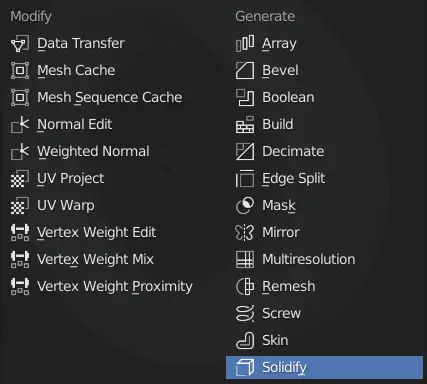
Add Solidify modifier from Modifier properties.

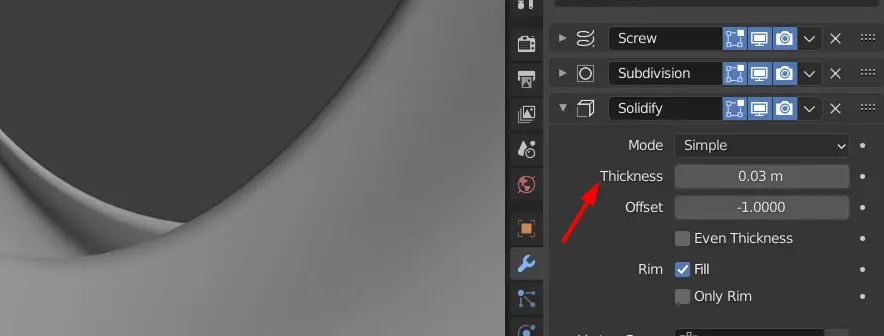
In this case, we have increased the Thickness.

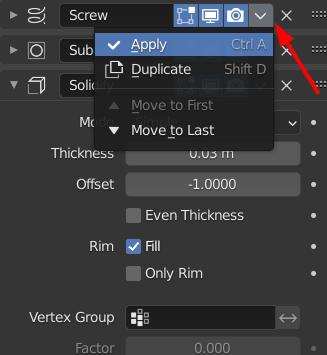
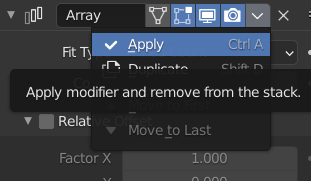
Now Apply all of the modifiers.

Go back to Object mode by pressing Tab key.
Making the treads
We have modeled the basic shape of the tire. We are now going to model the treads of the tire. We are going to make a tread first and then using Array modifiers make copies of it.
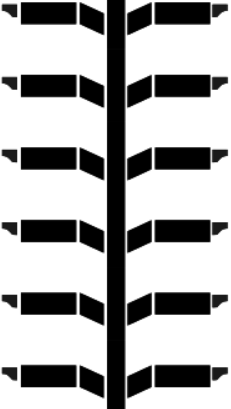
We are going to make this type of tread texture.

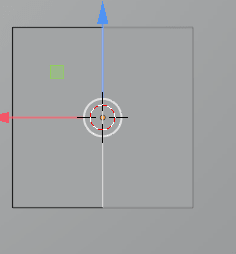
In the object mode, add a Plane by clicking Add > Mesh > Plane. Using the plane we are going to model one tread of the tire.
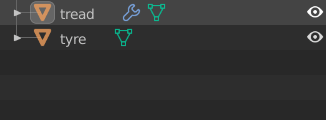
For our own convivence, change the names of the two objects to tread and tire.

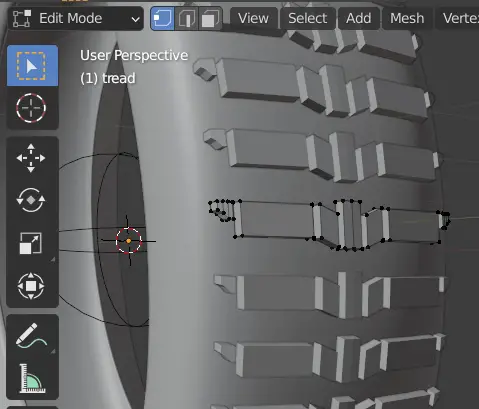
Go to Edit Mode by pressing Tab key. Select the Rotate tool, and rotate the plane 90 degrees on X-axis the same way as earlier.
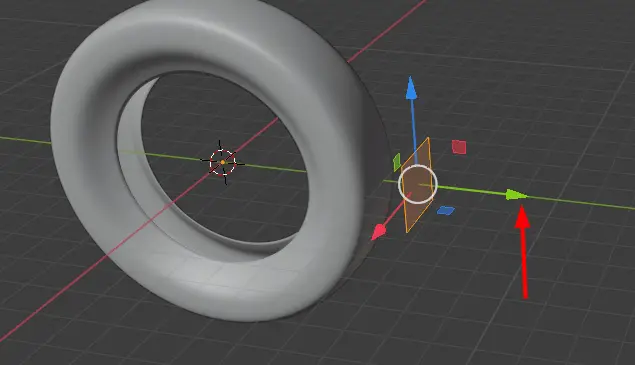
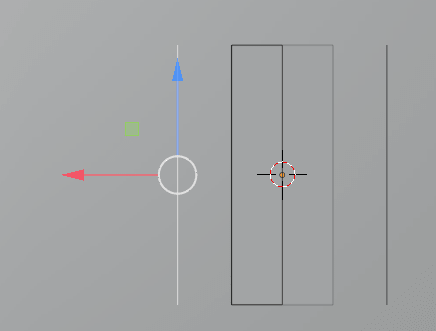
Now select the Move tool, and move the plane outside of the tire.

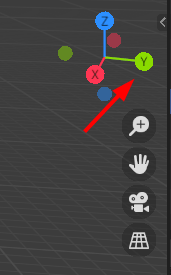
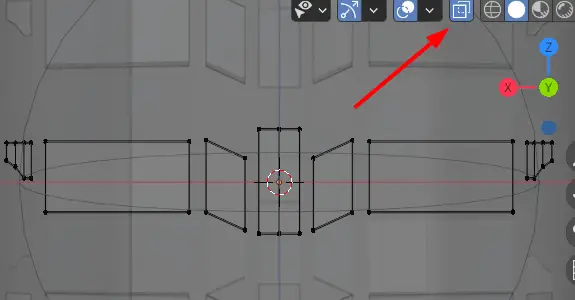
Go to side view by clicking Y-axis on the Coordinate.

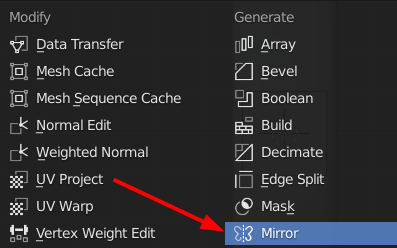
We will use Mirror modifier to mirror one side to the other.

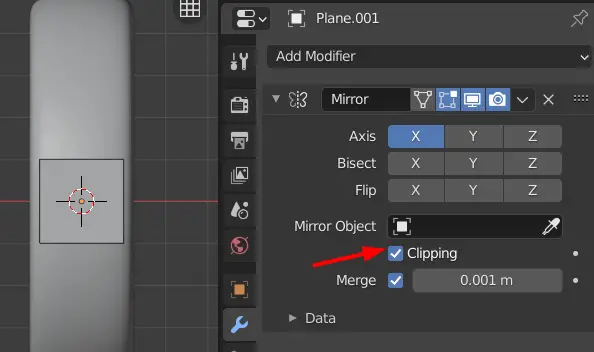
Enable Clipping. This will allow the vertices on the Mirror plane to remain intact and they will not be separated.

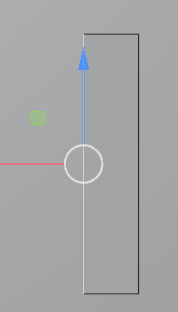
Using the Scale tool, scale down the plane appropriately. Choose Edge selection from top left or press 2 key.

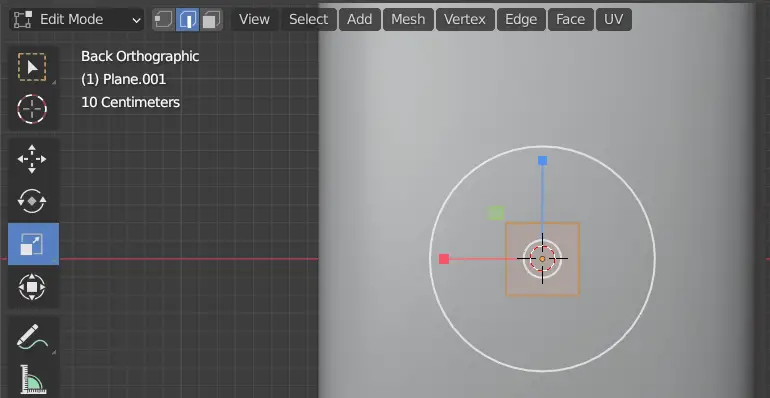
Select either left or right edge, and move it to the opposite side.

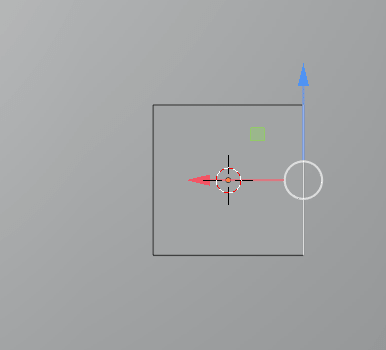
While moving the edge to the left side, we see the mirrored side of the plane. The edge cannot be moved further than the midpoint.

We shall duplicate the edges to make more parts of the tread.
Select a single edge and press Shift+D, when it is duplicated press X key to move it along the X axis and finally press Enter to place it.

Only a single edge is placed there, there should be a face.
Select the duplicated edge, press E to extrude, press X to extrude along X-axis, and press Enter key to place.

Complete the tread using the above technique.
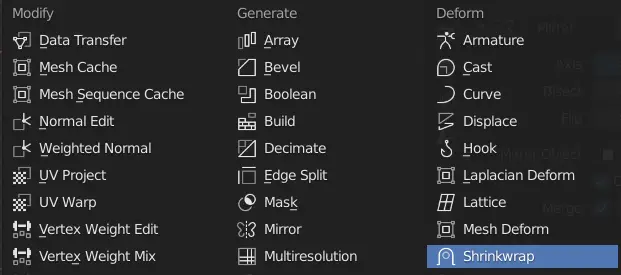
Using Shrinkwrap modifier
The tread should be placed right above the tire. Shrinkwrap modifier allows mesh to be placed right above the other.
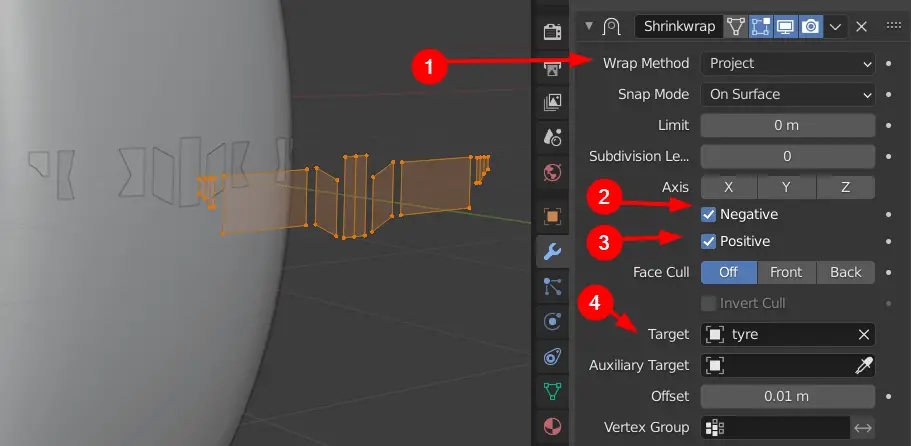
Add Shrinkwrap modifier.

Change the Wrap Method to Project, this will place the vertices on to the target mesh. Turn on the Negative and Positive, this is linked with direction of the mesh, in our case, we want both directions to be projected. Target is the object where vertices will projected, in this tutorial, the tire.

Apply the modifier.
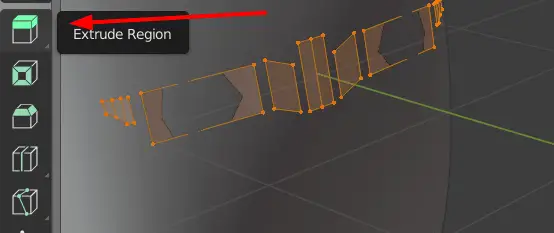
Extrude the mesh by using the Extrude Region tool from toolbar, or Press E.

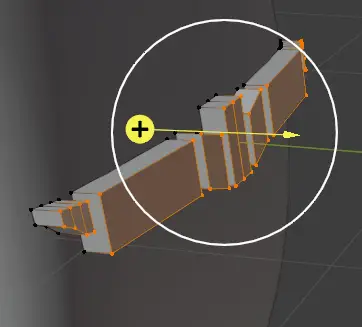
Drag the yellow cursor a little towards outside to extrude the mesh.

Go to Object Mode by pressing Tab key.
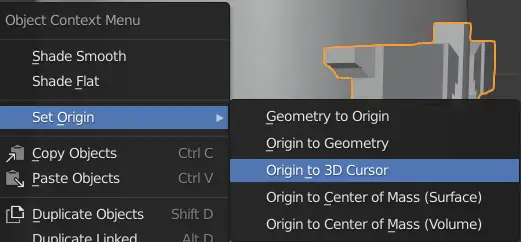
Make sure that the origin of the tread object is at 3d Cursor, to do that, select the treads object, press Right Mouse Button and click Set Origin > Origin to 3D Cursor

Use Array modifier to make copies of tread
Now we will make multiple copies of the tread around the tire. Array modifier will be used using another object.
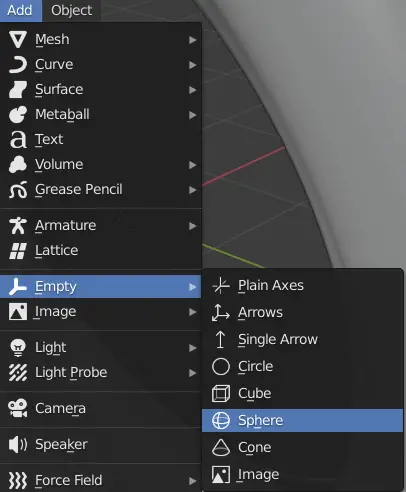
So, click Add > Empty > Sphere.

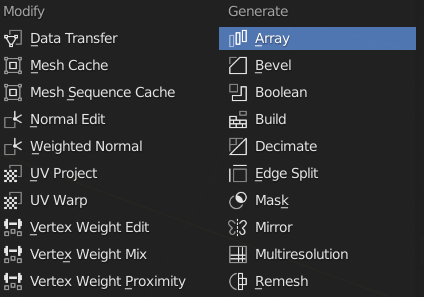
Now select the Tread and add a Array Modifier.

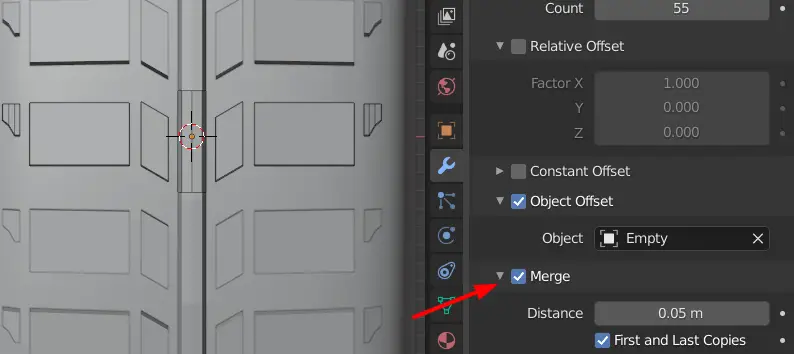
For this tutorial, choose the Count to be 55, disable the Relative offset and enable the Object Offset and choose the Object to be Empty. Properties of the Empty will determine the orientation of the tread.

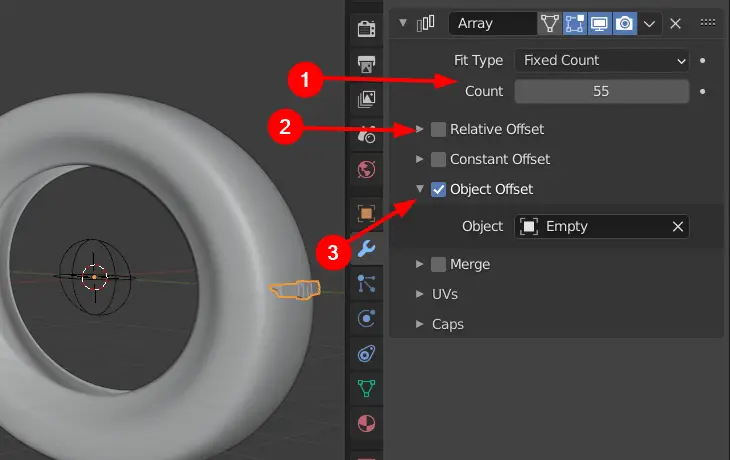
Apparently, nothing has happened. But, 55 copies of the object has been made at the the same position. The 55 objects should be at equal distances. We will change their Distance using the orientation of Empty.
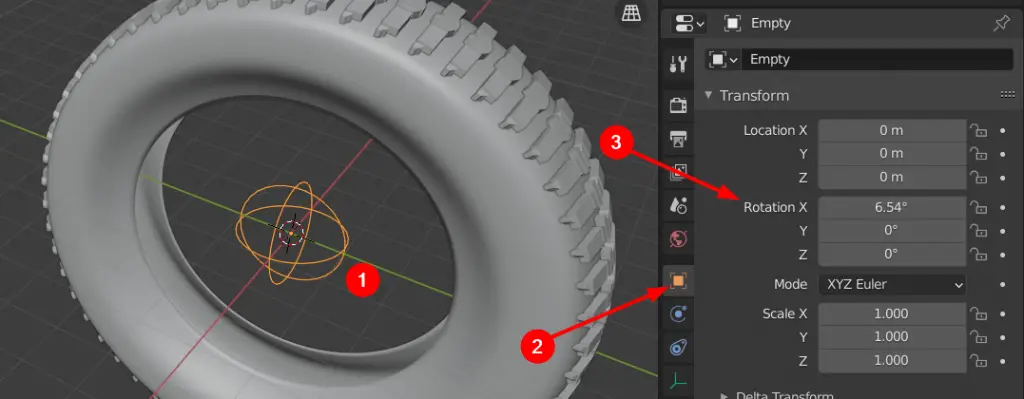
The tread should cover the 360 degree area of tire. We need to determine the angle between two treads from the empty. If we divide the 360 by the Array count, in this case 55, we get 6.54 degrees.
Select Empty, go to Object Properties, and change Rotation X to 6.54.

Now, we will join the middle part of the tread.
Go to Edit mode by pressing Tab key.

Adjust the tread of the tire properly.
Go to side view, and turn on the X-ray by pressing Alt+Z. This will allow us to select the vertices that are behind the mesh.

Bring the two ends of middle part closer which will be merged.


In the Array Modifier properties, enable Merge option, in the Merge option, change the Distance to 0.05 m and enable First and Last copies.
Make sure that middle part seems to be merged. If not, change the distance of the Merge.

Select all the Object by pressing A key. Press Right Mouse Button, Face Context Menu will appear. Click Subdivide.

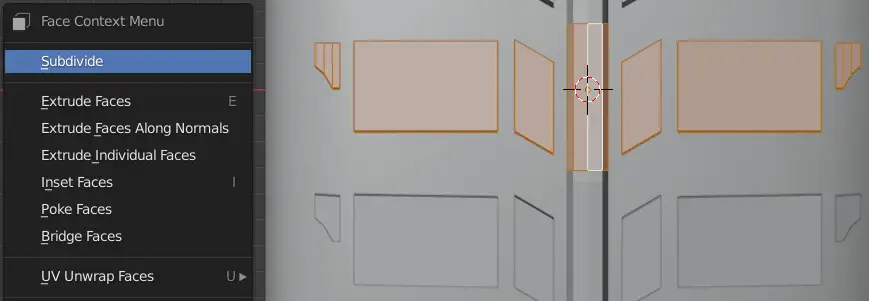
A Subdivide option will become available on the bottom left.

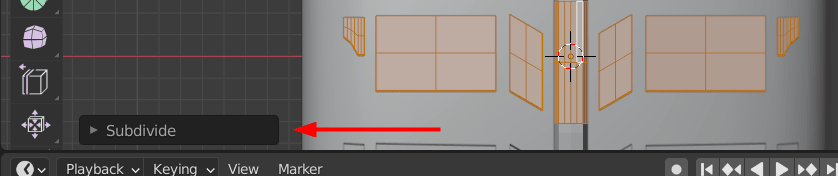
Click it and change the Number of Cuts to 3.


Apply the modifier.

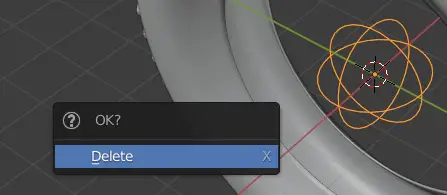
We do not need the empty now, delete it.

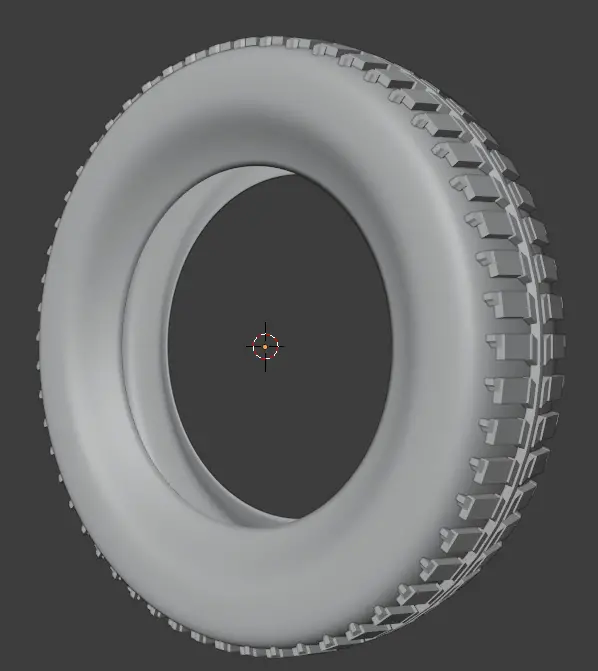
The final result will look similar to this.

One reply on “How to model a tire in Blender”
thank you