

In this tutorial, we will learn how to instance objects using Instance on Points node in Geometry Nodes. Spiral Curve node is used for instancing, since the objects will be part of the staircase. Blender version 3.0.
This is the first tutorial of the Procedural Spiral Staircase tutorial series in which we will learn how to make a procedural staircase using Geometry nodes.
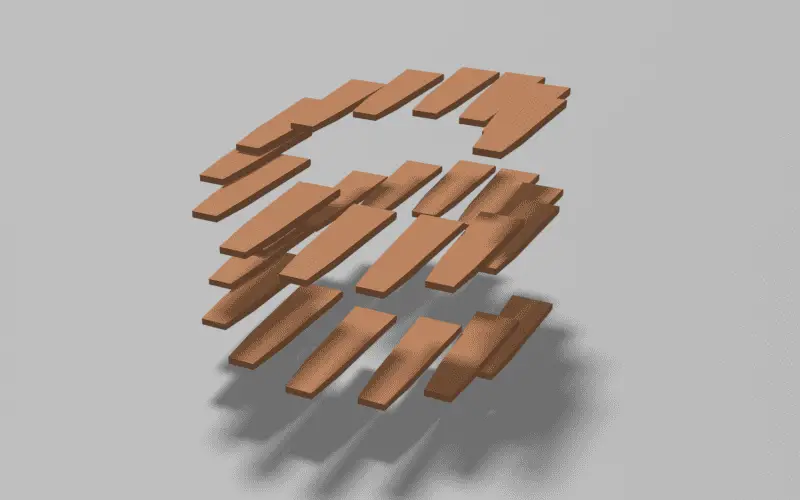
We will be instancing the stairs using Geometry Nodes. First, we need to make a single stair, so that we can instance it multiple times.
Model for the Stairs
Model the stair like shown, for this tutorial, the geometry origin of the stair is at the end of stair.


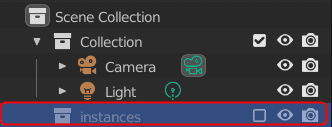
This stair object must be in another collection.
We will be adding more instances later, so make a separate collection and name it “instances” and disable it so that it is hidden. You can make a new collection from the outliner on the right side.

Using Geometry Nodes
Switch to Geometry Nodes tab from the top ribbon. Add any object, click Add > Mesh > Plane. Select the object click New on the Geometry Nodes window.

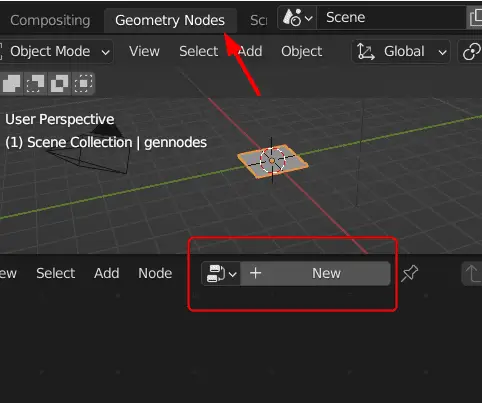
The Geometry Nodes tab have Geometry Nodes window on the bottom half of the screen. This is the window that we are going to use for geometry nodes.
The Geometry Nodes modifier is added on the object. This can be check by clicking the object and going to Modifier properties on the right side.
After adding Geometry Nodes, it can be seen that there are two nodes, Group Input and Group Output. Disconnect these nodes, as it is not necessary to use the mesh.
Adding Spiral Curve node
The Spiral node makes a poly curve in a spiral shape. It can be used to make springs like objects.
For a spiral staircase, spiral curve will be used. To add a Spiral Curve, click Add > Curve > Primitives > Curve Spiral.

Properties of Spiral Curve node
Spiral staircase has these parameters:
Resolution: Number of edges for a single rotation.Rotations: Number of loops for a curve.Start, End Radius: The radius for start and end position that linearly interpolate in between.Height: Vertical height of the curve.
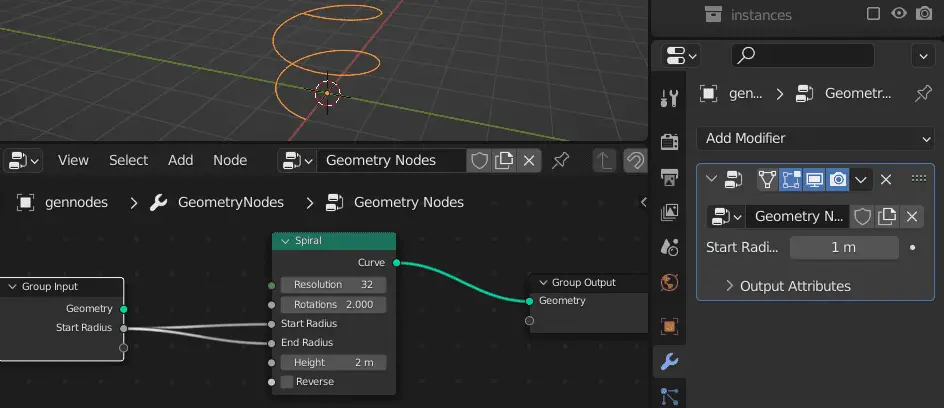
To make the spiral staircase, we are going to manipulate the above parameters. In the spiral staircase, the Start and End radius are same.
Connect the Start Radius and End Radius of the Spiral node to a same Group Input.
When any parameter is connected to Group Input, the parameter can be controlled from Modifier properties.
The purpose of the spiral node is to instance stairs on the curve. The Stairs will be instanced on the control points of the curve.
Adding Instance on Points node
Add an Instance on Points node after the Spiral node by clicking Add > Instances > Instance on Points. This node adds objects in place of control points of the curve.
Instance on Points node need the information of the object that is to be instanced.
Object info node
For this, we add another node Object Info by clicking Add > Input > Object Info. Select the Object to be “stair”, that we made earlier. Connect it to the Instance input of Instance on Points node.

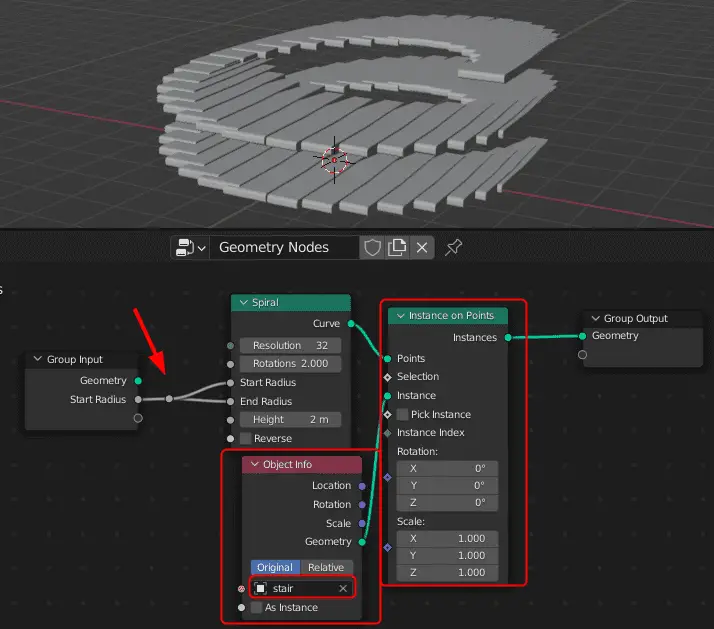
Reroute can be used to alter the path, so we may have a better layout. Add a reroute by clicking Add > Reroute.
The stair objects have been instanced on the place of control points, their parameters can be controlled from the Spiral node.
There are a lot of stairs and they are merging into each other. To fix this, decrease the value of Resolution.

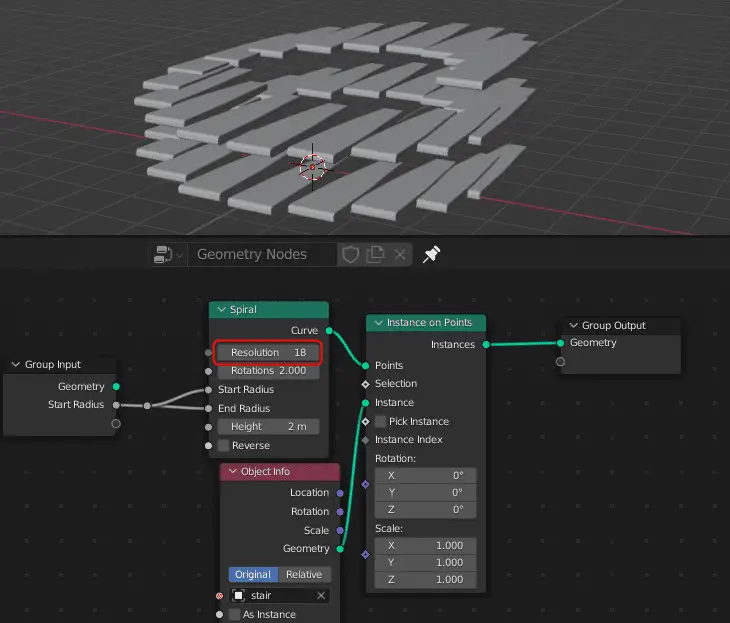
Connect the Resolution parameter of the Spiral node to the Group Input, so that it can be changed from the Modifier properties.
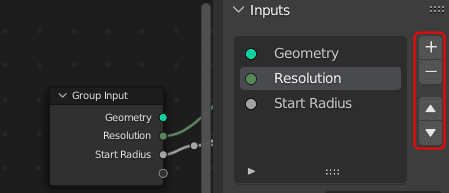
Adding and arranging Group Inputs
Press N key and from the Group properties from the right side of the Geometry Nodes window, you can change the arrangement of the Group Inputs.

Add Frame node
Select the nodes, that have been added, and press Ctrl + J to add a frame. This helps us in organizing the nodes.

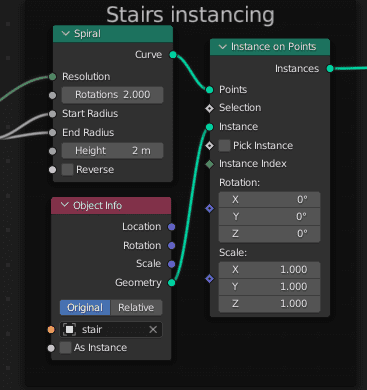
The above images are how the setup will look for instancing on a spiral curve using Geometry Nodes.
In the next tutorial, the instance objects will be aligned towards center :Aligning the instance objecsts towards the center.
All the parts of the tutorial series in order:
- Instancing the objects using Instance on Points.
- Aligning the instance objecsts towards the center.
- Adding Count Group Input to control the number of Control points and Instance Objects.
- Adding Width as a Group Input.
- Adding Baluster or staircase support.
- Extrude a profile curve in Geometry Nodes.
- Move the curve along its path for adjusting and increasing the length of the curve.
- Adding another set of Baluster and handrail in the Geometry Node.