

In this tutorial, we are going to focus on how to organize our Geometry node setup. We will be using Frame nodes to organize the nodes. Blender version 2.93 is used.
In the previous tutorial, we made the circular array face the center using Geometry Nodes. But the problem with that was, half of the instance objects were not facing the center. This tutorial is continuation of that tutorial series.
We have now a lot of nodes, it is essential for us to organize them, so that it is easier for us to work with them.
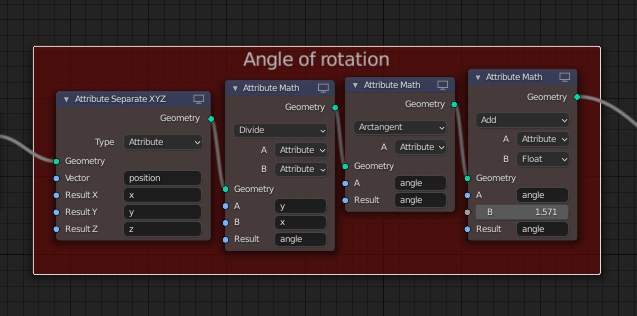
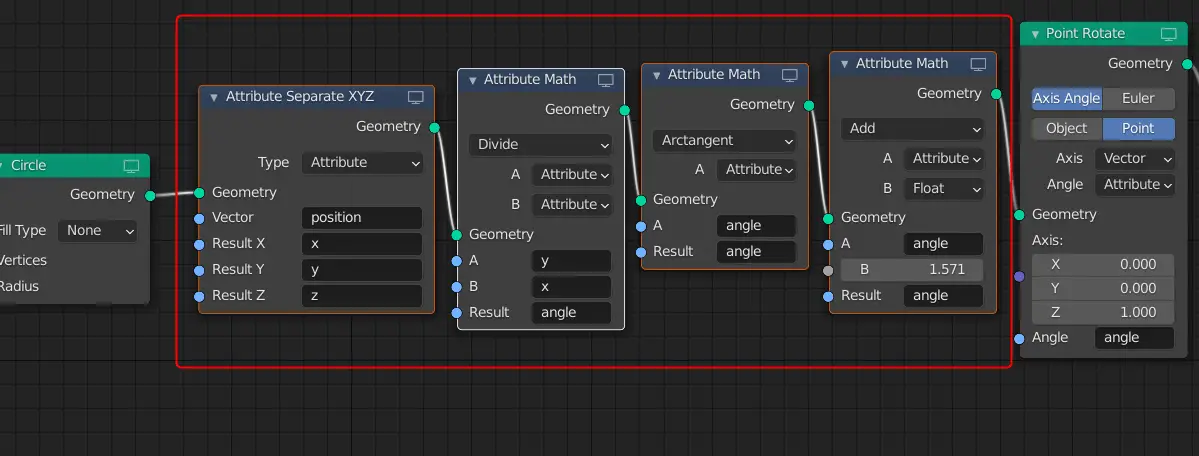
We will use Frame node and put multiple nodes inside that frame node and label the frame node, so we can see the function of those nodes.
Adding the Frame node
Select Multiple nodes, in this case, we have selected all the four Attribute nodes.

Press CTRL + J. This will form a frame over them.
Customizing the frame node
Press N key to open the side menu, in the Node panel you can change the color of the Frame node and change the Label to “Angle of rotation” or something that you find more suitable.
Disable the Shrink option and you should be able to change the size of frame node.

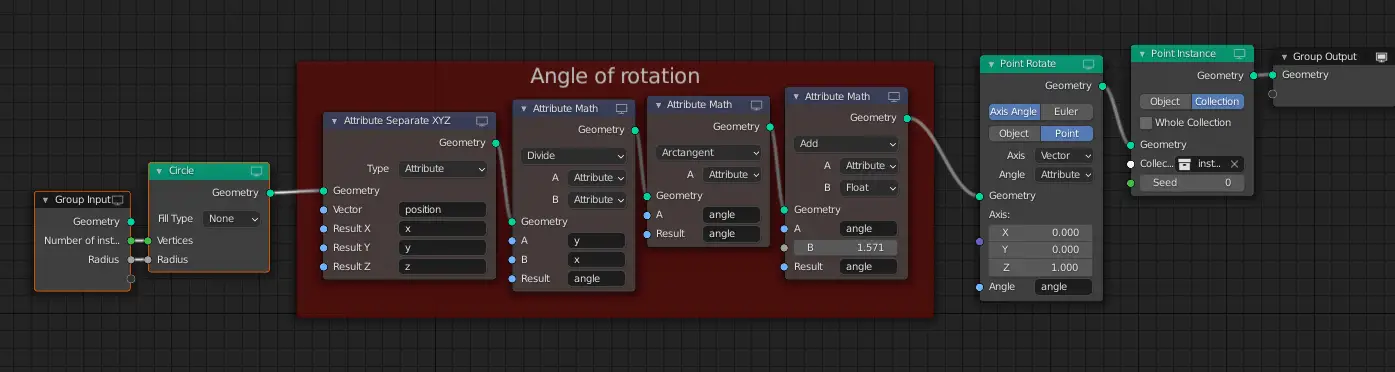
This is how the Geometry Node setup looks like with a Frame node.
In the next tutorial, we are going to Fix Circular array for X value less than 0 using Geometry Nodes.
Here are more parts of the tutorial series: