


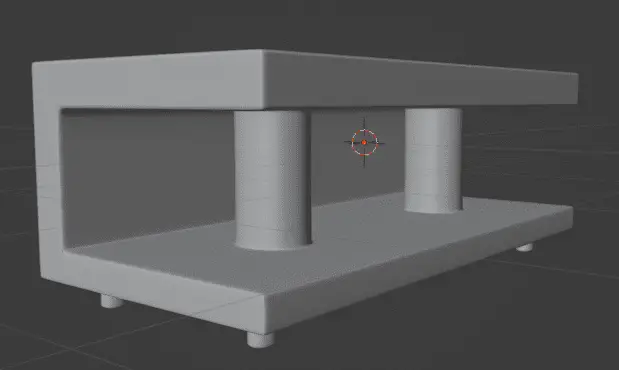
In this tutorial, we will learn how we can UV unwrap a table, so that we can apply textures to it. Blender 3.3.1 is used.
We will be UV unwrapping a simple table. We will cover all the basics for the UV unwrapping for this table.

Add UV Grid
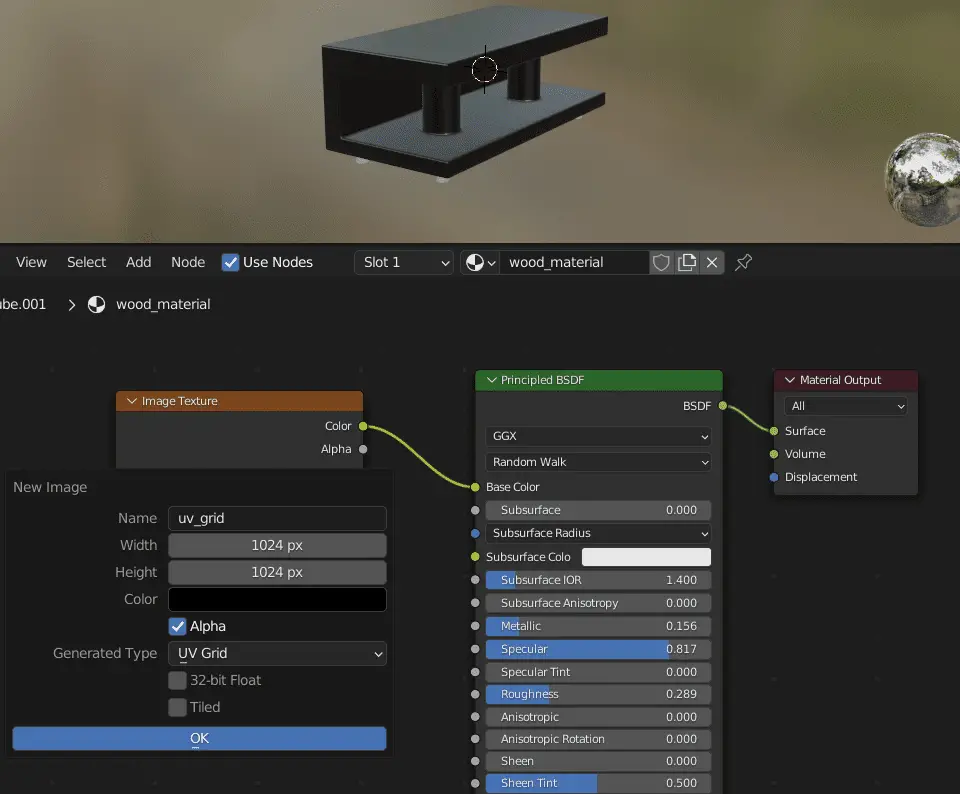
To check the UV Unwrap stretching, we add UV Grid to the model. This can be added in the Shading tab from the top ribbon. Add a UV grid from Shader Editor.
Add a new Material to the object.
In the Shader Editor, click Add > Texture > Image Texture. Click +New, in the New Image Menu, change the Generated Type to UV Grid.
Connect the Image Texture to Principled BSDF.

Go to UV Editing tab, in the 3d viewport, change the Shading to Material Preview by holding Z key and selecting Material Preview.

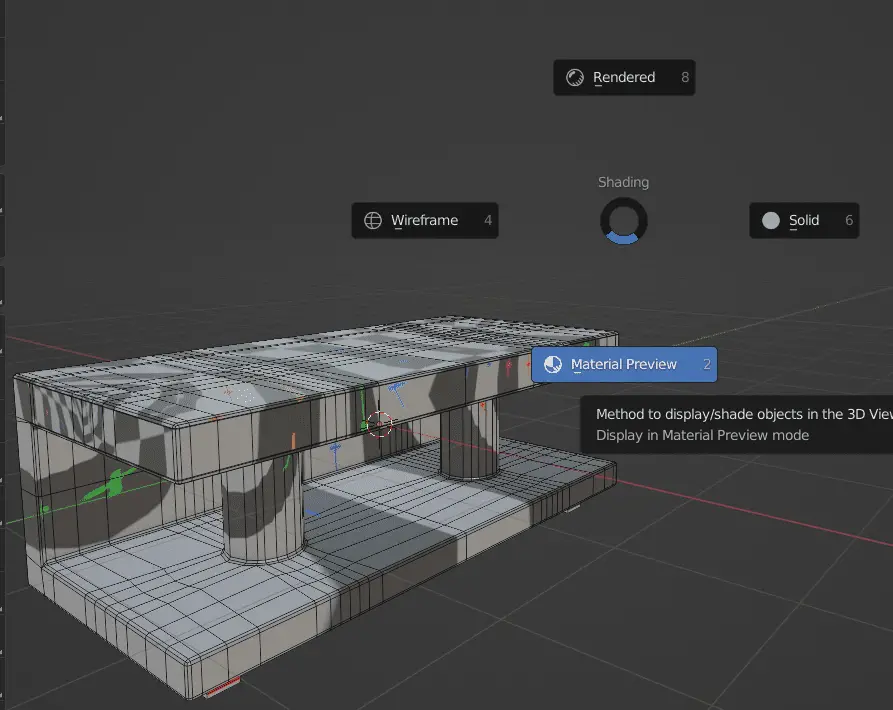
As you can see that the UVs are stretched, and the texture does not look good at all. This can be fixed by adding Seams.
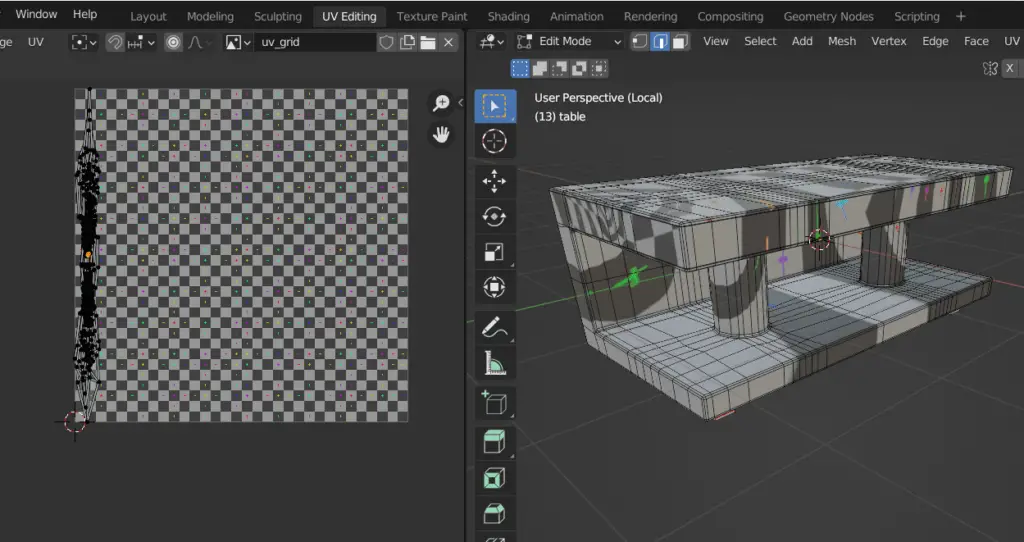
Make sure you are in the UV Editing tab, In the UV Editor change the image to UV Grid, this way we can see that how our UVs are being unwrapped.

All of the texture is stretched, and its UV unwrapping is not correct at all.
Add Seams
To rectify the situation, we can add Seams to the model. Seams are added to separate the flow of texture. The texture discontinues where seam is added. This helps us to avoid stretching in the texture.
Seams are usually added where there is a bend of 90 degrees. But they may also be added on other surfaces.
First of all, we need to find the edges where the seams will be added. They are added at the corners or edges of the model, where the discontinuation of the texture does not seem odd.
Seams should be added in such a way that the texture looks uniform and clean.
Select the relevant edges, for this model, the edges at the end of model, where there is a sharp curve or turn. While in the Edit mode, press 2 to for Edge Selection, and select the edges.


When you have selected all the relevant edges, Press CTRL + E for the Edge menu and click Mark Seam.

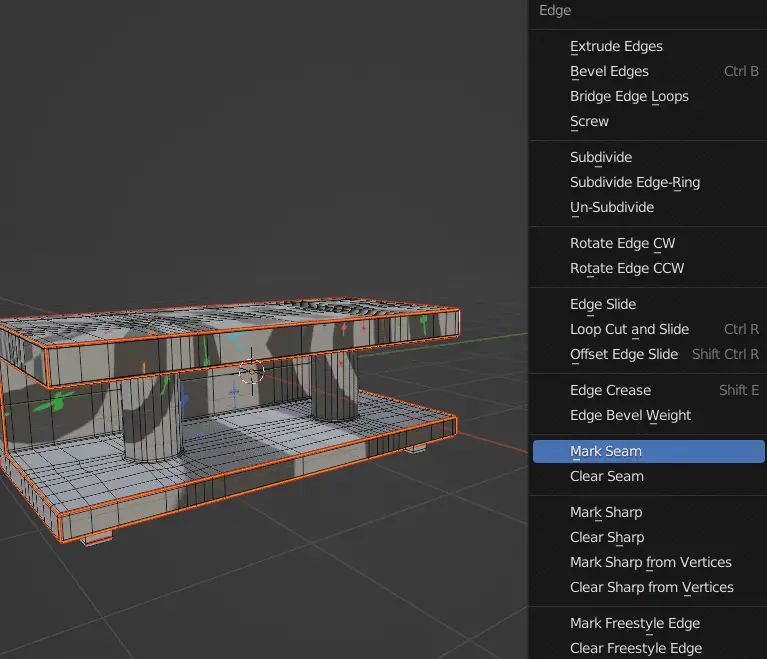
When the Edges are Marked Seam, their color becomes Red.
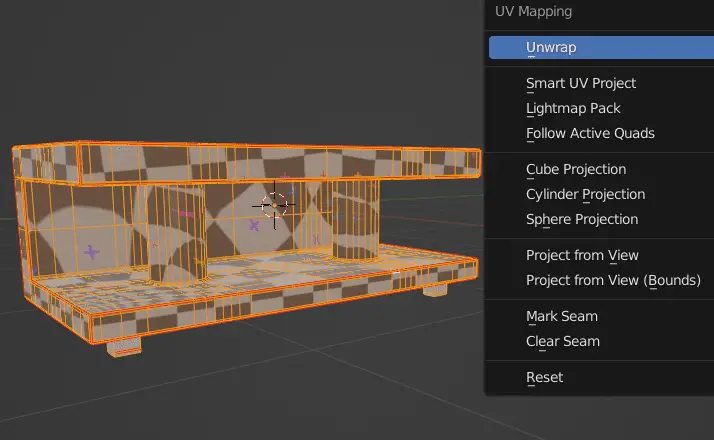
But Still, there is no apparent effect of the seams on the model, this is because we have yet to Unwrap the model. So, unwrap the model again, by selecting the whole model, press U for UV Mapping menu and click Unwrap.

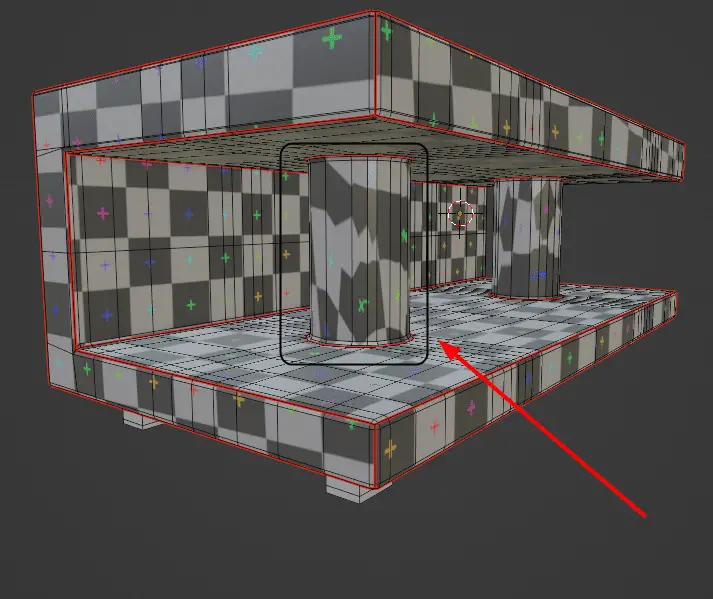
We see that some of the surfaces are still not UV unwrapped properly. That is because, we have not yet added Seams to the inner side of the table, and on the edges of columns.

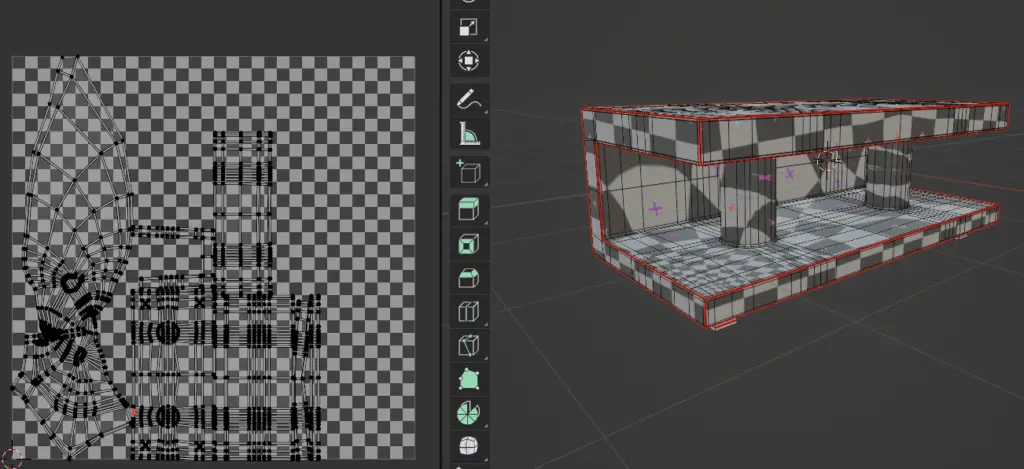
We will add Seams to the inner side of the table, and to columns of the table. You will see that, we have added Seams to the top and bottom of the columns. Unwrap the model again.

We have fixed the stretching of the model except that of the column part.
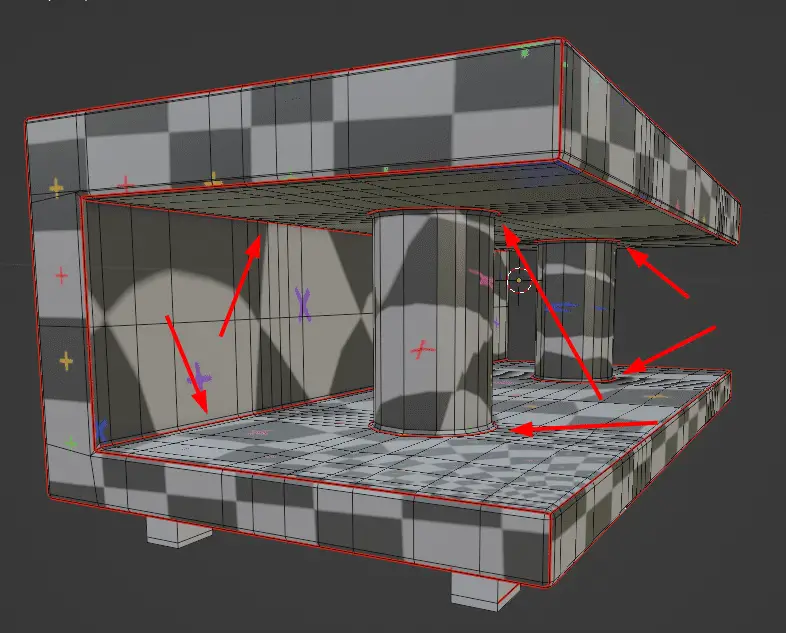
UV Unwrapping Circular surfaces
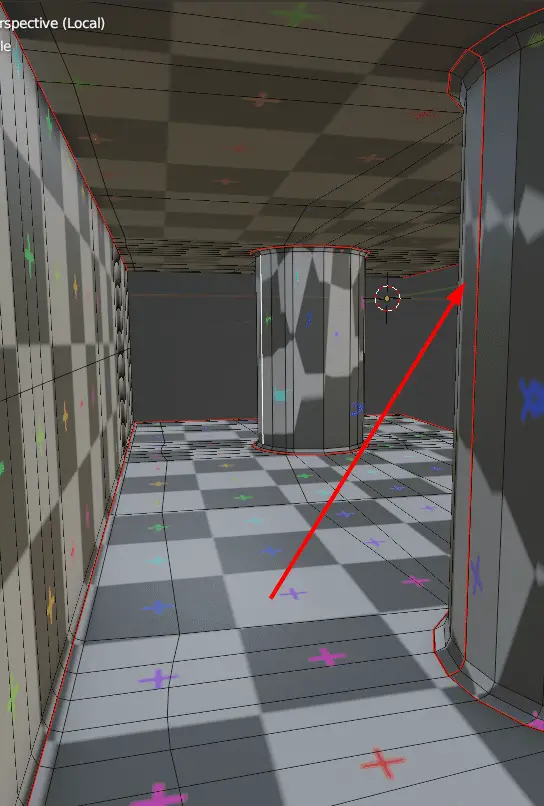
Dealing with circular surfaces can be a tricky part. For this column of the table, we have added seams on top and bottom of the column.

For Circular surfaces, we need to add seam to the surface, but we usually, add seam to the part which is hard to see. Like in this part, we have added Seam to the back side of the column, where the discontinuation is very difficult to see.

Our model looks much cleaner. We can add any texture we like.

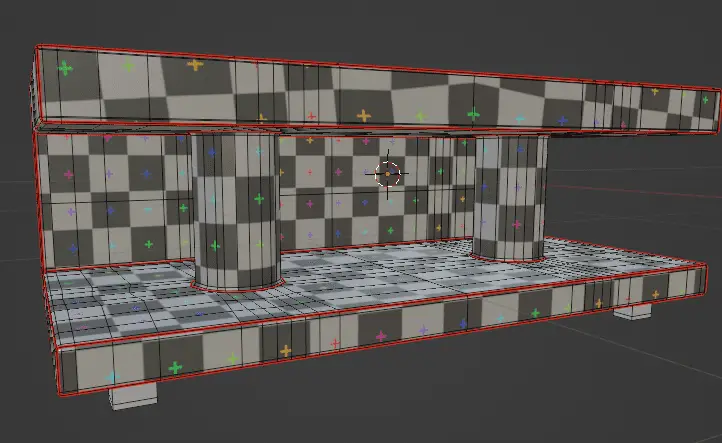
Make sure that the Scaling of the UV texture is correct.
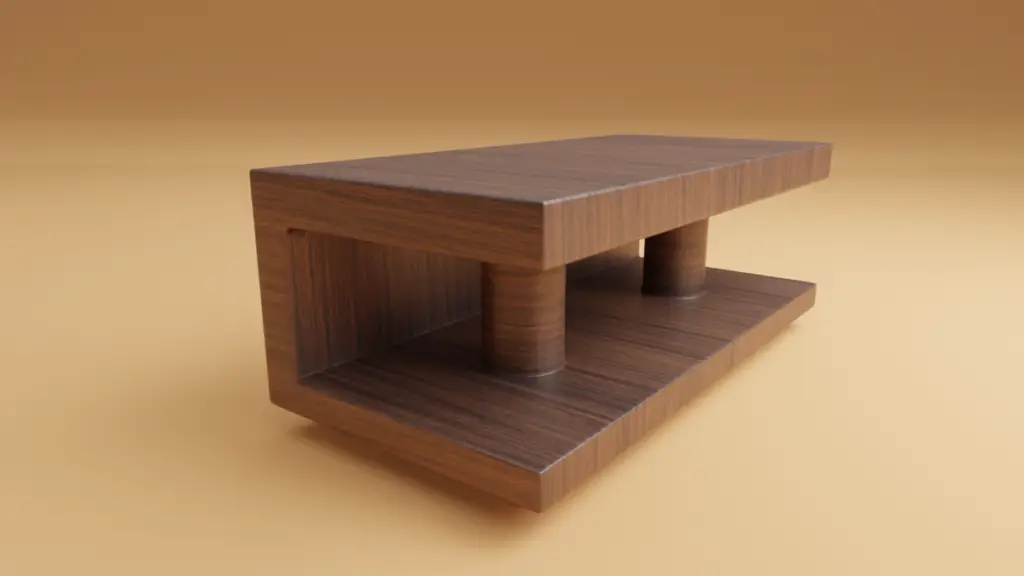
You can add any type of texture to the model. Click here for the tutorial for adding texture to the model.

For more UV Unwrapping tutorials click here: